Low Carb High Protein Chicken Crust Pizza
Chicken Crust Pizza is about to revolutionize your weeknights, and honestly, your entire approach to pizza night! If you’ve been craving that satisfying cheesy, saucy goodness without the carb-heavy guilt, then this recipe is your new best friend. We all love pizza, right? It’s a comfort food classic, perfect for family dinners, movie nights, or just a treat. But for those of us watching our carb intake or aiming for higher protein goals, traditional pizza can feel like a forbidden indulgence. That’s where the magic of Chicken Crust Pizza truly shines. What makes this dish so special? It’s the ingenious swap of a traditional flour crust for a lean, protein-packed base made from chicken. This incredible adaptation delivers all the flavor and satisfaction you expect, while keeping you feeling full and energized. Get ready to experience pizza in a whole new, delightfully guilt-free way!
Chicken Crust Pizza (Low Carb + High Protein)
Are you craving pizza but trying to keep your carb intake low and your protein high? Look no further! This incredible chicken crust pizza is the answer to your cheesy dreams. Forget those heavy flour-based crusts; we’re talking about a delicious, savory crust made entirely from ground chicken, packed with protein and virtually carb-free. It’s surprisingly easy to make and tastes so good, you won’t even miss the dough. Perfect for a weeknight dinner, a healthy lunch, or even a satisfying snack. Let’s get cooking!
Ingredients:
Crafting the Chicken Crust
The foundation of our low-carb pizza is the chicken crust itself. This is where the magic happens! It’s incredibly simple, requiring just a few pantry staples mixed with our star ingredient: ground chicken. The key is to ensure everything is thoroughly combined to create a cohesive dough-like consistency. This mixture will bake up to form a sturdy, flavorful crust that holds all your favorite toppings beautifully.
First, in a medium-sized mixing bowl, combine the 450 grams of ground chicken. To this, add the 2 large eggs. The eggs act as a binder, helping to hold the chicken mixture together and giving it some structure as it bakes. Next, we’ll incorporate the flavor enhancers. Sprinkle in the 1/2 cup of grated Parmesan cheese. Parmesan not only adds a wonderful salty, nutty flavor but also helps with browning and texture. Follow this with 1 teaspoon of garlic powder for that essential pizza aroma and taste, and 1 teaspoon of Italian seasoning, which typically includes herbs like oregano, basil, and thyme, perfectly complementing any pizza. Finally, season with 1/2 teaspoon of salt and 1/2 teaspoon of black pepper. Don’t be shy with the pepper; it adds a nice little kick.
Now, it’s time to mix it all together. Using your hands is the most effective way to ensure everything is evenly distributed. Get in there and really work the ingredients until they are thoroughly combined. You want the mixture to feel like a sticky dough. If it seems a little too wet, you can add another tablespoon of Parmesan cheese, but generally, this ratio works perfectly. Don’t overmix, but make sure there are no pockets of just egg or just chicken.
Forming and Pre-Baking the Crust
Once your chicken mixture is well combined, it’s time to form the pizza crust. Preheat your oven to 200 degrees Celsius (400 degrees Fahrenheit). It’s important to get the oven nice and hot for the best results. Line a baking sheet with parchment paper. This is crucial for preventing the chicken crust from sticking and for easy cleanup.
Now, take your chicken mixture and spread it evenly onto the prepared baking sheet. You can form a classic round pizza shape, or even a rectangular one if you prefer. Aim for a thickness of about 1 to 1.5 centimeters (about half an inch). Try to keep the thickness consistent across the entire crust to ensure even cooking. You can use your hands or the back of a spoon to flatten and shape it. Once you’ve got your crust formed, we’re going to pre-bake it. This step is vital for firming up the chicken crust before adding the toppings. This prevents a soggy bottom and ensures the crust is cooked through.
Pop the baking sheet into the preheated oven and bake for approximately 15-20 minutes. You’re looking for the crust to be cooked through and for the edges to start turning a light golden brown. It should feel firm to the touch and not have any pink in the center. This pre-baking stage is what gives our chicken crust its structure and prevents it from falling apart under the weight of the toppings.
Adding the Toppings and Final Bake
After your chicken crust has finished its initial bake, carefully remove it from the oven. Now comes the fun part: adding your favorite pizza toppings! Spread a thin, even layer of 1/2 cup of pizza sauce over the pre-baked chicken crust. Be careful not to go too heavy with the sauce, as too much moisture can make the crust a little soggy. You want just enough to provide that classic pizza flavor.
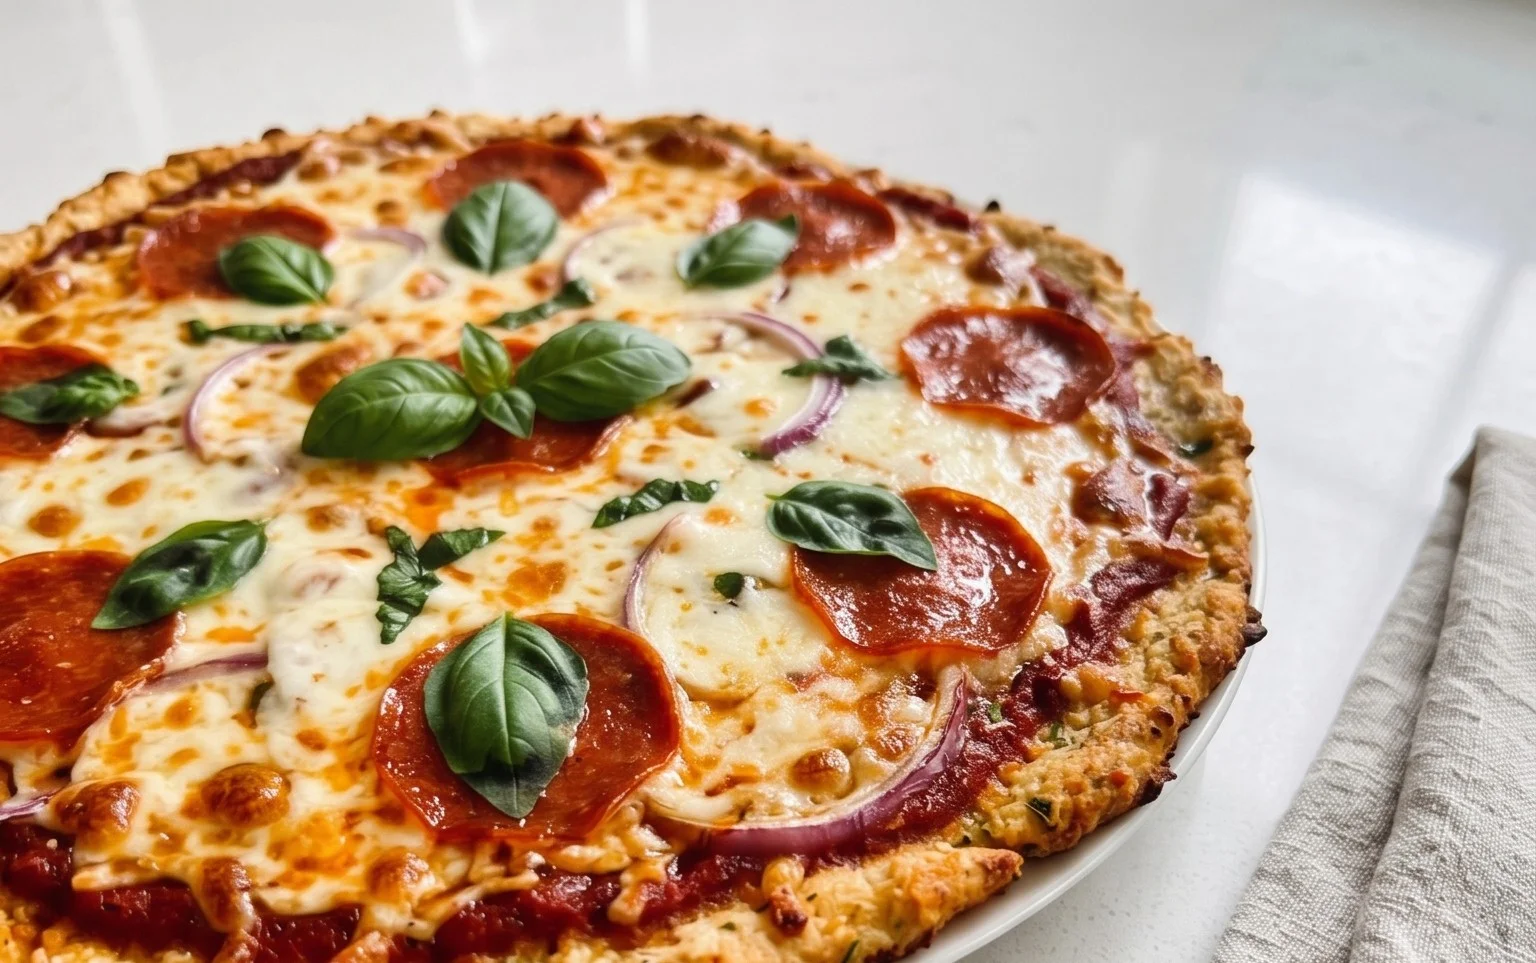
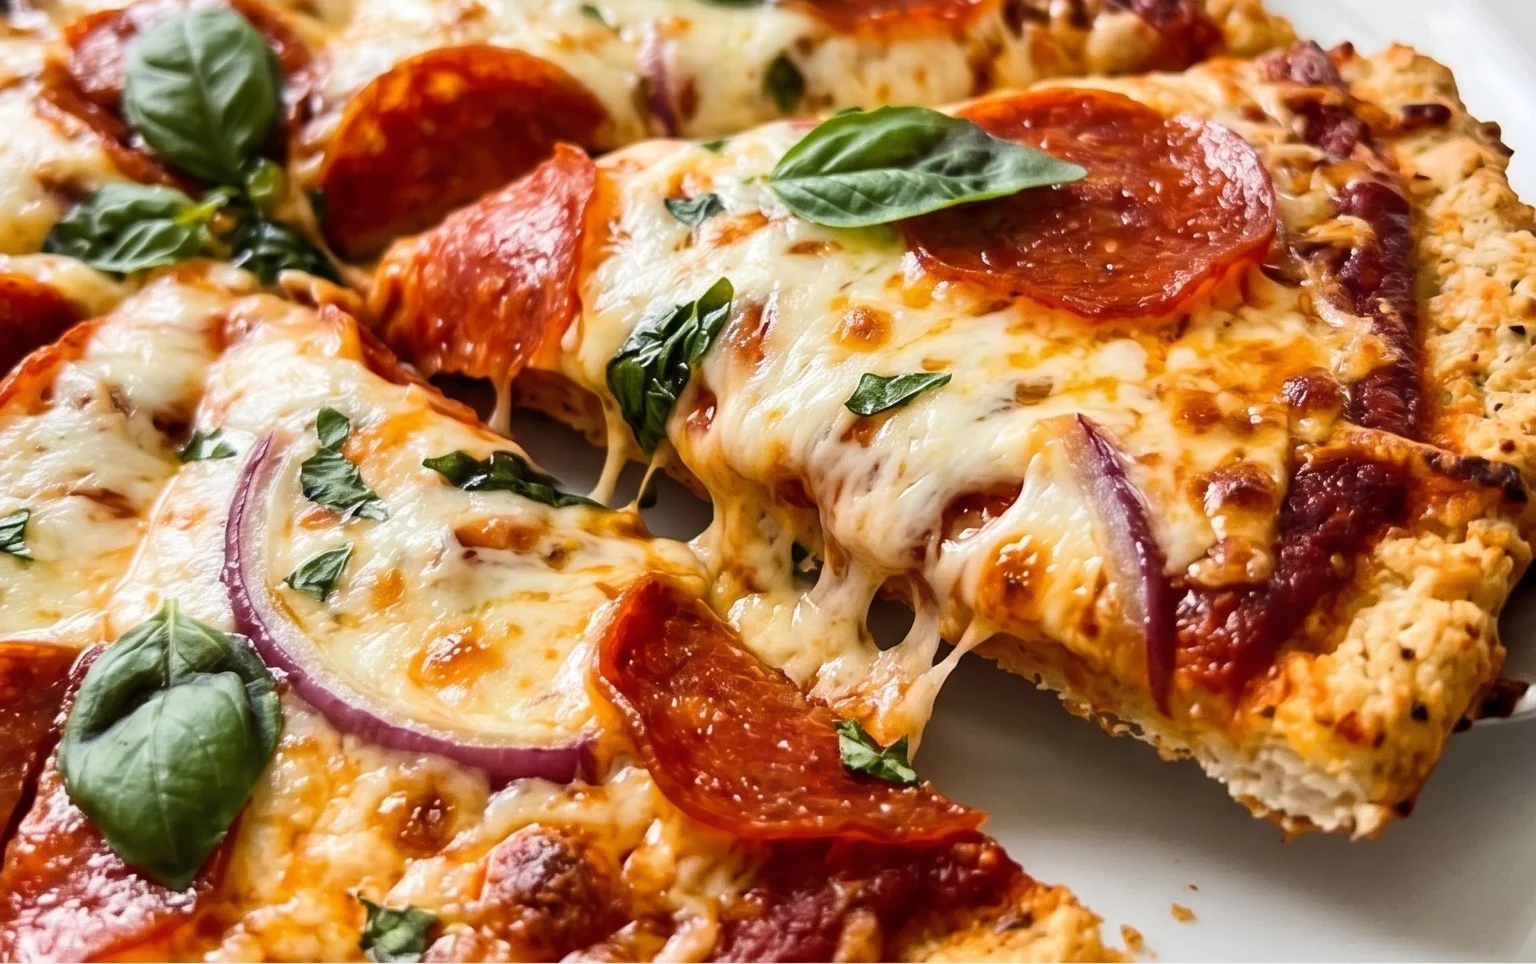
Next, generously sprinkle 1 cup of shredded mozzarella cheese over the sauce. Make sure to get it all the way to the edges, so you have that glorious cheese pull when you take a bite. Finally, arrange your 20 beef beef pepperoni slices over the mozzarella cheese. You can overlap them slightly or spread them out evenly, however you like your beef pepperoni!
Now, it’s time for the final bake. Place the pizza back into the oven. This time, we’ll bake it for another 10-15 minutes, or until the mozzarella cheese is melted, bubbly, and has achieved a beautiful golden-brown color in spots. Keep an eye on it to ensure the beef pepperoni doesn’t burn. The aroma filling your kitchen at this stage will be absolutely incredible!
Cooling and Serving Your Masterpiece
Once your chicken crust pizza is golden and bubbly, carefully remove it from the oven. The temptation to dive right in will be immense, but I highly recommend letting it cool for a few minutes on the baking sheet. This brief cooling period allows the cheese to set slightly and makes it much easier to slice. It also prevents any toppings from sliding off.
After a few minutes of resting, you can carefully transfer the pizza to a cutting board. Use a sharp knife or a pizza cutter to slice it into your desired number of pieces. The crust will be firm and hold its shape perfectly. Serve immediately and enjoy the satisfaction of a delicious, guilt-free pizza that’s packed with protein and incredibly low in carbs. This chicken crust pizza is a true game-changer for anyone looking for a healthier, more satisfying pizza experience. You’ve just created a culinary masterpiece!
Conclusion:
You’ve just discovered a game-changer in the low-carb, high-protein world! This Chicken Crust Pizza recipe offers a delicious and satisfying alternative to traditional pizza without the guilt. By using finely ground chicken as the base, we’ve created a crust that’s incredibly high in protein and virtually carb-free, making it perfect for anyone following a ketogenic, low-carb, or high-protein lifestyle. The versatility of this recipe is truly its superpower; it’s a fantastic canvas for all your favorite pizza toppings, from classic beef pepperoni and mushrooms to gourmet combinations like beef prosciutto and arugula. It’s a healthier way to enjoy pizza night, proving that you don’t have to sacrifice flavor for your dietary goals.
Serve this amazing Chicken Crust Pizza hot and fresh, just like you would any other pizza. It pairs wonderfully with a crisp side salad for a complete and balanced meal. Don’t be afraid to get creative with your toppings! Experiment with different cheeses, vegetables, and even some spicy jalapeños for an extra kick. The possibilities are endless!
I truly encourage you to give this recipe a try. You might be surprised at how satisfying and incredibly tasty a carb-free pizza can be. It’s a fantastic option for a weeknight dinner or even a weekend treat. So, gather your ingredients and get ready to enjoy a pizza experience that’s both delicious and aligned with your health objectives.
Frequently Asked Questions:
Can I use a different type of ground meat for the crust?
While this recipe is specifically designed for ground chicken to achieve the best texture and protein content, you could experiment with finely ground turkey. However, the texture might vary slightly, and the protein profile will be different. For the optimal low carb + high protein experience, chicken is highly recommended.
How do I prevent the chicken crust from becoming soggy?
Ensuring the chicken crust is cooked thoroughly before adding toppings is key. Pre-baking the crust until it’s golden brown and firm helps create a sturdy base. Also, avoid overloading the pizza with watery toppings; pat dry any vegetables like mushrooms or peppers before adding them.
Can I make the chicken crust ahead of time?
Yes, absolutely! You can prepare and pre-bake the chicken crusts and let them cool completely. Store them in an airtight container in the refrigerator for up to 2-3 days. When you’re ready for pizza, simply add your toppings and bake until heated through and cheese is melted.
Chicken Crust Pizza (Low Carb + High Protein)
A delicious and healthy pizza with a chicken breast crust, packed with protein and low in carbohydrates.
Ingredients
-
450 g ground chicken
-
2 large eggs
-
1/2 cup parmesan cheese
-
1 tsp garlic powder
-
1 tsp italian seasoning
-
1/2 tsp salt
-
1/2 tsp black pepper
-
1/2 cup pizza sauce
-
1 cup mozarella cheese
-
20 beef pepperoni slices
Instructions
-
Step 1
Preheat your oven to 400°F (200°C). Line a baking sheet with parchment paper. -
Step 2
In a bowl, combine the ground chicken, eggs, parmesan cheese, garlic powder, Italian seasoning, salt, and black pepper. Mix well until thoroughly combined. -
Step 3
Spread the chicken mixture evenly onto the prepared baking sheet to form a pizza crust shape, about 1/4 inch thick. -
Step 4
Bake the chicken crust for 15 minutes, or until it is cooked through and lightly browned. -
Step 5
Remove the crust from the oven. Spread the pizza sauce evenly over the chicken crust. Top with mozzarella cheese and pepperoni slices. -
Step 6
Return the pizza to the oven and bake for another 5-7 minutes, or until the cheese is melted and bubbly and the pepperoni is slightly crispy. -
Step 7
Let the pizza cool slightly before slicing and serving.
Important Information
Nutrition Facts (Per Serving)
It is important to consider this information as approximate and not to use it as definitive health advice.
Allergy Information
Please check ingredients for potential allergens and consult a health professional if in doubt.