Red White Blue Dirt Cups – Easy Patriotic Dessert
Red, White and Blue Dirt Cups are more than just a sweet treat; they’re a nostalgic journey to childhood picnics and patriotic celebrations! I’ve always had a soft spot for these delightful layered desserts. There’s something incredibly satisfying about the combination of creamy pudding, crunchy cookie crum extractbs, and the fun, whimsical presentation. What truly makes these Red, White and Blue Dirt Cups special is their incredible versatility and how they instantly bring smiles to faces, no matter the occasion. Whether you’re hosting a summer barbecue, celebrating the Fourth of July, or simply looking for a fun activity to do with the kids, these dirt cups are a guaranteed crowd-pleaser. They’re so easy to assemble, you’ll be amazed at how impressive they look, and they disappear even faster!
Red, White and Blue Dirt Cups
Get ready for a truly delightful and patriotic treat that’s as fun to make as it is to eat! These Red, White and Blue Dirt Cups are perfect for Fourth of July celebrations, Memorial Day picnics, or any time you want a burst of festive flavor. They’re a playful twist on the classic dirt cup, bringin extractg together creamy pudding, crunchy cookie crum extractbs, and vibrant colors that scream America the Beautiful. The best part? They are incredibly easy to assemble, making them a fantastic activity for kids and a stress-free dessert for any host. We’re taking the beloved chocolate pudding and Oreo combination and giving it a vibrant, patriotic makeover that will have everyone cheering for more.
Ingredients:
Getting Started: The Pudding Base
The foundation of our dirt cups is a wonderfully creamy pudding. Since we’re using cheesecake flavored pudding, we’re adding an extra layer of deliciousness that complements the chocolatey “dirt” perfectly. To begin extract, you’ll want to grab a large mixing bowl. Empty both boxes of cheesecake pudding into this bowl. Remember to make sure there are no lumps before you add the milk.
Next, pour in your 4 cups of milk. It’s important to use the amount of milk specified on the pudding box for the best consistency. Using too much milk can result in a runny pudding, and too little can make it too stiff. Whisk the pudding mix and milk together vigorously. You’ll want to whisk for about two minutes, or until the pudding begin extracts to thicken. Don’t be afraid to whisk with some enthusiasm! This helps to ensure a smooth, lump-free texture. Once it’s thickened to your liking, cover the bowl with plastic wrap, making sure the wrap touches the surface of the pudding. This prevents a skin from forming. Now, pop it into the refrigerator to set for at least 30 minutes, or until it’s firm.
Preparing the “Dirt”
While our pudding is chilling and firming up, it’s time to get our “dirt” ready. This involves crushing those delightful Oreo cookies. You have a few options here. For a finer, more sand-like texture, you can place the 19 Oreo cookies into a food processor and pulse them until they are finely crushed. If you don’t have a food processor, don’t worry! You can achieve a similar result by placing the cookies in a sturdy zip-top bag, removing as much air as possible, and then using a rolling pin or the bottom of a heavy pan to crush them into crum extractbs. Aim for a texture that resembles soil. You can leave some slightly larger cookie pieces for added texture, which can be quite appealing. The goal is to create a visually convincing “dirt” that will make our dirt cups look authentic.
Coloring Our Patriotic Layers
Now for the fun part – adding the patriotic colors! We’ll be creating distinct red and blue layers within our dirt cups to represent the American flag. After our cheesecake pudding has set, we’ll divide it into three portions. Take roughly one-third of the pudding and place it in a separate bowl. To this portion, add the ¼ teaspoon of red gel food dye. Gel food coloring is fantastic because it’s highly concentrated, meaning you’ll use less to achieve vibrant colors, and it won’t water down your pudding. Stir this red pudding thoroughly until the color is uniform and has a deep, rich red hue.
In another separate bowl, place another roughly one-third portion of the pudding. Add the ¼ teaspoon of blue gel food dye to this portion and stir until you achieve a consistent, vibrant blue color. The remaining one-third of the pudding will stay white, serving as our creamy middle layer. Make sure to thoroughly wash your spoon or whisk between coloring the different batches to avoid any color transfer.
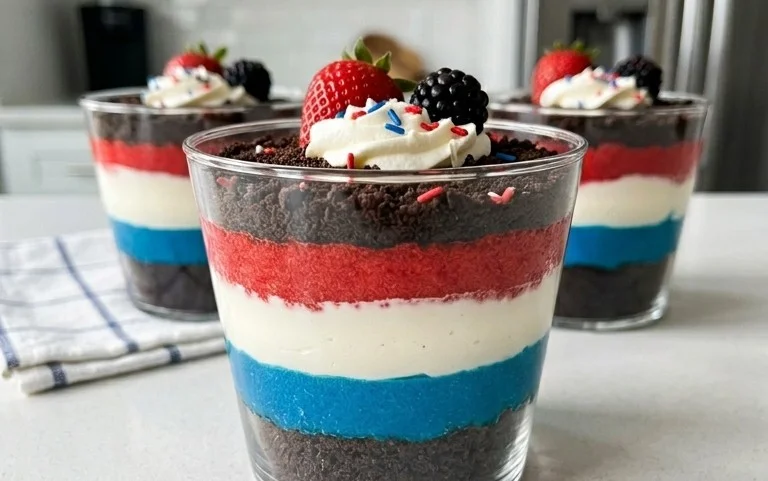
Assembling Our Festive Dirt Cups
Now that all our components are ready, it’s time for the assembly! You can use any clear serving dishes for these dirt cups, such as small jars, glasses, or even plastic cups. This allows the layers to be visible and adds to the visual appeal.
1. The First Layer of Dirt: Begin extract by spooning a layer of crushed Oreo cookie crum extractbs into the bottom of each serving dish. This forms the base of our “dirt” and adds a delightful crunch. You want a layer that’s about half an inch to an inch thick, depending on the size of your serving dishes. Press it down gently with the back of your spoon to create a firm base.
2. The Blue Layer: Carefully spoon a layer of the colored blue pudding over the cookie crum extractbs. Try to spread it evenly across the top of the “dirt” layer. You want this layer to be substantial enough to make a visual impact, perhaps about an inch thick.
3. The White Layer: Next, gently add a layer of the plain white cheesecake pudding on top of the blue layer. Again, aim for an even spread. This white layer adds a beautiful contrast and represents a clean slate before the final patriotic flourish.
4. The Red Layer: Now it’s time for the vibrant red pudding. Spoon this over the white layer, creating your final pudding layer. Ensure it’s spread evenly for a clean, defined layer.
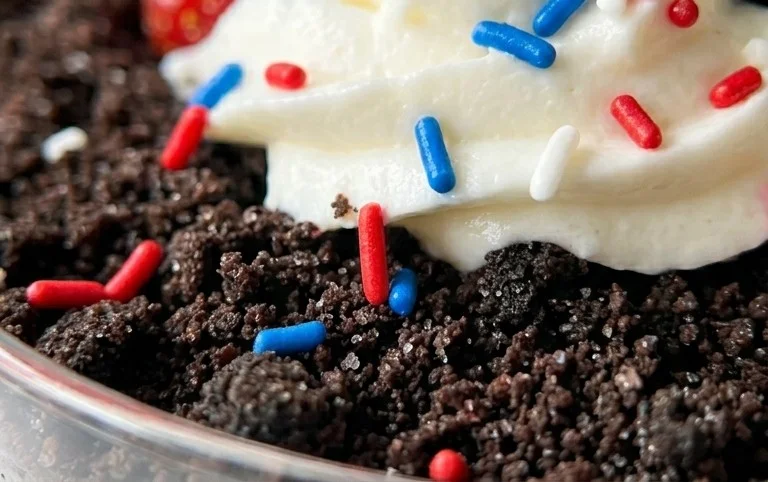
5. The Final Dirt Topping: Finish off each dirt cup by generously sprinkling more crushed Oreo cookie crum extractbs over the top of the red pudding layer. This creates the final, realistic “dirt” effect. You can even push a few crum extractbs down the sides of the cup for a more rustic look.
6. Adding the Gummy Worms: To complete the illusion, tuck 2 red and blue gummy worms into the “dirt” on top of each cup. Let them peek out as if they’re crawling out of the earth. These add a fun, whimsical touch that kids (and adults!) will adore.
Chill the assembled dirt cups in the refrigerator for at least another 30 minutes before serving. This allows the flavors to meld together and ensures the pudding is perfectly set. Enjoy these festive and delicious Red, White and Blue Dirt Cups – a truly sweet way to celebrate!
Conclusion:
I hope you’re as excited as I am to try these vibrant Red, White and Blue Dirt Cups! This recipe is a fantastic way to celebrate patriotic holidays, summer parties, or just to bring a smile to someone’s face. They’re incredibly easy to make, making them perfect for little helpers in the kitchen, and the combination of creamy pudding, crunchy cookies, and sweet candies is simply irresistible. The visual appeal is undeniable, and the taste delivers on that promise. For serving, these are perfect as individual desserts in clear cups or jars. Consider presenting them on a tiered stand for an extra festive touch at your next gathering. If you’re feeling adventurous with variations, try swapping out the chocolate pudding for vanilla or cheesecake flavor, or experiment with different red and blue candies like M&M’s or Skittles. You could even add a layer of fresh raspberries or blueberries for a burst of fresh fruit flavor. Don’t be afraid to get creative and make them your own! I truly encourage you to give these Red, White and Blue Dirt Cups a try; they are guaranteed to be a hit!
Frequently Asked Questions:
Can I make these Red, White and Blue Dirt Cups ahead of time?
Absolutely! These dirt cups are a great make-ahead dessert. You can assemble them up to a day in advance and store them covered in the refrigerator. The cookies might soften slightly, but many people actually prefer that texture. Just add any whipped cream or fresh fruit toppings right before serving to keep them looking their best.
What if I don’t have gummy worms? Are there any alternatives?
No problem at all! If gummy worms aren’t your thing or you can’t find them, you have plenty of other options. You could use pretzel sticks to mimic twigs, or even pipe chocolate frosting to look like worms. Another fun idea is to use small candy rocks or even chocolate chips to add to the ‘dirt’ texture.
Are these Red, White and Blue Dirt Cups suitable for a vegan diet?
With a few simple substitutions, you can easily make these dirt cups vegan! Opt for a vegan chocolate pudding mix or make your own from scratch using plant-based milk and cocoa powder. Many chocolate sandwich cookies are also accidentally vegan, so be sure to check the ingredients. For the whipped topping, use a dairy-free whipped cream alternative made from coconut or soy.
Red, White and Blue Dirt Cups
A festive and easy dessert featuring layers of creamy cheesecake pudding, crushed Oreos, and colorful gummy worms, perfect for patriotic holidays.
Ingredients
-
2 boxes cheesecake pudding (3.4 ounces each)
-
4 cups milk
-
19 Oreo cookies (crushed)
-
1/4 teaspoon red gel food dye
-
1/4 teaspoon blue gel food dye
-
8 red and blue gummy worms
Instructions
-
Step 1
In a large bowl, whisk together the cheesecake pudding mix and milk until well combined and smooth. Let it sit for 5 minutes. -
Step 2
Divide the pudding mixture into three equal portions in separate bowls. -
Step 3
Add the red gel food dye to one portion and stir until evenly colored. Add the blue gel food dye to another portion and stir until evenly colored. Leave the third portion white. -
Step 4
In the bottom of 8 clear cups or small jars, add a layer of crushed Oreo cookies. This will be your ‘dirt’. -
Step 5
Spoon alternating layers of the red, white, and blue pudding into each cup over the crushed cookies. -
Step 6
Top each cup with a few more crushed Oreo cookies for a final layer of dirt. -
Step 7
Garnish each dirt cup with a red and blue gummy worm, sticking it out of the ‘dirt’. -
Step 8
Chill the dirt cups in the refrigerator for at least 15 minutes before serving.
Important Information
Nutrition Facts (Per Serving)
It is important to consider this information as approximate and not to use it as definitive health advice.
Allergy Information
Please check ingredients for potential allergens and consult a health professional if in doubt.