
Crispy Baked Zucchini Chips Easy Healthy Snack
Crispy Baked Zucchini Chips are about to become your new go-to snack obsession! Forget the greasy, soggy versions you might have tried before. We’re talking about thin, golden slices of zucchini that achieve an almost impossibly satisfying crunch, all while being baked to perfection. If you’re like me, you adore finding ways to enjoy vegetables in a fun, craveable format, and these crispy baked zucchini chips deliver exactly that. What makes them so special? It’s the magic of simple ingredients transformed into something truly delightful. We’ll show you how to get that irresistible crispness without the fuss of frying, making them a healthy and delicious alternative for movie nights, appetizers, or even just a satisfying midday munch. Get ready to be amazed by how much flavor and texture you can pack into these simple, wholesome zucchini chips!
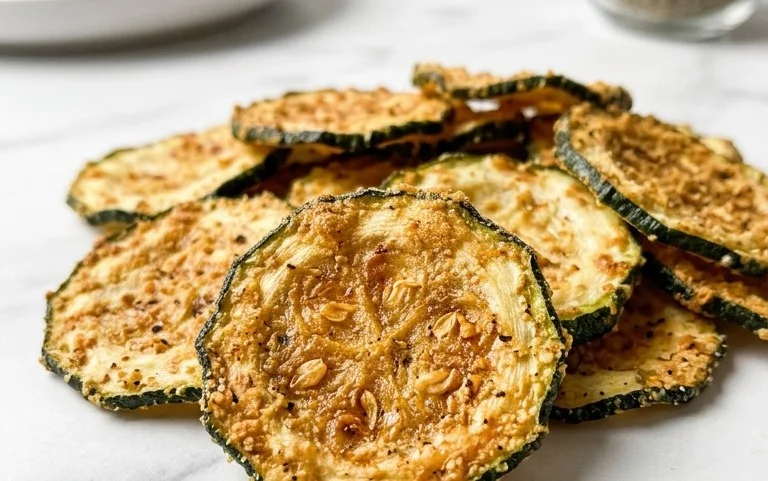
Crispy Baked Zucchini Chips
Forget those greasy, store-bought chips! We’re about to embark on a culinary adventure that will transform humble zucchini into golden, crispy delights. These baked zucchini chips are a fantastic way to sneak in some extra veggies, and the best part? They’re incredibly easy to make right in your own oven. The satisfying crunch, the savory flavor, and the fact that they’re baked instead of fried make these a guilt-free indulgence. They’re perfect as an appetizer, a healthy snack, or even a side dish. Let’s get started and create some magic in the kitchen!
Ingredients:
Cooking Instructions
Creating these delectable zucchini chips involves a few key steps, each contributing to that perfect crispy texture we’re all after.
Preparation is Key: Slicing and Salting
The first crucial step is preparing your zucchini. You’ll want to wash your zucchini thoroughly and then trim off the ends. The magic happens when you slice them into thin rounds, aiming for about 1/8 inch thickness. This is where a mandoline slicer can be your best friend, ensuring uniform thickness for even cooking. If you don’t have a mandoline, a sharp knife and a steady hand will do the trick, but be patient and try to keep them as consistent as possible. Overly thick slices will result in softer chips, while super-thin ones might burn too quickly.
Once sliced, we need to tackle the moisture content. Zucchini is notoriously watery, and to achieve that coveted crispiness, we must draw out as much liquid as possible. Lay your zucchini slices in a single layer on a clean kitchen towel or paper towels. Sprinkle them generously with a little extra salt – this will help them release their moisture. Let them sit for at least 15-20 minutes. You’ll be amazed at how much water they release. After the resting period, gently pat each slice dry with another clean towel, ensuring they are as dry as possible. This drying step is non-negotiable for achieving crispiness.
Creating the Flavorful Coating
Now that our zucchini is prepped and relatively dry, it’s time to get them ready for their crispy transformation. In a medium bowl, combine the panko breadcrum extractbs, grated Parmesan cheese, and the 1/4 teaspoon of salt. Panko breadcrum extractbs are essential here because their coarse texture creates superior crispiness compared to regular breadcrum extractbs. The Parmesan cheese adds a delightful savory, nutty flavor that pairs beautifully with zucchini. Give this mixture a good stir to ensure everything is well combined. This is where the flavor foundation is laid for your delicious chips.
In a separate shallow dish or on a plate, pour out your 1.5 tablespoons of olive oil. You’ll be working with your dried zucchini slices one by one. You want to lightly coat each zucchini round with olive oil. A pastry brush is excellent for this, ensuring an even, thin layer. Alternatively, you can carefully dip each slice into the oil, but be mindful not to oversaturate them. The oil acts as a binder for the breadcrum extractb mixture and helps them crisp up in the oven. Don’t skip this step; a little oil goes a long way in achieving that perfect golden hue and satisfying crunch.
Coating and Arrangin extractg for Baking
With your zucchini slices oiled, it’s time to coat them in our flavorful breadcrum extractb and cheese mixture. Take each oiled zucchini slice and gently press it into the panko and Parmesan mixture, ensuring both sides are well-coated. Don’t be afraid to be a little generous here, but also avoid clumping the breadcrum extractbs too much. You want a nice, even coating that will bake up golden brown. Once coated, carefully transfer the zucchini slices to a baking sheet that has been lined with parchment paper. Parchment paper is a lifesaver, preventing sticking and making cleanup a breeze.
It’s incredibly important to arrange the zucchini chips in a single layer on the baking sheet. Do not overlap them. Overlapping will cause them to steam rather than bake, and you’ll end up with soggy, sad chips. If your baking sheet is too small to fit all the chips in a single layer, use a second baking sheet. Proper spacing is crucial for air circulation, allowing the heat to reach all sides of the zucchini and create that delightful crispiness.
The Baking Process: Patience and Perfection
Preheat your oven to 400°F (200°C). This moderate-high heat is ideal for baking these chips to perfection. Once your oven is preheated and your baking sheet is loaded with your perfectly coated zucchini slices, it’s time to bake. Place the baking sheet in the preheated oven and let the magic happen.
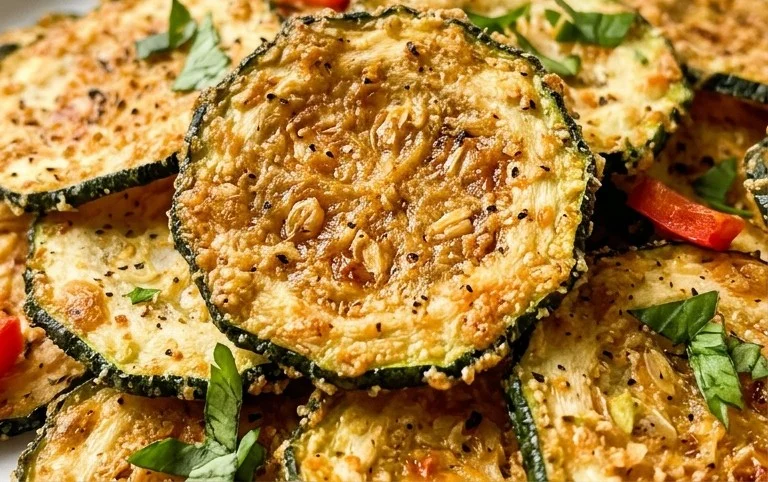
Baking time will generally be between 15 to 20 minutes. However, this can vary depending on your oven and the thickness of your zucchini slices. About halfway through the baking time, you’ll want to carefully flip each zucchini chip. This ensures even browning and crisping on both sides. Keep a close eye on them, especially towards the end of the baking time. You’re looking for a beautiful golden-brown color and edges that appear slightly crisped. They should feel firm and not bend easily.
Cooling and Enjoying
Once your crispy baked zucchini chips have reached that perfect golden-brown perfection, carefully remove the baking sheet from the oven. For the ultimate crispiness, let them cool on the baking sheet for a few minutes. As they cool, they will continue to crisp up even further. They are best enjoyed warm, fresh out of the oven, but they are also quite good at room temperature. Serve them immediately with a side of Greek yogurt ranch for dipping, if desired. These are incredibly addictive, so you might want to double the recipe! Enjoy your healthy and delicious homemade zucchini chips!
Conclusion:
And there you have it – a simple, healthy, and incredibly satisfying way to enjoy zucchini! These crispy baked zucchini chips are a revelation, transforming a humble vegetable into a guilt-free snack that’s perfect for munching on during movie nights, packing in lunchboxes, or serving as an appetizer. The beauty of this recipe lies in its simplicity; a few common pantry staples and a little oven time yield a delightful crunch that will have everyone asking for seconds. I absolutely encourage you to give these crispy baked zucchini chips a try; they’re a fantastic gateway to enjoying more vegetables in a fun and delicious way.
For serving, I love them just as they are, but they’re also wonderful dipped in a creamy ranch, a zesty aioli, or even a tangy marinara sauce. Don’t be afraid to experiment with seasonings! A sprinkle of smoked paprika, garlic powder, or a pinch of red pepper flakes can elevate these chips even further. You can even try different breading mixtures, perhaps incorporating nutritional yeast for a cheesy flavor or finely ground nuts for added texture.
Frequently Asked Questions:
Why are my zucchini chips not crispy?
Ensuring your zucchini chips are truly crispy often comes down to two key factors: moisture removal and oven temperature. Make sure to pat your zucchini slices very dry with paper towels after slicing and before breading. This removes surface moisture that can steam the zucchini instead of crisping it. Also, ensure your oven is preheated to the correct temperature (usually around 400°F or 200°C) and that the chips have enough space on the baking sheet for air to circulate around them. Avoid overcrowding the pan!
Can I make these ahead of time?
While these crispy baked zucchini chips are best enjoyed fresh out of the oven for maximum crispness, you can prepare the sliced and seasoned zucchini a few hours in advance. Store them in a single layer on a plate or baking sheet in the refrigerator, covered loosely with plastic wrap. This helps to draw out some of the moisture before baking. However, for the absolute best crispy texture, baking them right before serving is highly recommended.
Crispy Baked Zucchini Chips
Enjoy a healthier alternative to potato chips with these incredibly crispy baked zucchini chips. Thinly sliced zucchini is coated in seasoned panko and parmesan, then baked to golden perfection.
Ingredients
-
2 medium zucchini, sliced into 1/8″ rounds
-
1.5 tablespoons olive oil
-
1/3 cup panko breadcrumbs
-
1/3 cup grated parmesan cheese
-
1/4 teaspoon salt
Instructions
-
Step 1
Preheat your oven to 400°F (200°C). Line two baking sheets with parchment paper. -
Step 2
Pat the zucchini slices very dry with paper towels. This is crucial for crispiness. -
Step 3
In a shallow bowl, whisk together the panko breadcrumbs, grated parmesan cheese, and salt. -
Step 4
Brush both sides of each zucchini slice with olive oil. -
Step 5
Dip each oiled zucchini slice into the panko mixture, pressing gently to coat both sides evenly. -
Step 6
Arrange the coated zucchini slices in a single layer on the prepared baking sheets, ensuring they do not overlap. -
Step 7
Bake for 15-20 minutes, flipping halfway through, until golden brown and crispy. Adjust baking time as needed based on thickness.
Important Information
Nutrition Facts (Per Serving)
It is important to consider this information as approximate and not to use it as definitive health advice.
Allergy Information
Please check ingredients for potential allergens and consult a health professional if in doubt.