Easy Homemade Bread Recipe – Soft & Delicious
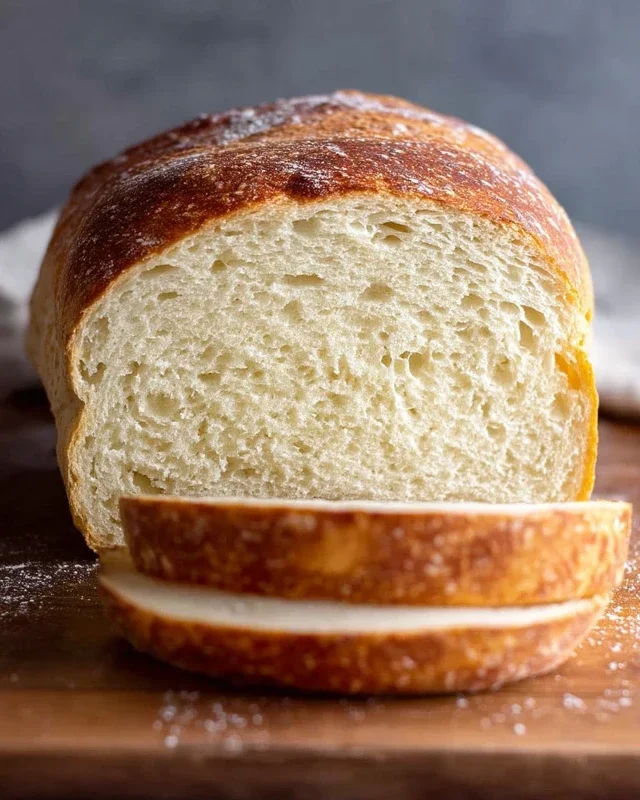
Homemade bread isn’t just food; it’s an experience. There’s a primal satisfaction, a comforting warmth that fills your kitchen and your soul when you pull a golden, fragrant loaf from your own oven. Forget the plastic-wrapped supermarket versions; we’re talking about bread with character, with a crackling crust that yields to a tender, pillowy crum extractb. That non-intoxicating aroma that wafts through your home is a testament to the magic you’ve conjured from simple ingredients: flour, water, yeast, and salt. People are drawn to this timeless craft for so many reasons – the therapeutic rhythm of kneading, the anticnon-alcoholic ipation of the rise, and the sheer joy of sharing something so beautifully, fundamentally good. What makes our approach to homemade bread truly special is its accessibility. We’ll guide you through every step, demystifying the process so you can confidently create your own perfect loaf, a delicious masterpiece born from your own two hands.
The Unbeatable Appeal of Homemade Bread
A Journey from Simple Ingredients to Culinary Comfort
Homemade Bread
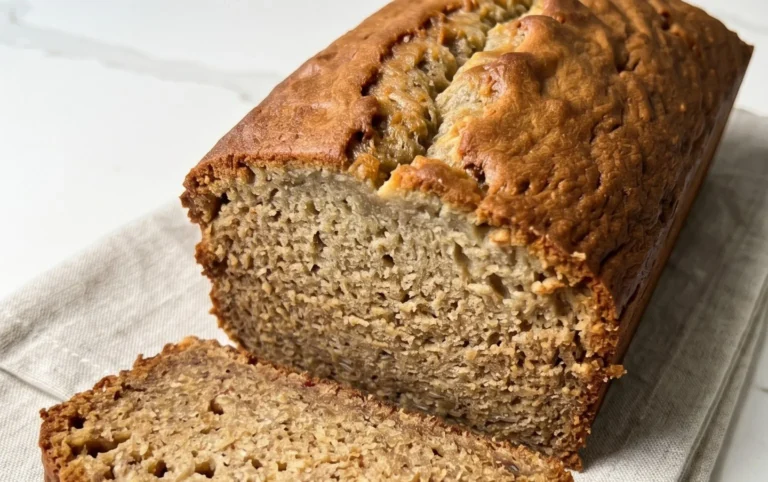
There’s a special kind of magic that happens when you transform simple ingredients into a warm, fragrant loaf of homemade bread. The aroma filling your kitchen, the satisfying crackle of the crust, and the pillowy softness within – it’s an experience that’s hard to beat. While the idea of baking bread from scratch might seem daunting, I promise you, it’s incredibly rewarding and surprisingly straightforward. This recipe is a fantastic starting point for any aspiring baker, yielding a wonderfully versatile loaf perfect for sandwiches, toast, or simply enjoying with a slather of butter.
Ingredients:
Let’s talk about the ingredients for a moment. The water temperature is crucial for activating the yeast. Too hot, and you’ll kill it; too cool, and it won’t wake up properly. Aim for that sweet spot between 105 and 115 degrees Fahrenheit, which feels comfortably warm to the touch, like a warm bath. For the sweetener, both honey and sugar work well. Honey will give your bread a slightly richer, more nuanced flavor and a tender crum extractb, while sugar is a more neutral option. The salt is essential for flavor and also plays a role in controlling yeast activity. The oil adds moisture and tenderness to the final loaf. As for the flour, all-purpose flour will give you a good result, but bread flour, with its higher gluten content, will provide a chewier texture and a more robust structure, making it ideal for this kind of bread. I recommend starting with 4 cups and adding more as needed, as humidity levels can affect how much flour your dough absorbs.
Getting Started: Activating the Yeast
1. In a large mixing bowl, combine the warm water and your chosen sweetener (honey or sugar). Sprinkle the active dry yeast evenly over the surface. Give it a gentle stir and then let it sit for about 5-10 minutes. You’re looking for the mixture to become foamy and bubbly. This foamy layer is a sign that your yeast is alive and ready to work its magic! If you don’t see any bubbles or foam after 10 minutes, your yeast might be inactive, and you’ll want to start over with fresh yeast.
Developing the Dough
2. Once your yeast mixture is nicely foamy, add the salt and oil to the bowl. Now, it’s time to start adding the flour. Begin extract by stirring in about 4 cups of the flour, mixing until it’s just combined. The dough will be quite shaggy and sticky at this stage.
3. Turn the dough out onto a lightly floured surface. This is where the kneading begin extracts! Kneading develops the gluten in the flour, which is what gives bread its structure and chegrape juicess. Fold the dough over onto itself and press down with the heels of your hands, rotating the dough as you go. Continue kneading for about 8-10 minutes. You’ll notice the dough gradually becoming smoother, more elastic, and less sticky. Add more flour, a tablespoon at a time, only if the dough is too sticky to handle. The goal is a dough that is still slightly tacky but doesn’t cling excessively to your hands. You should be able to press your finger into it, and the indentation will slowly spring back.
First Rise: Letting the Dough Grow
4. Lightly grease a clean bowl with a little oil. Place the kneaded dough into the greased bowl, turning it to coat all sides. Cover the bowl tightly with plastic wrap or a clean kitchen towel. Find a warm, draft-free place for your dough to rise. This could be a slightly warm oven (turned off, of course!) or simply a sunny spot on your counter. Let the dough rise for about 1 to 1.5 hours, or until it has doubled in size. This first rise is where all the flavor development happens, as the yeast consumes sugars and produces carbon dioxide gas, which makes the dough expand.
Shaping and Second Rise
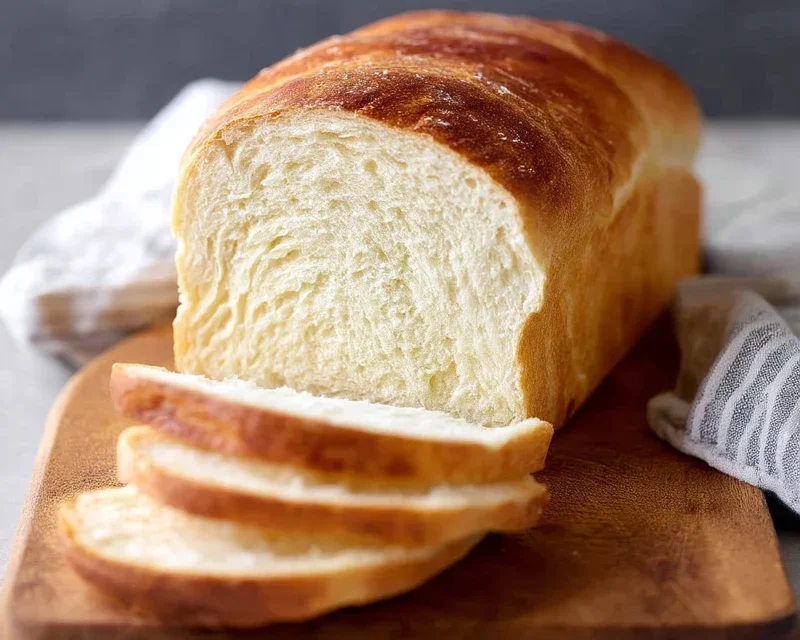
5. Once your dough has doubled, gently punch it down to release the air. Turn it out onto a lightly floured surface and shape it into your desired loaf. For a standard sandwich loaf, you can gently pat it into a rectangle and then roll it up tightly from one of the short ends. Pinch the seam to seal it. Place the shaped loaf into a greased 9×5-inch loaf pan. Cover the pan loosely with plastic wrap or a clean kitchen towel and let it rise again in a warm place for another 30-45 minutes, or until it has nearly doubled in size and the dough is peeking over the edges of the pan.
Baking the Loaf
6. Preheat your oven to 375 degrees Fahrenheit (190 degrees Celsius) during the last 15-20 minutes of the second rise. Once the oven is preheated and the dough has had its second rise, place the loaf pan in the center of the oven. Bake for 30-35 minutes, or until the crust is a deep golden brown and the internal temperature of the bread reaches 190-200 degrees Fahrenheit (88-93 degrees Celsius) when tested with an instant-read thermometer. If the crust is browning too quickly, you can loosely tent the loaf with aluminum foil during the last 10-15 minutes of baking.
Once baked, carefully remove the bread from the loaf pan and place it on a wire rack to cool completely. Resist the urge to slice into it immediately! Letting it cool allows the internal structure to set properly, preventing a gummy texture. The sound of the crust crackling as it cools is one of my favorite parts. Enjoy your delicious, homemade bread!
Conclusion:
Embarking on the journey of making your own homemade bread is incredibly rewarding. This recipe, with its straightforward steps and minimal ingredients, proves that delicious, crusty loaves are well within reach for any home baker. You’ll discover the unparalleled satisfaction of pulling a warm, fragrant loaf from your oven, a feat that consistently impresses friends and family. The aroma alone is worth the effort, promising a delightful taste experience far superior to anything store-bought. It’s perfect for enjoying simply with butter, as a base for delicious sandwiches, or as a side to your favorite soups and stews. Don’t be afraid to experiment with variations like adding herbs, cheese, or seeds to the dough for a personalized touch. I truly encourage you to give this recipe a try – the magic of baking your own bread awaits!
Frequently Asked Questions:
Why is my bread dense?
A common reason for dense bread is insufficient kneading or proving. Ensure you’ve kneaded the dough until it’s smooth and elastic, and allow it to rise in a warm place until doubled in size. Over-measuring flour can also contribute to density; try weighing your flour for more accuracy.
Can I freeze homemade bread?
Absolutely! Once your homemade bread has cooled completely, you can slice it and freeze it in an airtight bag or wrap it tightly in plastic wrap followed by foil. It can stay frozen for up to 3 months and thaws beautifully at room temperature.
Homemade Bread
A simple and delicious recipe for classic homemade white bread.
Ingredients
-
2 cups warm water (105-115 degrees Fahrenheit)
-
1 Tablespoon active dry yeast
-
1/4 cup honey
-
2 teaspoons salt
-
2 Tablespoons canola oil
-
4 to 5 1/2 cups all-purpose flour
Instructions
-
Step 1
In a large bowl, combine the warm water, yeast, and honey. Let it sit for 5-10 minutes until foamy. -
Step 2
Stir in the salt and canola oil. -
Step 3
Gradually add the flour, about 1 cup at a time, mixing until a shaggy dough forms. You may not need all of the flour. -
Step 4
Turn the dough out onto a lightly floured surface and knead for 8-10 minutes until smooth and elastic. -
Step 5
Place the dough in a greased bowl, cover with a damp cloth, and let rise in a warm place for about 1 hour, or until doubled in size. -
Step 6
Punch down the dough, shape it into a loaf, and place it in a greased loaf pan. Cover and let rise again for about 30 minutes. -
Step 7
Bake in a preheated oven at 375 degrees Fahrenheit (190 degrees Celsius) for 30-35 minutes, or until golden brown and the internal temperature reaches 200 degrees Fahrenheit (93 degrees Celsius).
Important Information
Nutrition Facts (Per Serving)
It is important to consider this information as approximate and not to use it as definitive health advice.
Allergy Information
Please check ingredients for potential allergens and consult a health professional if in doubt.