Perfect Ramen Eggs Ajitama Your Best Bowl
Ramen eggs, or ajitama as they’re known in Japan, are the undisputed kings of ramen toppings, and for good reason. These perfectly marinated, custardy delights are what elevate a humble bowl of noodles into a truly extraordinary culinary experience. Just imagin extracte: a glistening, soft-boiled egg, its yolk a vibrant sunset orange, with a creamy, almost molten center that oozes with rich, savory flavor. That’s the magic of a well-made ramen egg! People adore them because they offer a burst of umami and a luxurious texture that complements the brothy depths of ramen so beautifully. What makes these ramen eggs so special is the meticulous marination process. It’s not just about boiling an egg; it’s about infusing it with a complex, soul-warming marinade that transforms it into something truly unforgettable. I can’t wait to show you how to achieve this perfection at home.
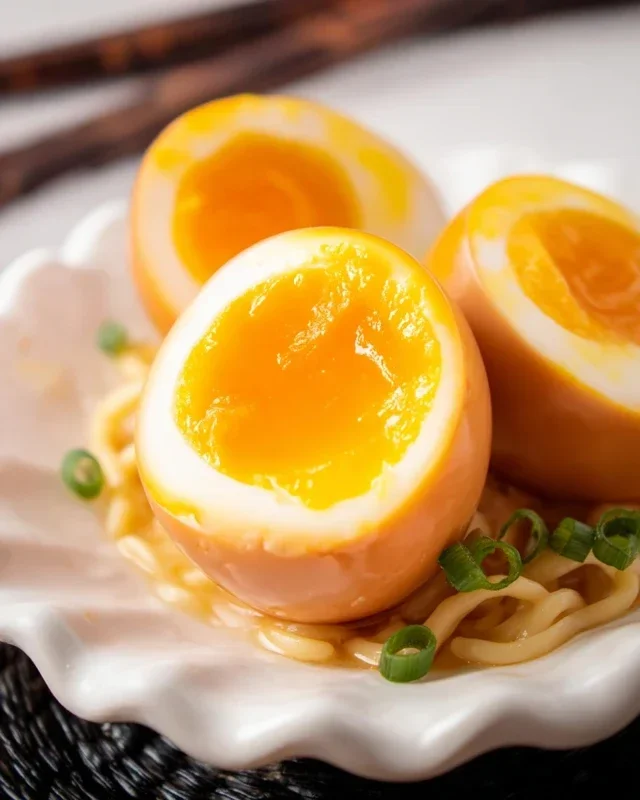
Ramen Eggs (Ajitama)
There are few toppings as iconic or as universally loved on a bowl of ramen as a perfectly cooked, marinated ramen egg, also known as ajitama. These aren’t just your average hard-boiled eggs; they’re transformed into something truly special. The magic lies in a savory, slightly sweet marinade that infuses the cooked egg with incredible depth of flavor and gives the yolk a lusciously creamy, jammy texture. Making ajitama at home is surprisingly simple, and once you’ve mastered it, you’ll find yourself adding them to all sorts of dishes, not just ramen. Let’s dive into how we can create these flavor bombs.
Ingredients:
*Note: For the best results and a consistently jammy yolk, I recommend using eggs that are about a week old. Fresher eggs can be more difficult to peel cleanly after boiling. If you only have very fresh eggs, you can try increasing the boiling time slightly or being extra careful during the peeling process.
Cooking Instructions
Creating perfect ajitama involves two main stages: boiling the eggs to achieve the ideal yolk consistency and then marinating them to absorb all those delicious flavors.
Stage 1: Boiling the Eggs
The key to a perfect ramen egg is the cooking time. We’re aiming for a soft, jammy yolk that’s still slightly runny in the center but fully cooked around the edges. Overcooking will result in a dry, chalky yolk, which is definitely not what we want.
1. First, let’s get our eggs ready for boiling. Gently place the eggs in a medium saucepan. It’s important to use a saucepan that’s just large enough to hold the eggs in a single layer. Avoid overcrowding the pan, as this can lead to uneven cooking and the eggs bumping into each other, which increases the chance of them cracking. You can add a teaspoon of vinegar to the water if you like. This is an optional step, but some people find it helps the egg whites coagulate more quickly if an egg does happen to crack, minimizing leakage. Fill the saucepan with cool water, ensuring the eggs are completely submerged by about an inch of water.
2. Now, let’s bring those eggs to a boil. Place the saucepan over medium-high heat and bring the water to a rolling boil. As soon as the water reaches a full boil, immediately reduce the heat to low, cover the saucepan, and let the eggs cook for exactly 6 minutes and 30 seconds. This precise timing is crucial for achieving that coveted jammy yolk. If you prefer a slightly firmer yolk, you can increase this to 7 minutes. For a runnier yolk, aim for 6 minutes. I’ve found that 6 minutes and 30 seconds is the sweet spot for a beautiful, creamy center.
3. Once the cooking time is up, you need to shock the eggs to stop the cooking process instantly. This is vital for preventing them from overcooking in their own residual heat. Prepare an ice bath by filling a large bowl with ice and cold water. As soon as the timer goes off, carefully remove the eggs from the boiling water using a slotted spoon or spider strainer and plunge them directly into the ice bath. Let them sit in the ice bath for at least 10 minutes, or until they are completely cool to the touch. This rapid cooling not only stops the cooking but also makes the eggs much easier to peel.
4. Peeling the eggs is often the most dreaded part of boiling eggs, but with the ice bath, it should be a breeze. Gently tap each egg on a hard surface to crack the shell all over. Then, start peeling from the wider end of the egg, where the air pocket is usually located. If you find any stubborn spots, you can try rolling the egg gently between your palms to loosen the shell. You can also peel them under a gentle stream of cool running water, which can help wash away any small shell fragments and make the process smoother. Take your time and be gentle to avoid damagin extractg the delicate egg white.
Stage 2: Marinating the Ajitama
This is where the real flavor transformation happens! The marinade is simple but packs a punch, creating that signature umami-rich taste that complements ramen perfectly.
5. While our eggs are cooling and being peeled, let’s prepare the marinade. In a small saucepan or a heatproof bowl, combine the light sodium soy sauce, water, non-non-non-alcoholic alternativeic non-alcoholic mirin, and granulated sugar. Stir these ingredients together until the sugar is completely dissolved. You can gently heat this mixture over low heat just until the sugar dissolves, which helps it incorporate better, but it’s not strictly necessary. Once combined, let the marinade cool slightly. Once the eggs are peeled and completely cool, carefully place them into a resealable bag or a small, airtight container. Pour the cooled marinade over the eggs, ensuring they are fully submerged. If you’re using a bag, gently press out as much air as possible before sealing it. If using a container, make sure the lid is tightly secured. Now, the most important part: patience! Place the marinating eggs in the refrigerator for at least 4 hours, but for the best flavor, I recommend marinating them for 12 to 24 hours. You can flip the bag or container halfway through the marinating time to ensure even flavor distribution.
Once marinated, your ajitama are ready to be enjoyed. Slice them in half lengthwise, revealing that beautiful jammy yolk, and place them atop your favorite ramen. They’re also fantastic in bento boxes, on salads, or even just as a delicious snack!

Conclusion:
And there you have it! Crafting perfect Ramen Eggs, or Ajitama, is a surprisingly simple yet incredibly rewarding culinary endeavor. These savory, marinated soft-boiled eggs are the star of any ramen bowl, adding a burst of umami and a delightful textural contrast. Their golden yolks, infused with a rich soy-based marinade, elevate even the simplest of noodle soups into a gourmet experience. I truly believe this recipe is fantastic because it’s accessible to home cooks of all levels, yet delivers restaurant-quality results that will impress your friends and family.
Don’t limit yourself to just ramen! These versatile eggs are fantastic sliced over avocado toast, added to salads, or even enjoyed as a standalone snack. For variations, consider experimenting with the marinade. A touch of non-alcoholic mirin can add sweetness, while a dash of toasted sesame oil can introduce a nutty depth. You could even try incorporating finely chopped garlic or gin extractger for an extra flavor kick. I wholeheartedly encourage you to give this Ramen Egg recipe a try. It’s a game-changer for your home cooking repertoire!
Frequently Asked Questions about Ramen Eggs (Ajitama):
Q: How long do ramen eggs last in the refrigerator?
A: Properly stored in their marinade in an airtight container, ramen eggs will typically stay fresh and delicious in the refrigerator for about 3 to 5 days. Make sure to discard them if you notice any off smells or textures.
Q: Can I make the marinade ahead of time?
A: Absolutely! The marinade can be prepared up to a week in advance and stored in an airtight container in the refrigerator. This makes the egg marinating process even quicker when you’re ready to use them.
Q: What kind of eggs should I use?
A: While you can use any large eggs, fresh eggs tend to be easier to peel after boiling. The quality of your eggs will directly impact the final flavor and texture of your Ajitama, so opt for the best you can find!
Ramen Eggs (Ajitama)
Perfectly marinated soft-boiled eggs, ideal for ramen or as a side dish. They boast a custardy yolk and a savory, umami-rich flavor.
Ingredients
-
6 large egg
-
Vinegar (optional for boiling eggs)
-
½ cup soy sauce (light sodium)
-
¼ cup water
-
¼ cup non-alcoholic mirin
-
2 tablespoons granulated sugar
Instructions
-
Step 1
Gently lower eggs into boiling water using a spoon. If using vinegar, add a splash to the water. Boil for 6.5 minutes for a jammy yolk. -
Step 2
Immediately transfer eggs to an ice bath for at least 10 minutes to stop the cooking process and make peeling easier. -
Step 3
While eggs are chilling, prepare the marinade. In a small saucepan, combine soy sauce, water, non-alcoholic mirin, and granulated sugar. -
Step 4
Heat the marinade over medium heat, stirring until the sugar is completely dissolved. Do not boil. Let it cool slightly. -
Step 5
Carefully peel the chilled eggs. -
Step 6
Place the peeled eggs in a resealable bag or a small container. Pour the cooled marinade over the eggs, ensuring they are fully submerged. -
Step 7
Marinate in the refrigerator for at least 4 hours, or preferably overnight, flipping them halfway through for even coloring.
Important Information
Nutrition Facts (Per Serving)
It is important to consider this information as approximate and not to use it as definitive health advice.
Allergy Information
Please check ingredients for potential allergens and consult a health professional if in doubt.