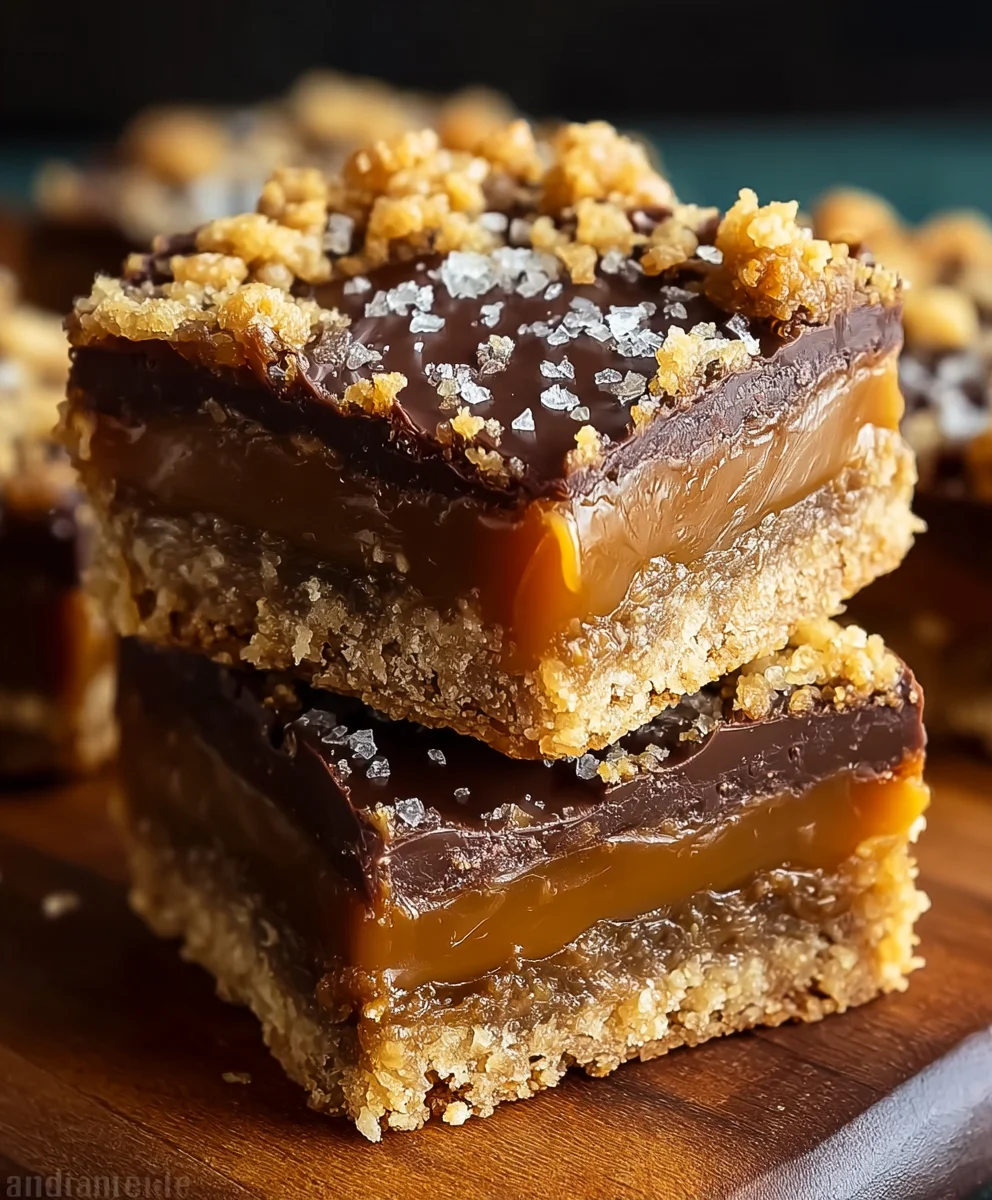
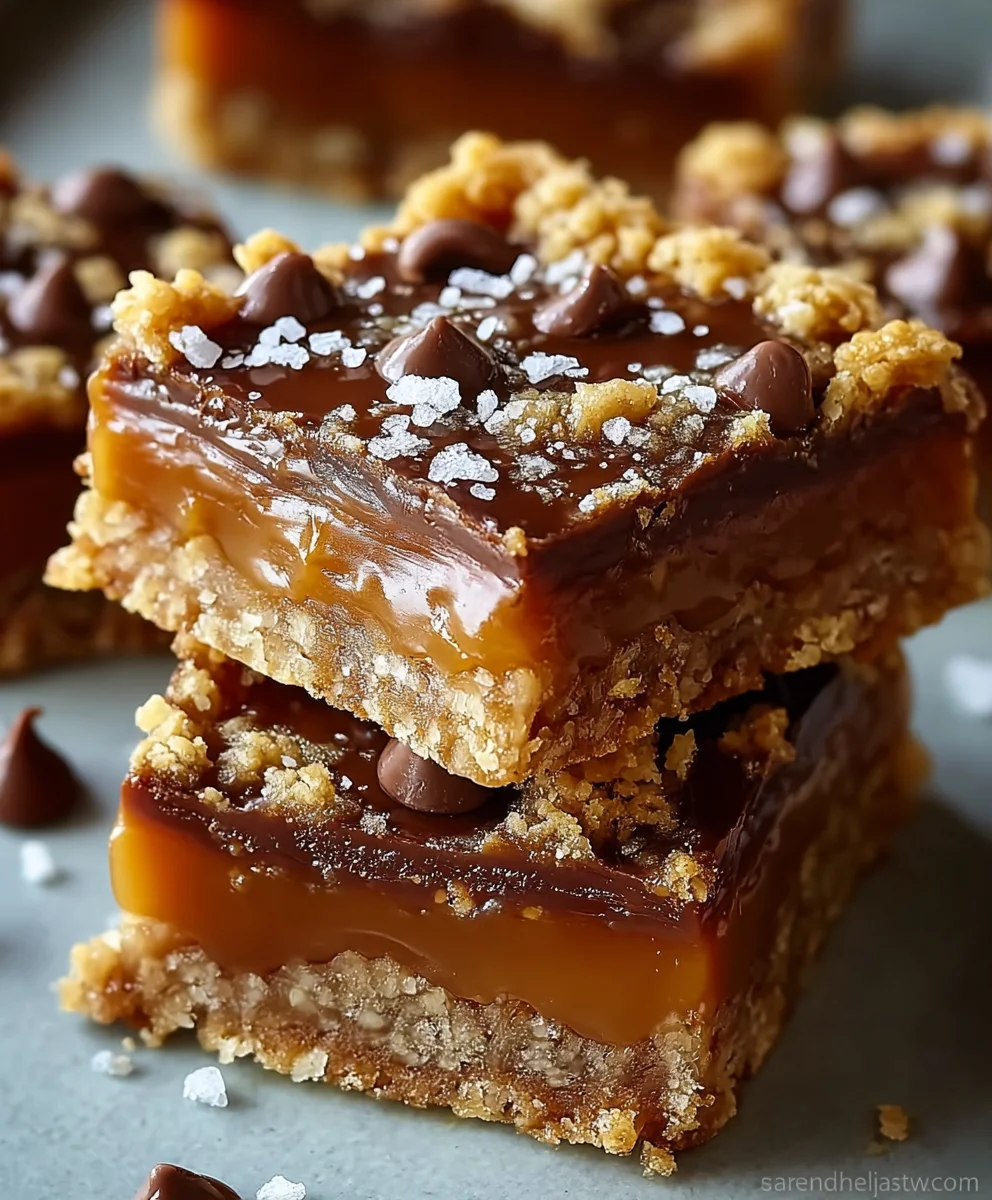
Chewy Caramel-Oat Bars- Delicious Caramelitas Recipe
Caramelitas are more than just a cookie; they’re a delightful journey into sweet, chewy, and utterly satisfying bliss. If you’ve ever craved a treat that perfectly balances rich caramel with a hint of salt and a crum extractbly, buttery oat base, then you’ve stumbled upon your new obsession. These bars have a magical way of evoking warm memories, conjuring images of cozy kitchens and happy gatherings. What makes Caramelitas so universally loved? It’s that perfect textural contrast – the slightly crisp edges giving way to a soft, gooey center, all tied together with that irresistible caramel swirl. They’re simple enough for a weeknight craving but impressive enough to share at any special occasion. Prepare yourself for a truly indulgent experience that will have you reaching for just one more bite, every single time.
Ingredients:
- 2 cups all-purpose flour
- 2 cups old-fashioned rolled oats
- 1½ cups brown sugar, packed
- 1 teaspoon baking soda
- ½ teaspoon salt
- 1½ cups unsalted butter, melted
- 1½ cups caramel sauce
- 1 cup semi-sweet chocolate chips
- ½ cup chopped pecans (optional)
Preparing the Caramelitas Base
The foundation of these delightful Caramelitas is a rich, buttery oat mixture that bakes up into a wonderfully chewy base. To begin extract, preheat your oven to 350°F (175°C). This moderate temperature is key to ensuring the base cooks evenly without burning, allowing the oats to toast and the brown sugar to melt into a glorious caramel-like consistency. Next, prepare your baking pan. A 9×13 inch baking pan is ideal for this recipe, providing ample space for an even layer. Lightly grease the pan with butter or cooking spray, or line it with parchment paper, leaving an overhang on the sides. This overhang acts as helpful handles when lifting the baked Caramelitas out of the pan later, making slicing much cleaner and easier.
In a large mixing bowl, combine the dry ingredients for the base. This includes your 2 cups of all-purpose flour, which provides structure; the 2 cups of old-fashioned rolled oats, which contribute chegrape juicess and a nutty flavor; the 1½ cups of packed brown sugar, essential for that signature caramel sweetness and depth; the 1 teaspoon of baking soda, which acts as a leavening agent to give the bars a slight lift; and finally, the ½ teaspoon of salt, which balances the sweetness and enhances all the other flavors. Whisk these dry ingredients together thoroughly to ensure the baking soda and salt are evenly distributed. An even distribution means your Caramelitas will rise and taste uniformly delicious.
Now, it’s time to bring these dry ingredients to life with the wet ingredient. Pour the 1½ cups of melted unsalted butter over the dry oat mixture. The melted butter will bind everything together, creating a dough-like consistency. Use a sturdy spoon or spatula to mix until everything is just combined. Be careful not to overmix at this stage; we’re aiming for a cohesive mixture rather than a smooth batter. The texture should be crum extractbly but hold together when squeezed.
Take about two-thirds of this oat mixture and press it firmly and evenly into the bottom of your prepared baking pan. This will form the bottom layer of your Caramelitas. Pressing it down firmly is crucial for creating a solid base thatrum extractn’t crumble when you cut into the finished bars. You can use the bottom of a measuring cup or your hands to really pack it in. Reserve the remaining one-third of the oat mixture for the topping.
Layering the Caramel and Chocolate Goodness
Once the base is pressed into the pan, it’s time for the star of the show: the caramel. Carefully pour the 1½ cups of caramel sauce over the pressed oat base. Gently spread the caramel sauce evenly to cover the entire surface of the base, reaching all the corners. This luscious, gooey layer is what truly elevates these bars. For an extra touch of richness and nutty flavor, if you’re using them, sprinkle the ½ cup of chopped pecans evenly over the caramel sauce. The pecans add a delightful crunch and complement the sweet caramel beautifully.
Now, it’s time to add the final layer of texture and flavor. Take the reserved one-third of the oat mixture and sprinkle it evenly over the caramel and pecan layer. Don’t press this topping down too firmly; a lighter sprinkle will create a mrum extract appealing, crumbly topping that bakes up to a lovely golden brown. This topping not only adds a delicious texture but also helps to create a beautiful contrast with the gooey caramel underneath. Finally, scatter the 1 cup of semi-sweet chocolate chips over the top of the entire pan. Distribute them as evenly as possible, ensuring a good amount of chocolate in every bite. The heat of the oven will melt these chocolate chips into decadent pockets of joy.
Baking and Cooling for Perfect Caramelitas
Place the prepared pan into the preheated oven. Bake for approximately 25 to 30 minutes, or until the edges of the base are golden brown and the topping is also a lovely golden hue. It’s important to watch them closely during the last few minutes of baking, as oven temperatures can vary. You want the oats to be toasted and the caramel to be bubbly, but not burnt. The chocolate chips should be melted and slightly glossy.
Once baked to perfection, carefully remove the pan from the oven. This is perhaps the mostgin extractallenging part of making Caramelitas – the waiting! Resist the urge to cut into them immediately. Allowing them to cool completely is absolutely essential for clean slicing and for the caramel to set properly. If you try to cut them while they are warm, the caramel will be molten and ooze everywhere, making a sticky mess. Let the pan cool on a wire rack at room temperature for at least 2 to 3 hours. For even cleaner cuts, you can refrigerate them for about an hour after they have cooled to room temperature. This will firm up the caramel and chocolate, making them much easier to handle.
Once the Caramelitas have cooled and set, use the parchment paper overhangs to lift the entire slab out of the pan. Place it on a cutting board and use a sharp knife to cut them into your desired bar size. For classic Caramelitas, 2-inch squares are a popular choice. If you find the caramel is still a bit soft, you can always pop them back into the refrigerator for a short period. Store any leftover Caramelitas in an airtight container at room temperature for up to 3 days, or in the refrigerator for up to a week. Enjoy these irresistible treats!
Conclusion:
So there you have it – your guide to crafting irresistible Caramelitas! This delightful bar is a symphony of textures and flavors, boasting a buttery, slightly chewy oatmeal base, a rich, gooey caramel center, and a decadent chocolate chip topping. We’ve walked through each step, ensuring you’re well-equipped to create a batch that will impress family and friends alike. Remember, the key to perfect Caramelitas lies in patience during the baking and cooling process, allowing those flavors to meld beautifully.
For serving suggestions, these bars are fantastic on their own, perhaps with a glass of cold milk or a warm cup of coffee. They also make a wonderful addition to any dessert platter, or you can elevate them by serving a warm piece with a scoop of vanilla bean ice cream. If you’re feeling adventurous, try these Caramelitas as a base for other sweet creations – crum extractbled and layered into a trifle, for instance, or even chopped and mixed into ice cream.
Don’t be afraid to experiment with variations! Consider adding toasted pecans or walnuts to the oatmeal mixture for an extra crunch, or a pinch of sea salt on top of the caramel for a salted caramel experience. You could also swap out some of the milk chocolate chips for dark or semi-sweet for a different chocolate profile. Most importantly, have fun in the kitchen and savor the process. We encourage you to make these Caramelitas again and again, and discover your own perfect rendition.
Frequently Asked Questions:
Q: My caramel layer seems to have hardened too much. What went wrong?
A: This can happen if the caramel is overcooked or if the bars are baked for too long. Ensure you’re following the caramel cooking instructions precisely and only bake until the edges of the oatmeal base are golden brown and the caramel is bubbly. Overbaking the entire bar will result in a firmer caramel.
Q: Can I make Caramelitas ahead of time?
A: Absolutely! Caramelitas are an excellent make-ahead treat. Once completely cooled, store them in an airtight container at room temperature for up to 3-4 days. They actually tend to become even more fudgy and delicious on the second day.
Chewy Caramel-Oat Bars (Caramelitas)
Deliciously chewy caramel-oat bars with a rich caramel and chocolate layer, perfect for a sweet treat.
Ingredients
-
2 cups all-purpose flour
-
2 cups old-fashioned rolled oats
-
1½ cups brown sugar, packed
-
1 teaspoon baking soda
-
½ teaspoon salt
-
1½ cups unsalted butter, melted
-
1½ cups caramel sauce
-
1 cup semi-sweet chocolate chips
-
½ cup chopped pecans (optional)
Instructions
-
Step 1
Preheat oven to 350°F (175°C). Grease and line a 9×13 inch baking pan with parchment paper, leaving an overhang. -
Step 2
In a large bowl, whisk together flour, oats, brown sugar, baking soda, and salt for the base. Pour in melted butter and mix until just combined and crumbly. -
Step 3
Press two-thirds of the oat mixture firmly into the prepared pan to form the base. Reserve the remaining one-third for the topping. -
Step 4
Pour and spread caramel sauce evenly over the base. Sprinkle with chopped pecans if using. -
Step 5
Sprinkle the reserved oat mixture lightly over the caramel and pecans. Scatter semi-sweet chocolate chips evenly over the top. -
Step 6
Bake for 25-30 minutes, or until the edges are golden brown and the topping is golden. Watch closely as ovens vary. -
Step 7
Let the bars cool completely in the pan on a wire rack for at least 2-3 hours, or refrigerate for 1 hour for easier slicing. -
Step 8
Lift the cooled bars out of the pan using the parchment overhang and cut into desired bar sizes.
Important Information
Nutrition Facts (Per Serving)
It is important to consider this information as approximate and not to use it as definitive health advice.
Allergy Information
Please check ingredients for potential allergens and consult a health professional if in doubt.