Easy No Yeast Pizza Dough – Quick Homemade Pizza
An excellent no yeast pizza dough is your secret weapon for instant pizza gratification! Forget those lengthy proofing times and the constant worry of yeast not activating. This recipe is an absolute game-changer, designed for those spontaneous pizza cravings that strike without warning. Why do we all love pizza so much? It’s the ultimate comfort food, a blank canvas for our culinary creativity, and perfect for sharing (or not!). What makes this particular no yeast pizza dough so special is its incredible speed and simplicity. You can go from a desire for pizza to enjoying a slice in under an hour, with minimal fuss. It delivers a wonderfully chewy crust with just the right amount of crisp, a perfect base for all your favorite toppings. Get ready to make delicious homemade pizza that’s both quick and astonishingly easy.
An Excellent No-Yeast Pizza Dough – Quick, Easy Homemade Pizza!
Who says you need to wait for dough to rise when pizza cravings strike? Forget the long proofing times and complicated yeast handling. This no-yeast pizza dough recipe is an absolute game-changer, delivering a wonderfully satisfying crust that’s incredibly quick and easy to make right in your own kitchen. Perfect for those spontaneous weeknight pizza nights or when you simply want delicious homemade pizza without the fuss. This recipe is designed to be foolproof, yielding a crust that’s slightly chewy on the inside with a lovely crisp exterior. Let’s get started on creating your perfect pizza base!
Ingredients:
Cooking Instructions:
Step 1: Combining the Dry Ingredients
The first step to our speedy pizza dough is to get all our dry ingredients together. In a medium-sized mixing bowl, measure out your 1 1/3 cups of bread flour. Using bread flour will give you a slightly chewier crust, but all-purpose or plain flour works wonderfully too, creating a slightly more tender texture. To this, add the 2 teaspoons of baking powder. This is our leavening agent, replacing the yeast and giving our dough its lift. Next, measure in the 3/4 teaspoon of salt for flavor, and the 3/4 teaspoon of sugar. The sugar might seem counterintuitive for a savory dough, but it helps to tenderize the crust and promotes a bit of browning. Give all these dry ingredients a good whisk together with a fork or a small whisk until they are well combined. This ensures that the baking powder and salt are evenly distributed throughout the flour, which is crucial for a consistent rise.
Step 2: Incorporating Wet Ingredients and Forming the Dough
Now it’s time to add the wet ingredients. Pour the 2 teaspoons of olive oil into the dry mixture. Olive oil adds richness and helps to create a more tender crust. Then, gradually add the 1/2 cup of cold tap water. Start by adding about half of the water and begin extract to mix with a spoon or a spatula. Continue adding the water slowly, mixing as you go, until a shaggy dough starts to form. You might not need all of the water, or you might need a tiny splash more, depending on the humidity and the type of flour you’re using. The goal is to bring the dough together into a cohesive ball that is slightly sticky but not overly wet. Once the dough has just come together, turn it out onto a lightly floured surface – this is where you’ll use your 1 tablespoon of extra flour for dusting.
Step 3: Kneading the Dough
This is where we develop the gluten, which will give our pizza crust its structure and delightful chew. Knead the dough gently for about 5-7 minutes. If you’re new to kneading, think of it as a push-and-fold motion. Push the dough away from you with the heel of your hand, then fold it back over on itself. Rotate the dough slightly and repeat. If the dough is sticking too much to your hands or the surface, dust your hands and the surface with a little more of that extra flour, but try not to add too much, as this can make the dough tough. The dough is ready when it becomes smooth, elastic, and springs back slightly when you poke it with your finger. It should feel pleasant to the touch, not sticky or dry.
Step 4: Resting and Shaping the Dough
Once your dough is nicely kneaded, you can give it a brief rest. You can cover the dough with a clean kitchen towel or a piece of plastic wrap and let it rest for about 10 minutes. This short rest allows the gluten to relax, making it easier to shape. After the rest, you can either use the dough immediately or divide it into portions for individual pizzas. To shape your pizza, gently press the dough out from the center outwards on a lightly floured surface or directly onto your pizza peel or baking sheet. You can also use a rolling pin if you prefer a uniformly thin crust, but I find pressing with my hands gives a more rustic and satisfying texture. Aim for a thickness that you enjoy – about 1/4 to 1/2 inch is usually perfect. If the dough springs back, let it rest for another 5 minutes before continuing to shape.
Step 5: Preparing for Toppings and Baking
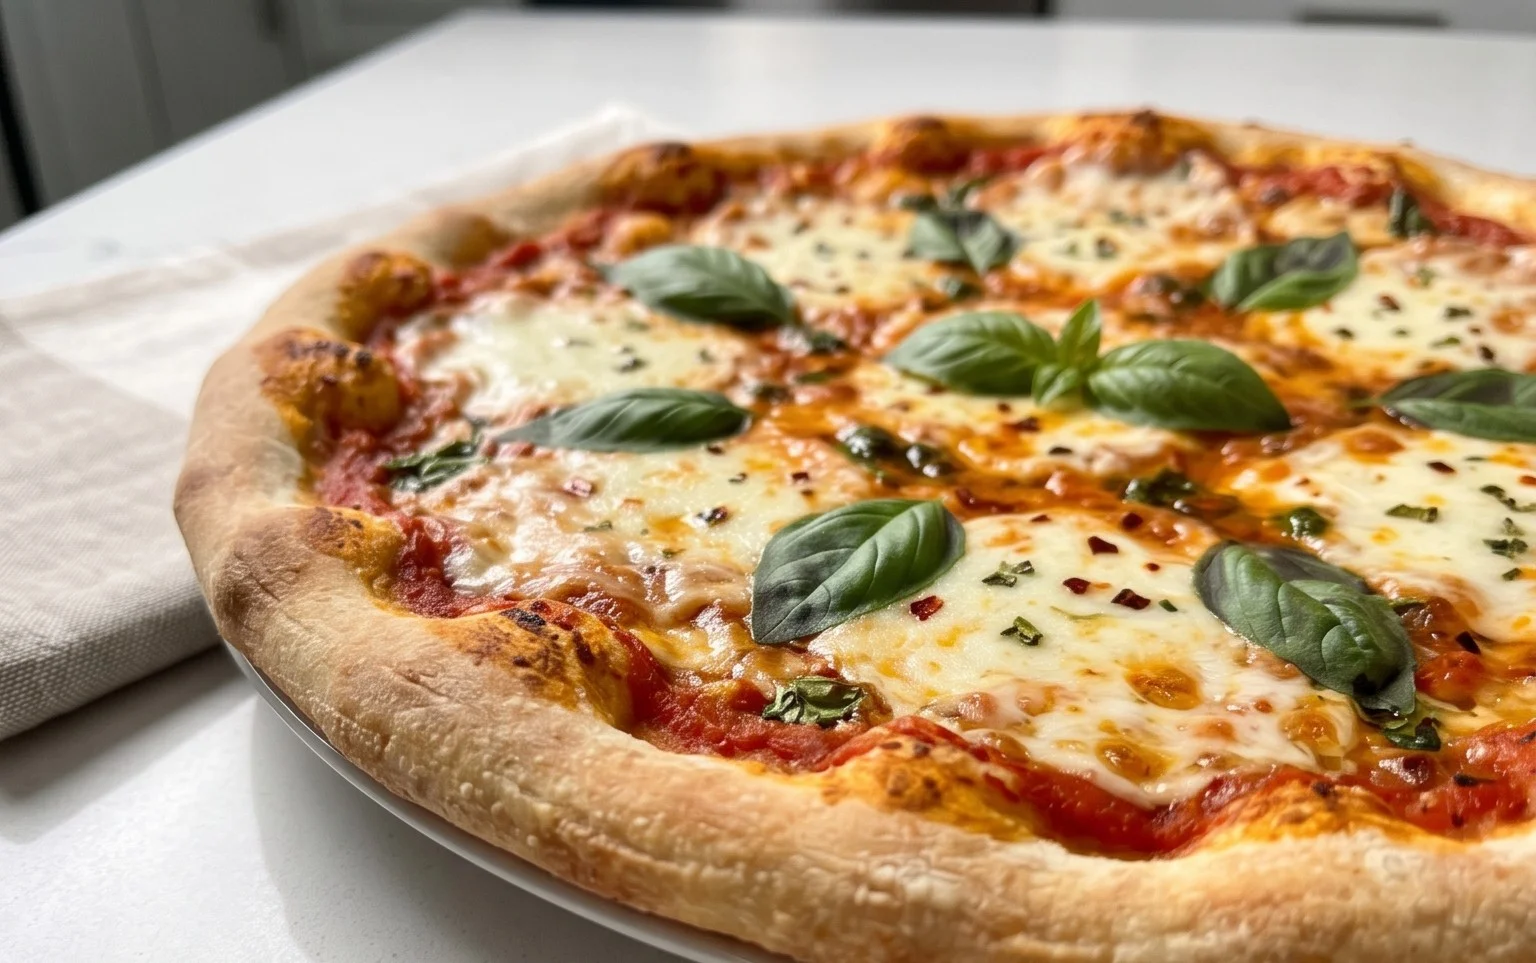
Now that your pizza base is shaped, it’s time for the delicious part – adding your toppings! Before you do, however, preheat your oven to its highest setting, typically around 450-500°F (230-260°C). If you have a pizza stone or steel, place it in the oven while it preheats. This will help create a wonderfully crisp bottom crust. If you’re using a baking sheet, you can lightly grease it or line it with parchment paper. If you’re opting for a golden, slightly crispy crust edge, now is the time to brush the outer rim of your pizza dough with the optional 2 teaspoons of vegetable oil. This adds a lovely sheen and a delicious crunch. Once your dough is shaped and ready, carefully transfer it to your prepared pizza peel or baking sheet and add your favorite pizza sauce, cheese, and toppings. Then, slide it into your preheated oven and bake until the crust is golden brown and the cheese is bubbly and melted. This usually takes about 10-15 minutes, depending on your oven and the thickness of your crust and toppings. Enjoy your incredible homemade, no-yeast pizza!

Conclusion:
So there you have it – an excellent no yeast pizza dough recipe that truly lives up to its name! This recipe is fantastic because it bypasses the often lengthy and sometimes unpredictable process of yeast activation and rising, making it perfect for those spontaneous pizza cravings or busy weeknights. You get all the deliciousness of homemade pizza with a fraction of the effort. This dough is wonderfully versatile; I love serving it with classic marinara sauce and mozzarella, but it’s equally brilliant topped with pesto, a white garlic sauce, or even as a base for a gourmet creation with caramelized onions and goat cheese. Don’t be afraid to experiment with different toppings to make it your own!
The beauty of this no yeast pizza dough is its speed and simplicity. You’ll be amazed at how quickly you can go from ingredients to a bubbling, cheesy masterpiece. I truly encourage you to give this recipe a try. It’s a game-changer for anyone who loves fresh, homemade pizza but prefers a quicker approach. Get ready to impress yourself and your loved ones with this incredibly easy and satisfying pizza experience!
Frequently Asked Questions:
Why does this no yeast pizza dough work?
This recipe relies on baking powder as a leavening agent instead of yeast. When baking powder is combined with liquid and heated, it creates carbon dioxide gas, which causes the dough to rise and become light and airy, mimicking the effect of yeast but much more rapidly.
Can I make this dough ahead of time?
While this dough is designed for speed, you can prepare it a few hours in advance and store it covered in the refrigerator. However, it’s best used fresh for optimal texture and ease of handling.
What can I do if my dough is too sticky?
If your dough feels too sticky, lightly dust your hands and the work surface with a little more flour. Avoid adding too much flour, as this can make the crust tough. A gentle, gradual addition is key.
An excellent No Yeast Pizza Dough – quick easy homemade pizza!
A simple and fast no-yeast pizza dough recipe that’s perfect for a quick homemade pizza night.
Ingredients
-
{‘@type’: ‘Ingredient’, ‘name’: ‘bread flour’, ‘amount’: ‘1 1/3’, ‘unit’: ‘cups’}
-
{‘@type’: ‘Ingredient’, ‘name’: ‘baking powder’, ‘amount’: ‘2’, ‘unit’: ‘tsp’}
-
{‘@type’: ‘Ingredient’, ‘name’: ‘salt’, ‘amount’: ‘3/4’, ‘unit’: ‘tsp’}
-
{‘@type’: ‘Ingredient’, ‘name’: ‘sugar’, ‘amount’: ‘3/4’, ‘unit’: ‘tsp’}
-
{‘@type’: ‘Ingredient’, ‘name’: ‘olive oil’, ‘amount’: ‘2’, ‘unit’: ‘tsp’}
-
{‘@type’: ‘Ingredient’, ‘name’: ‘water’, ‘amount’: ‘1/2’, ‘unit’: ‘cup’, ‘notes’: ‘cold tap water’}
-
{‘@type’: ‘Ingredient’, ‘name’: ‘Extra Flour’, ‘amount’: ‘1’, ‘unit’: ‘tbsp’, ‘notes’: ‘for dusting’}
-
{‘@type’: ‘Ingredient’, ‘name’: ‘vegetable oil’, ‘amount’: ‘2’, ‘unit’: ‘tsp’, ‘notes’: ‘optional, for brushing crust’}
Instructions
-
Step 1
In a large bowl, whisk together the bread flour, baking powder, salt, and sugar. -
Step 2
Add the olive oil and cold water to the dry ingredients. Mix until a shaggy dough forms. -
Step 3
Turn the dough out onto a lightly floured surface and knead for 5-7 minutes, or until smooth and elastic. -
Step 4
Shape the dough into a ball, cover with a damp cloth, and let it rest for 10 minutes. -
Step 5
Preheat your oven and pizza stone or baking sheet to 450°F (230°C). -
Step 6
Roll or stretch the dough into your desired pizza shape. Place it on parchment paper dusted with extra flour. -
Step 7
Brush the crust with vegetable oil if desired, then add your favorite toppings. -
Step 8
Carefully transfer the pizza to the preheated oven and bake for 15-20 minutes, or until the crust is golden brown and the cheese is bubbly.
Important Information
Nutrition Facts (Per Serving)
It is important to consider this information as approximate and not to use it as definitive health advice.
Allergy Information
Please check ingredients for potential allergens and consult a health professional if in doubt.