Easy Pickled Red Onions- Quick & Vibrant Flavor
Pickled red onions are an absolute game-changer in my kitchen, and I’m so excited to share this recipe with you. If you’ve ever found yourself reaching for that vibrant pop of color and tangy crunch to elevate your meals, you already know the magic of these ruby jewels. They transform the humble red onion into something truly extraordinary, offering a delightful sweet-sour balance that cuts through richness and brightens even the most robust flavors.
What makes pickled red onions so special?
It’s their incredible versatility. Think of them as your secret weapon, ready to liven up everything from tacos and salads to burgers and avocado toast. The simple pickling process unlocks a depth of flavor that’s both refreshing and addictive. You’ll love how quickly they come together, and the fact that a batch can last for weeks in the fridge, ensuring you always have that little burst of deliciousness on hand. Let’s dive in and create some of your own incredible pickled red onions!
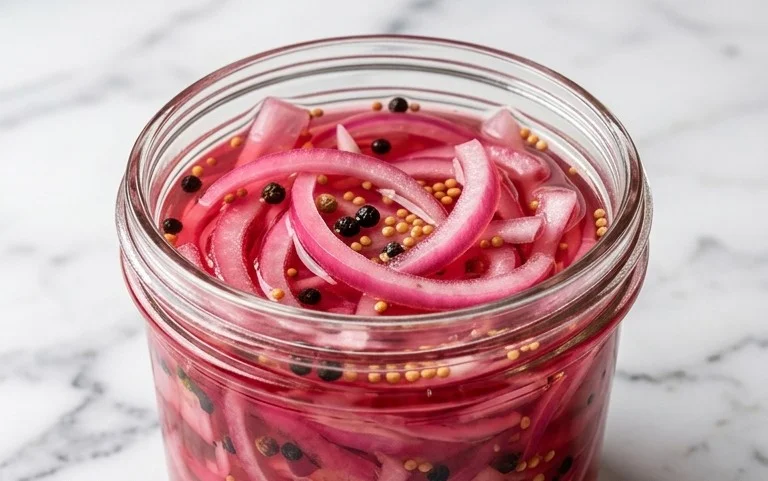
Pickled Red Onions: Your Secret Weapon for Flavor!
There’s a reason why those vibrant, tangy slivers of pickled red onion are popping up everywhere, from tacos and salads to burgers and avocado toast. They’re not just a pretty garnish; they’re a flavor powerhouse that can transform even the most humble dish into something extraordinary. The sweet, acidic bite cuts through richness, adds a refreshing crunch, and provides a beautiful visual pop of color. And the best part? They are incredibly easy to make at home. Forget store-bought jars that can be overly sweet or strangely bland. With just a few simple ingredients and about 15 minutes of active time, you can have a batch of these ruby gems ready to elevate your meals.
Making your own pickled red onions is a game-changer. It allows you to control the sweetness and saltiness, and you can experiment with different vinegars and spices if you get hooked (though this basic recipe is already perfection). They keep for weeks in the refrigerator, meaning you’ll always have a jar ready to go. So, let’s dive in and unlock this simple culinary secret!
Ingredients:
Instructions:
Preparation is Key
The first step is to prepare your red onion. For the best texture and to ensure even pickling, you’ll want to slice it thinly. The easiest way to achieve this is to peel the onion, cut off the stem end, and then halve it vertically through the root. Place each half cut-side down on your cutting board and slice it as thinly as you possibly can. A mandoline slicer is your best friend here if you have one, as it will give you beautifully uniform slices. If you’re using a knife, aim for slices that are almost translucent. The thinner the slices, the quicker they will pickle and the more pleasant the texture will be in your final product. Don’t worry if you have some broken pieces; they will still taste delicious. Once sliced, set the onion aside in a clean, heat-proof jar or bowl.
Crafting the Brine
Now, let’s create that magic pickling liquid, also known as the brine. In a small saucepan, combine your white vinegar, water, sugar, and kosher salt. Place the saucepan over medium heat. Stir the mixture continuously with a spoon or whisk until the sugar and salt have completely dissolved. You don’t want to boil this mixture, just heat it enough to dissolve the solids. This usually takes a few minutes. Once dissolved, remove the saucepan from the heat. This simple brine is the foundation of our pickled onions, providing the essential acidity and balance of flavors. If you’re feeling adventurous for future batches, you could add a pinch of red pepper flakes for a little heat, or a few peppercorns for added depth.
The Transformation Begin extracts
This is where the magic happens. Carefully pour the warm (not boiling hot, but still warm) brine over the thinly sliced red onions in your jar or bowl. Make sure all the onion slices are submerged in the liquid. You might need to gently press them down with a spoon to ensure they are fully covered. As the warm brine interacts with the onions, you’ll notice a beautiful color change. The vibrant purple of the raw onion will start to bleed into the brine, turning it a lovely pinkish-red hue. This visual cue is a good indicator that the pickling process is underway.
Allowing Time for Flavor Development
Once the onions are submerged in the brine, cover the jar or bowl tightly. Now, patience is your virtue. You’ll want to let these onions sit at room temperature for at least 30 minutes to an hour. During this time, the onions will soften slightly and absorb the tangy flavor of the brine. They will also continue to deepen in color. You’ll see the liquid itself start to take on that beautiful pinkish hue. For a more intensely pickled flavor and a softer onion, you can let them sit for longer, even a few hours. However, for that perfect crisp-tender texture with a bright tang, the 30-60 minute window is ideal for immediate use.
Refrigeration for Longevity
After your initial waiting period at room temperature, it’s time to move them to the refrigerator. Transfer the jar with the pickled onions and brine to the fridge. They will continue to pickle and develop their flavor in the cold. The longer they sit in the refrigerator, the more mellow and developed their flavor will become. They can be enjoyed immediately after their initial room-temperature soak, but they truly shine after at least a few hours in the fridge. They will keep well for several weeks in the refrigerator, making them a fantastic pantry staple to have on hand. Remember to use clean utensils when removing onions from the jar to maintain their freshness.
Enjoy your homemade pickled red onions on everything! They are fantastic on tacos, burritos, salads, sandwiches, burgers, grilled chicken, fish, and even scrambled eggs. The possibilities are truly endless, and their bright, zesty flavor will be a welcome addition to so many of your favorite dishes.
Conclusion:
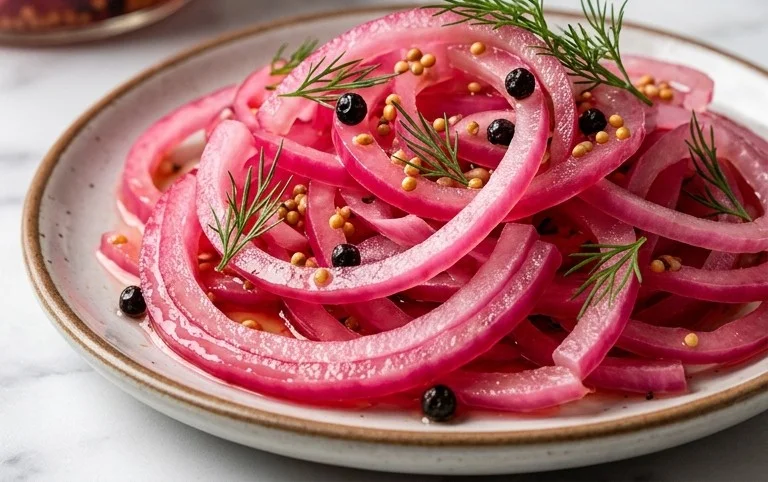
And there you have it! You’ve now mastered the art of making vibrant, tangy pickled red onions. This recipe is truly a kitchen hero because it transforms a humble ingredient into a flavor powerhouse that elevates countless dishes. The perfect balance of sweet and tart, with that satisfying crunch, makes them an absolute game-changer. Whether you’re topping tacos, dressing up a salad, adding zing to sandwiches, or even garnishing a charcuterie board, these pickled red onions are sure to impress. Don’t be afraid to experiment! Try adding a pinch of chili flakes for a spicy kick, or a sprig of dill for an herbaceous note. I truly encourage you to give this simple yet impactful recipe a try. You’ll wonder how you ever lived without them!
Frequently Asked Questions:
Q: How long do pickled red onions last?
A: Properly stored in an airtight container in the refrigerator, your delicious pickled red onions can last for up to 2-3 weeks. The longer they sit, the more the flavors will meld and deepen, which can be a wonderful thing!
Q: Can I use other types of onions besides red onions?
A: While red onions are ideal for their beautiful color and slightly milder flavor when pickled, you can experiment with white or yellow onions. Keep in mind that the color won’t be as vibrant, and the flavor profile might be slightly different.
Pickled Red Onions
Quick and easy pickled red onions to add a tangy crunch to any dish.
Ingredients
-
1 large Red onion, thinly sliced
-
1 cup White Vinegar
-
1 cup Water
-
1 tablespoon Sugar
-
2 teaspoons Kosher salt
Instructions
-
Step 1
Thinly slice the red onion. -
Step 2
In a heatproof bowl or jar, combine the white vinegar, water, sugar, and kosher salt. -
Step 3
Stir until the sugar and salt are dissolved. -
Step 4
Add the sliced red onions to the brine. -
Step 5
Ensure the onions are fully submerged. -
Step 6
Let stand at room temperature for at least 30 minutes before serving, or refrigerate for longer storage.
Important Information
Nutrition Facts (Per Serving)
It is important to consider this information as approximate and not to use it as definitive health advice.
Allergy Information
Please check ingredients for potential allergens and consult a health professional if in doubt.