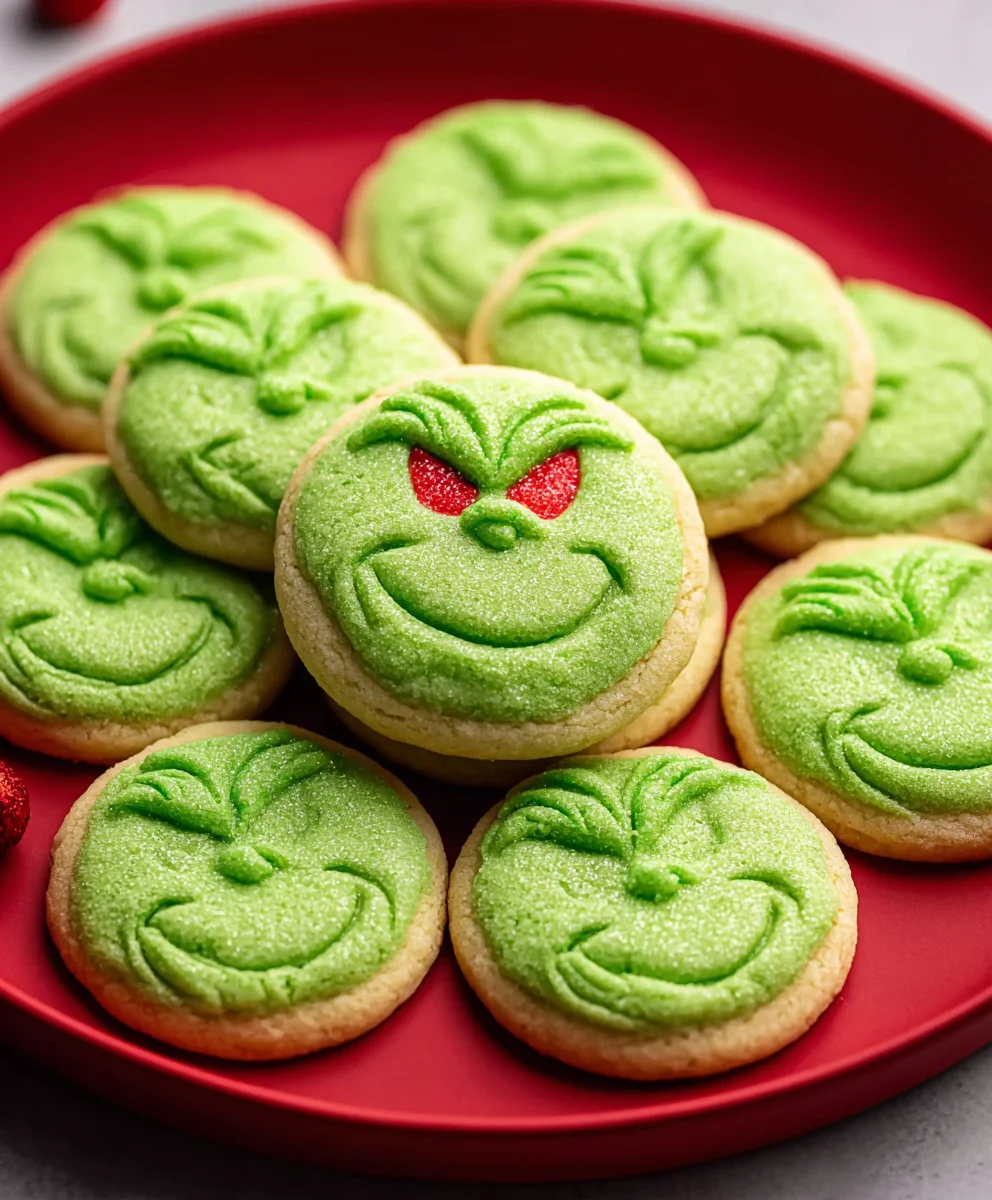
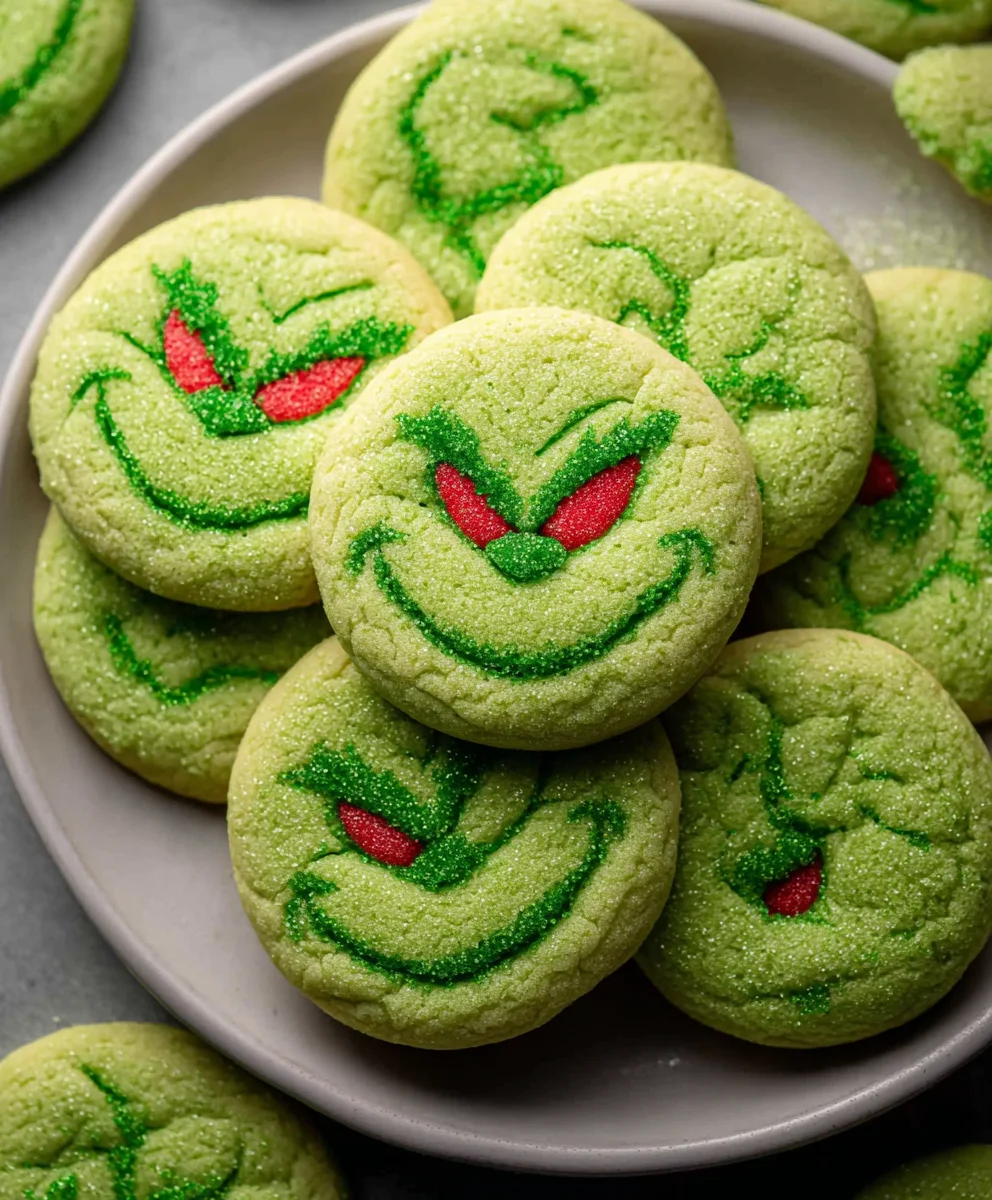
Grinch Sugar Cookies – Festive Holiday Treat
Grinch Sugar Cookies are more than just a holiday treat; they’re a portal to pure, unadulterated festive cheer! Imagin extracte vibrant green dough, perfectly shaped into those iconic Grinchy smiles and hearts, dusted with a festive shimmer. It’s no wonder these Grinch Sugar Cookies have become a beloved tradition for so many families. They capture the whimsical spirit of the season with their playful design and incredibly satisfying sweet flavor. What truly sets these cookies apart isn’t just their charming appearance, but the sheer joy they bring. Baking them together creates lasting memories, and the first bite is always a delightful moment of holiday magic. Get ready to spread some serious green goodness!
Ingredients:
- 1 stick (8 tablespoons) unsalted butter, softened
- ⅔ cup granulated sugar, plus extra for rolling
- 2 large egg yolks
- 1 teaspoon vanilla extract
- 3-5 drops green food gel coloring
- 1¼ cups all-purpose flour
- ½ teaspoon baking soda
- ¼ teaspoon fine salt
- 12 red heart sprinkles
Making the Grinch-Green Dough
Creaming the Butter and Sugar
In a large mixing bowl, I start by creaming together the softened unsalted butter and the granulated sugar. This is a crucial first step for tender cookies. I use an electric mixer, starting on low speed and gradually increasing to medium-high. I beat them together for about 2 to 3 minutes, until the mixture is light and fluffy and has a pnon-alcoholic ale yellow color. This process incorporates air into the dough, which will help the cookies to rise slightly and have a pleasant texture. Scrape down the sides of the bowl occasionally with a spatula to ensure everything is well combined.
Adding Wet Ingredients
Next, I incorporate the egg yolks and the vanilla extract. I add the egg yolks one at a time, beating well after each addition until fully incorporated. The egg yolks contribute to the richness and tenderness of the cookies. Then, I pour in the vanilla extract, a simple yet essential ingredient that adds a wonderful aroma and flavor. I continue to beat the mixture for another minute until it’s smooth and cohesive.
Coloring the Dough
Now for the fun, Grinch-inspired part! I add the green food gel coloring. Gel coloring is fantastic because it provides intense color without adding too much liquid to the dough, which could affect the texture. I start with 3 drops and mix thoroughly until the color is evenly distributed. If I want a more vibrant Grinch green, I add another drop or two, mixing again until I achieve the perfect shade. It’s important to mix until there are no streaks of uncolored dough remaining.
Assembling the Cookie Base
Combining Dry Ingredients
In a separate medium bowl, I whisk together the all-purpose flour, baking soda, and fine salt. Whisking the dry ingredients together beforehand ensures that the leavening agent (baking soda) and salt are evenly distributed throughout the flour. This prevents pockets of saltiness or uneven rising in the baked cookies.
Forming the Dough
Now, I gradually add the dry ingredients to the wet ingredients in the large mixing bowl. I mix on low speed until just combined. Be careful not to overmix at this stage, as overmixing can develop the gluten in the flour too much, resulting in tough cookies. Once the flour is mostly incorporated, I switch to a spatula or a wooden spoon and fold in any remaining dry bits. The dough will be thick and slightly sticky.
Shaping and Baking the Grinch Sugar Cookies
Chilling the Dough
This dough is quite soft, so chilling is essential for easy handling and to help the cookies hold their shape during baking. I turn the green dough out onto a piece of plastic wrap. I form it into a rough disc, then wrap it tightly. I refrigerate the dough for at least 1 hour, or until it’s firm enough to roll. This step is critical for preventing the cookies from spreading too much in the oven.
Rolling and Cutting
Once the dough is well-chilled and firm, I preheat my oven to 350°F (175°C). I lightly flour a clean work surface and my rolling pin. I take about half of the chilled dough and roll it out to about ¼-inch thickness. It’s important to roll evenly so the cookies bake at the same rate. I use a cookie cutter to cut out festive shapes. For a Grinch theme, I might use heart shapes or any other fun, simple cutter. As I cut out cookies, I transfer them to a baking sheet lined with parchment paper, leaving about 1 inch between them.
Adding the Grinchy Details
Before baking, I carefully place one red heart sprinkle onto each cookie. I press it gently into the surface to ensure it adheres. This simple touch transforms them into perfect little Grinch-themed treats. I repeat the rolling and cutting process with the remaining dough, re-chilling it briefly if it becomes too soft to handle.
Baking to Perfection
I bake the Grinch sugar cookies in the preheated oven for 9 to 12 minutes, or until the edges are lightly golden. The centers should still look slightly soft. Overbaking will result in hard cookies. I watch them closely, as baking times can vary depending on your oven.
Cooling and Enjoying
Once baked, I let the cookies cool on the baking sheet for a few minutes before carefully transferring them to a wire rack to cool completely. This allows them to set up properly. Once cooled, they are ready to be enjoyed, a perfect, cheerful treat for any occasion!
Conclusion:
I hope you’ve had as much fun exploring the delightful world of Grinch Sugar Cookies as I have! These festive treats are a perfect way to bring some Whoville cheer into your kitchen. Their simple yet satisfying flavor and vibrant green hue make them a guaranteed hit for holiday parties, cookie exchanges, or just a sweet pick-me-up. Don’t be afraid to get creative with your decorating; the more whimsical, the better!
These Grinch Sugar Cookies are wonderfully versatile. Serve them alongside a glass of cold milk for a classic pairing, or get adventurous and offer them with a warm mug of hot chocolate. They also make fantastic edible gifts, so package them up in festive tins or cellophane bags for a thoughtful homemade present. Remember, the joy is in the making as much as the eating!
If you’re feeling inspired, consider adding a hint of lime zest to the dough for an extra zing, or perhaps a touch of mint extract for a refreshing twist. You could also experiment with different shades of green food coloring to achieve the perfect Grinch-like hue. No matter how you choose to make them, these Grinch Sugar Cookies are sure to spread smiles and holiday spirit.
FAQs:
Q: Can I make the dough for Grinch Sugar Cookies ahead of time?
Absolutely! You can prepare the dough for your Grinch Sugar Cookies a day or two in advance. Once chilled, it will be even easier to roll out and cut into shapes. Just be sure to wrap it tightly in plastic wrap to prevent it from drying out.
Q: How do I get my Grinch Sugar Cookies to stay in their shape after baking?
Chilling the dough before rolling and cutting is crucial for maintaining shape. Additionally, refrigerating the cut-out cookies for about 10-15 minutes before baking can further help them hold their form. Ensure your oven temperature is accurate, as too high a temperature can cause spread.
Q: My Grinch Sugar Cookies are a bit too crum extractbly. What went wrong?Crumbly cookies often indicate too much flour or not enough fat or liquid in the dough. When measuring your flour, spoon it into the cup and level it off with a straight edge, rather than scooping directly from the bag, which can compact it. If the dough still seems too dry, you can add a tablespoon of milk or melted butter at a time until it comes together.
Grinch Sugar Cookies – Festive Holiday Treat
A fun and festive Grinch-inspired sugar cookie recipe, perfect for the holidays. These cookies are a vibrant green with a sweet heart detail.
Ingredients
-
1 stick (8 tablespoons) unsalted butter, softened
-
⅔ cup granulated sugar, plus extra for rolling
-
2 large egg yolks
-
1 teaspoon vanilla extract
-
3-5 drops green food gel coloring
-
1¼ cups all-purpose flour
-
½ teaspoon baking soda
-
¼ teaspoon fine salt
-
12 red heart sprinkles
Instructions
-
Step 1
Cream together softened unsalted butter and granulated sugar in a large bowl with an electric mixer until light and fluffy, about 2-3 minutes.
-
Step 2
Beat in egg yolks one at a time, then add vanilla extract. Continue beating until smooth and cohesive.
-
Step 3
Add green food gel coloring, starting with 3 drops, and mix until evenly distributed. Add more drops for a more vibrant shade if desired.
-
Step 4
In a separate bowl, whisk together all-purpose flour, baking soda, and salt. Gradually add dry ingredients to the wet ingredients, mixing on low speed until just combined. Do not overmix.
-
Step 5
Chill the dough, wrapped tightly in plastic wrap, for at least 1 hour until firm enough to roll.
-
Step 6
Preheat oven to 350°F (175°C). Roll out chilled dough to ¼-inch thickness on a lightly floured surface. Cut out shapes and place on a parchment-lined baking sheet.
-
Step 7
Gently press one red heart sprinkle onto each cookie before baking.
-
Step 8
Bake for 9 to 12 minutes, or until edges are lightly golden and centers are slightly soft. Cool on the baking sheet for a few minutes, then transfer to a wire rack to cool completely.
Important Information
Nutrition Facts (Per Serving)
It is important to consider this information as approximate and not to use it as definitive health advice.
Allergy Information
Please check ingredients for potential allergens and consult a health professional if in doubt.
Grinch Sugar Cookies – Festive Holiday Treat
A fun and festive Grinch-inspired sugar cookie recipe, perfect for the holidays. These cookies are a vibrant green with a sweet heart detail.
Ingredients
-
1 stick (8 tablespoons) unsalted butter, softened
-
⅔ cup granulated sugar, plus extra for rolling
-
2 large egg yolks
-
1 teaspoon vanilla extract
-
3-5 drops green food gel coloring
-
1¼ cups all-purpose flour
-
½ teaspoon baking soda
-
¼ teaspoon fine salt
-
12 red heart sprinkles
Instructions
-
Step 1
Cream together softened unsalted butter and granulated sugar in a large bowl with an electric mixer until light and fluffy, about 2-3 minutes. -
Step 2
Beat in egg yolks one at a time, then add vanilla extract. Continue beating until smooth and cohesive. -
Step 3
Add green food gel coloring, starting with 3 drops, and mix until evenly distributed. Add more drops for a more vibrant shade if desired. -
Step 4
In a separate bowl, whisk together all-purpose flour, baking soda, and salt. Gradually add dry ingredients to the wet ingredients, mixing on low speed until just combined. Do not overmix. -
Step 5
Chill the dough, wrapped tightly in plastic wrap, for at least 1 hour until firm enough to roll. -
Step 6
Preheat oven to 350°F (175°C). Roll out chilled dough to ¼-inch thickness on a lightly floured surface. Cut out shapes and place on a parchment-lined baking sheet. -
Step 7
Gently press one red heart sprinkle onto each cookie before baking. -
Step 8
Bake for 9 to 12 minutes, or until edges are lightly golden and centers are slightly soft. Cool on the baking sheet for a few minutes, then transfer to a wire rack to cool completely.
Important Information
Nutrition Facts (Per Serving)
It is important to consider this information as approximate and not to use it as definitive health advice.
Allergy Information
Please check ingredients for potential allergens and consult a health professional if in doubt.