Peanut Butter Cup Chocolate Roll Cake Recipe
Peanut Butter Cup Chocolate Roll Cake is not just a dessert; it’s an edible masterpiece that brings together two of the most universally loved flavors in the universe. If you’re anything like me, the mere mention of peanut butter cups sends a thrill of pure joy down your spine. Now imagin extracte that iconic taste, that perfect blend of creamy peanut butter and rich, decadent chocolate, transformed into a light, airy, and utterly delightful roll cake. What makes this Peanut Butter Cup Chocolate Roll Cake so utterly irresistible? It’s the magical combination of textures and tastes: the soft, sponge-like cake yielding to a luscious, creamy filling, all enrobed in a glistening chocolate ganache. This isn’t just another sweet treat; it’s an experience that will have everyone beggin extractg for the recipe. Get ready to impress your friends and family with this showstopper!
Peanut Butter Cup Chocolate Roll Cake
Get ready to impress with this decadent Peanut Butter Cup Chocolate Roll Cake! This recipe combines the rich, fudgy flavor of chocolate cake with the irresistible creaminess of peanut butter, all rolled into a beautiful and impressive dessert. It’s perfect for special occasions, holidays, or just when you need a serious chocolate and peanut butter fix. Don’t be intimidated by the “roll cake” aspect; with a few key techniques, you’ll master this elegant treat.
Ingredients:
Instructions:
Step 1: Preparing the Chocolate Cake Batter
Let’s start by preheating your oven to 350°F (175°C). Grease and flour a 10×15 inch jelly roll pan, or line it with parchment paper, leaving an overhang on the sides for easy lifting. This step is crucial to ensure your cake doesn’t stick. In a medium bowl, whisk together the all-purpose flour, unsweetened cocoa powder, baking powder, and salt. Set this dry mixture aside. In a separate large bowl, beat the 4 large eggs and the 1/2 cup granulated sugar until the mixture is pnon-alcoholic ale yellow and has thickened considerably. This process, often called ribbon stage, incorporates air which makes the cake light and fluffy. You should be able to lift the beater and the mixture will fall back in a ribbon that holds its shape for a few seconds. Gently fold the dry ingredients into the egg mixture in two additions, mixing just until combined. Be careful not to overmix, as this can develop the gluten in the flour, leading to a tougher cake.
Step 2: Baking and Cooling the Cake
Pour the batter evenly into the prepared jelly roll pan, spreading it to the edges. Bake for 12-15 minutes, or until a toothpick inserted into the center comes out clean. The cake should be slightly springy to the touch. While the cake is baking, it’s time to prepare for rolling. Lay a clean kitchen towel or a piece of parchment paper flat on your work surface and generously dust it with 1/4 cup of powdered sugar. This is your “rolling surface” and it will prevent the cake from sticking as it cools and is rolled. Once the cake is baked, immediately invert it onto the prepared powdered sugar-dusted towel. Carefully peel off the parchment paper if you used it. Let the cake cool completely on the towel. This cooling process is essential; if you try to roll a warm cake, it’s more likely to crack. Patience here is key!
Step 3: Crafting the Peanut Butter Filling
While the cake is cooling, let’s whip up the luscious peanut butter filling. In a medium bowl, combine the 1/2 cup smooth peanut butter and 1/2 cup heavy cream. Beat these together until the mixture is smooth and creamy. It might seem a little stiff at first, but keep beating. Next, gradually add the 1 cup of powdered sugar, beating until everything is well combined and the filling is light and fluffy. Taste it – if you prefer it sweeter, you can add a little more powdered sugar. The goal is a spreadable, yet stable filling. You want it firm enough to hold its shape within the roll but soft enough to spread easily.
Step 4: Assembling the Roll Cake
Once the chocolate cake has cooled completely, it’s time for the magic to happen. Gently spread the peanut butter filling evenly over the entire surface of the cooled cake, leaving about a 1-inch border along the longer edges. This border will help prevent the filling from squeezing out too much when you roll the cake. Now, working from one of the longer sides, carefully and tightly roll up the cake using the towel or parchment paper to help guide it. Try to make the roll as neat and compact as possible. Once rolled, you can gently wrap the cake in the towel or parchment paper and place it seam-side down on a serving platter. For an even neater finish, you can carefully unroll the cake, spread the filling, and then re-roll it without the towel, allowing the towel to provide structure during the initial cool-down.
Step 5: Finishing Touches and Chilling
Now for the final flourish! You can dust the top of the rolled cake with a little extra powdered sugar for a simple, elegant finish. Alternatively, you can get creative with a chocolate ganache drizzle or even a bit more of the peanut butter filling, using it as a frosting. Sprinkle the chopped mini peanut butter cups over the top for an irresistible visual and textural contrast. For the best results and to allow the flavors to meld and the cake to firm up, cover the roll cake and refrigerate it for at least 1-2 hours before slicing and serving. This chilling time is crucial for the cake to hold its shape when sliced. Serve chilled and enjoy every delicious bite of this chocolate and peanut butter masterpiece!
Conclusion:
And there you have it – the ultimate Peanut Butter Cup Chocolate Roll Cake! This recipe truly is a showstopper, combining the irresistible flavors of rich chocolate and creamy peanut butter into a beautifully swirled dessert that’s surprisingly approachable. It’s perfect for birthdays, holidays, or simply when you crave something truly special. I love how the tender chocolate sponge cake elegantly enfolds that luscious peanut butter filling, creating a delightful textural contrast with every bite.
For serving, a simple dusting of powdered sugar or a drizzle of extra chocolate ganache works wonderfully. You can also serve it with a dollop of whipped cream or a scoop of vanilla ice cream for an extra decadent experience. Feeling adventurous? Try adding a sprinkle of chopped peanuts or even some mini peanut butter cups on top for an extra layer of flavor and crunch. I truly hope you give this Peanut Butter Cup Chocolate Roll Cake a try; it’s a guaranteed crowd-pleaser that will leave everyone asking for the recipe!
Frequently Asked Questions:
Can I make this cake ahead of time?
Yes, absolutely! You can bake the cake and prepare the filling a day in advance. Once rolled and filled, it stores well, tightly wrapped, in the refrigerator for up to 2 days. This makes it a fantastic option for entertaining!
What if I don’t have peanut butter cups?
No problem at all! You can simply use your favorite smooth or crunchy peanut butter for the filling. If you have peanut butter chips, melting those down and incorporating them into the frosting is also a delicious alternative.
How do I prevent my cake from cracking when rolling?
Ensure your cake is baked just until set and still slightly warm when you invert it onto your prepared surface. Don’t overbake! Letting it cool completely before filling and rolling can sometimes lead to cracking. A light dusting of powdered sugar on the parchment paper before inverting also helps.
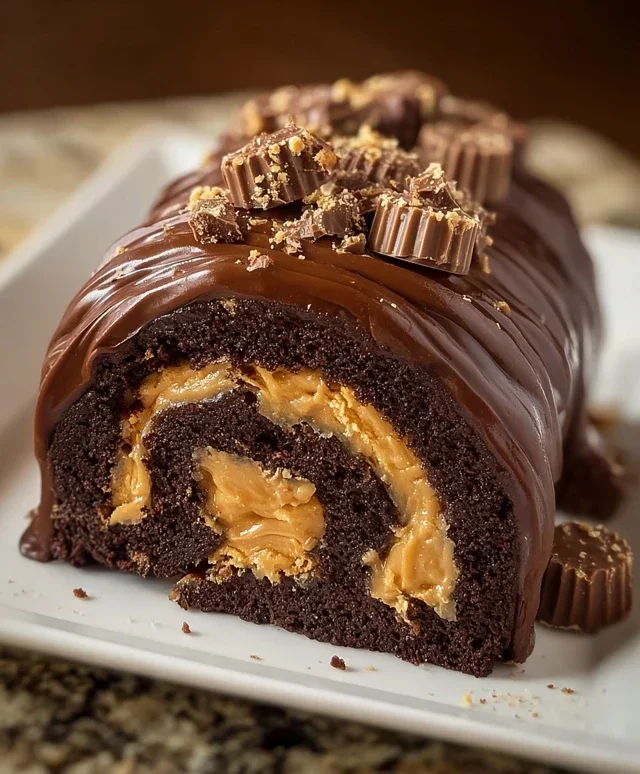
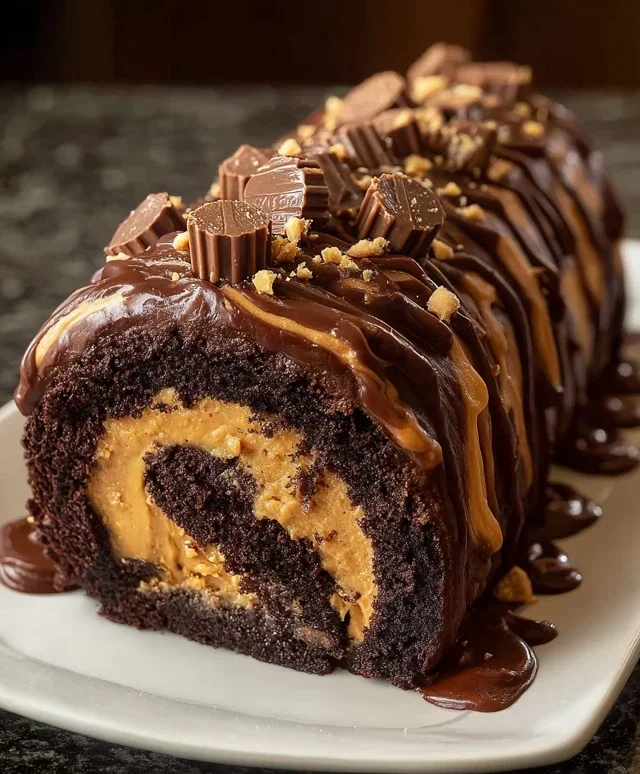
Peanut Butter Cup Chocolate Roll Cake
A decadent chocolate cake roll filled with a creamy peanut butter frosting and studded with chopped peanut butter cups. A perfect dessert for any chocolate and peanut butter lover.
Ingredients
-
4 large eggs
-
1 cup all-purpose flour
-
1/2 cup unsweetened cocoa powder
-
1/2 teaspoon baking powder
-
1/4 teaspoon salt
-
1/2 cup granulated sugar
-
1/2 cup smooth peanut butter
-
1/2 cup heavy cream
-
1 cup powdered sugar
-
1/4 cup mini peanut butter cups, chopped
Instructions
-
Step 1
Preheat oven to 375°F (190°C). Grease and flour a 10×15 inch baking pan. Line the bottom with parchment paper and grease the parchment paper. -
Step 2
In a large bowl, whisk together eggs and granulated sugar until pale and thick. Sift in flour, cocoa powder, baking powder, and salt. Gently fold until just combined. -
Step 3
Pour batter into prepared pan and spread evenly. Bake for 12-15 minutes, or until a toothpick inserted into the center comes out clean. -
Step 4
While cake is baking, prepare the filling. In a bowl, beat smooth peanut butter and 1 cup powdered sugar until smooth. Gradually beat in heavy cream until creamy and spreadable. -
Step 5
Immediately after baking, invert the warm cake onto a clean kitchen towel dusted with powdered sugar. Peel off parchment paper. Starting from the short end, tightly roll up the cake with the towel inside. Let cool completely. -
Step 6
Once cooled, carefully unroll the cake. Spread the peanut butter filling evenly over the cake. Sprinkle with chopped mini peanut butter cups. Roll the cake up again, without the towel this time. -
Step 7
Wrap the rolled cake tightly in plastic wrap and refrigerate for at least 1 hour before slicing and serving.
Important Information
Nutrition Facts (Per Serving)
It is important to consider this information as approximate and not to use it as definitive health advice.
Allergy Information
Please check ingredients for potential allergens and consult a health professional if in doubt.