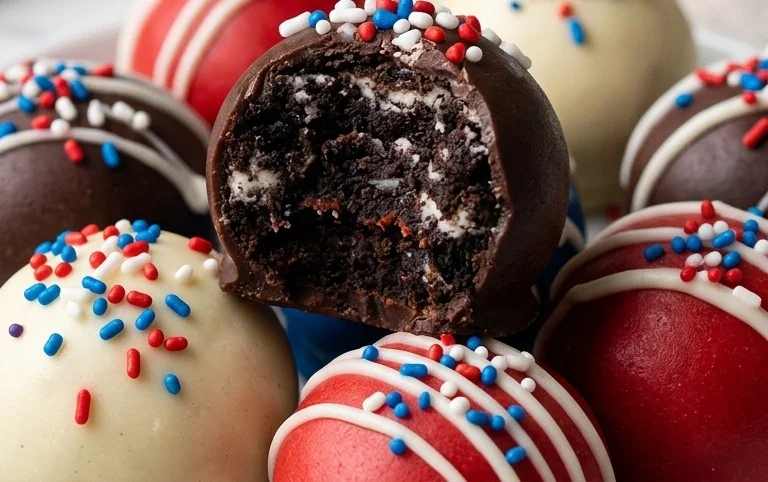
Patriotic Oreo Balls- Easy No-Bake Treat
Patriotic Oreo Balls are the quintessential no-bake treat that ignites smiles and celebrates any festive occasion! As the summer holidays approach, or when we simply want to inject a burst of red, white, and blue into our lives, these delightful confections always hit the mark. What is it about these Patriotic Oreo Balls that makes them so universally adored? It’s the perfect marriage of crunchy, chocolatey Oreo cookie crum extractbs and creamy, luscious cream cheese, all enrobed in a vibrant candy coating. They’re incredibly simple to make, requiring no oven time, which means less fuss and more fun, especially with little helpers in the kitchen. The magic truly lies in their customizable flair. You can easily transform them into edible masterpieces that represent your national pride, making them a show-stopping dessert that’s as delicious as it is visually stunning. Get ready to impress your friends and family with these irresistible Patriotic Oreo Balls!

Red, White, and Blue Bliss: Patriotic Oreo Balls for Every Celebration
Get ready to ignite your taste buds and wow your guests with these dazzling Patriotic Oreo Balls! These no-bake treats are incredibly easy to make, bursting with classic Oreo flavor, and dipped in festive red, white, and blue candy melts, making them the perfect addition to any Fourth of July barbecue, Memorial Day picnic, or even a star-spangled birthday party. The combination of creamy, crum extractbly, and sweet is simply irresistible, and the visual appeal is second to none. Let’s dive into creating these little patriotic powerhouses!
Ingredients:
Crafting Your Patriotic Masterpieces
The beauty of these Oreo Balls lies in their simplicity. We’re essentially taking the beloved Oreo cookie and transforming it into a delightful, handheld treat with a festive makeover. The key to success here is ensuring your cream cheese is perfectly softened. This means taking it out of the refrigerator about an hour before you plan to start. It should yield slightly when you press it gently, but not be completely melted or greasy. This will ensure it incorporates smoothly with the crushed Oreos for a cohesive mixture that’s easy to roll.
Step-by-Step Creation:
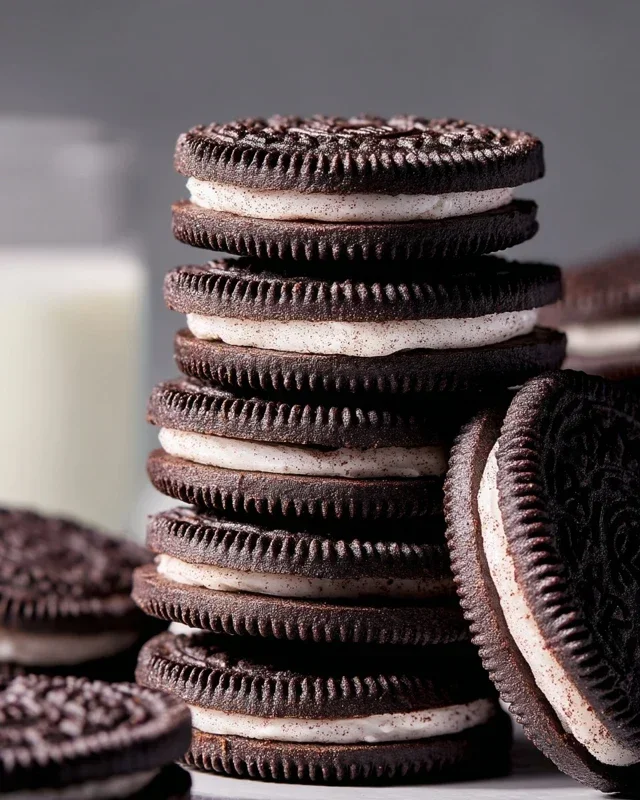
1. Prepare the Oreo Base: The first step is to transform our glorious Oreos into fine crum extractbs. I find that using a food processor is the most efficient way to achieve a consistent texture. Simply dump the entire family-size package of Oreo cookies (yes, all of them!) into your food processor. Pulse until you have fine crum extractbs. You want it to be almost like a coarse flour. If you don’t have a food processor, you can place the Oreos in a sturdy resealable bag and crush them with a rolling pin. Aim for a fine, even consistency; large chunks will make it harder to form the balls. Once crushed, transfer the Oreo crum extractbs to a large mixing bowl.
2. Combine with Cream Cheese: Now it’s time to introduce the creamy element. Add the softened cream cheese to the bowl with the Oreo crum extractbs. Using a sturdy spoon or a spatula, begin extract to mix the cream cheese into the crum extractbs. At first, it might seem like a difficult task, but keep mixing! The cream cheese will gradually absorb into the crum extractbs. Once it starts to come together, I find that using my hands is the best way to fully incorporate everything. Knead and mix the cream cheese and Oreo crum extractbs until a uniform, dough-like mixture forms. It should be moist enough to hold its shape when squeezed but not overly sticky. If it feels a bit too dry, you can add another tablespoon of softened cream cheese; if it’s too wet, add a few more crushed Oreos.
3. Form the Balls: Once you have your perfectly combined Oreo and cream cheese mixture, it’s time to roll them into balls. I like to aim for a size that’s about one inch in diameter, similar to a large marble. Scoop out a portion of the mixture using a tablespoon or a small cookie scoop to ensure uniformity. Roll the mixture between your palms until you have a smooth, compact ball. Place the formed balls onto a baking sheet lined with parchment paper. As you roll them, you might notice a slight oily residue from the cream cheese and cookies; this is completely normal. It’s also a good idea to slightly dampen your hands with water if the mixture starts to stick to them excessively. Continue this process until all the mixture has been rolled into balls.
4. Chill for Firmness: For the best dipping experience and to prevent the balls from losing their shape, it’s crucial to chill them. Place the baking sheet with the rolled Oreo balls into the refrigerator for at least 30 minutes. This will firm them up considerably, making them much easier to coat evenly with the candy melts. You can even pop them in the freezer for about 15-20 minutes if you’re short on time, but be careful not to freeze them solid, as this can make them crack when dipping. This chilling step is a game-changer for achieving professional-looking results.
5. Melt and Dip with Flair: This is where the magic happens and our Oreo balls get their patriotic glow! Prepare your candy melts and white melting wafers. Melt the red candy melts in one microwave-safe bowl and the blue candy melts in another, following the package instructions. Typically, this involves microwaving in short bursts (30 seconds) and stirring thoroughly between each burst until smooth and fully melted. In a separate small bowl, melt the Ghirardelli white melting wafers. Once melted and smooth, carefully dip each chilled Oreo ball into the melted candy of your choice. I like to do about half in red and half in blue for a striking contrast. Use a fork or a toothpick to gently lift the dipped ball, allowing any excess chocolate to drip back into the bowl. Place the dipped ball back onto the parchment-lined baking sheet. For the white stripes, you can either drizzle the melted white chocolate over the red and blue dipped balls using a fork or piping bag, or you can dip a portion of the ball in white chocolate. Immediately after dipping or drizzling, sprinkle with the white star confetti sprinkles while the candy coating is still wet. This is your chance to get creative with your patriotic designs – think stripes, swirls, or even just a simple sprinkle of stars. Repeat this process until all your Oreo balls are beautifully coated and decorated.
These Patriotic Oreo Balls are a guaranteed crowd-pleaser. Their rich flavor, fun decoration, and simple preparation make them an ideal treat for any patriotic gathering. Enjoy!
Conclusion:
So there you have it – the ultimate guide to creating these delightful Patriotic Oreo Balls! These little treats are an absolute winner for any celebration, especially around national holidays. Their simplicity combined with their crowd-pleasing appeal makes them a fantastic addition to your dessert repertoire. Whether you’re a seasoned baker or a complete begin extractner, you’ll find this recipe incredibly rewarding and, most importantly, delicious! The combination of crushed Oreos, cream cheese, and a vibrant candy coating creates a perfectly balanced, no-bake treat that’s always a hit. Don’t be afraid to get creative with your decorating; that’s where the real fun begin extracts!
I truly encourage you to give these Patriotic Oreo Balls a try. They are perfect for potlucks, birthday parties, or just as a special homemade gesture. Serve them chilled for the best texture and watch them disappear in minutes. You can also experiment with different colored candy melts to match other themes or holidays!
Frequently Asked Questions:
Can I make these ahead of time?
Absolutely! Patriotic Oreo Balls are fantastic for making ahead. Once they’re fully set, you can store them in an airtight container in the refrigerator for up to a week. This makes them ideal for busy hosts who want to get a head start on party preparations.
What are some other variations I could try?
The possibilities are endless! For a different flavor profile, consider adding a hint of peppermint extract to the cream cheese mixture. You could also swap out some of the Oreos for other crushed cookies like vanilla wafers or even grabeef ham crackers. And don’t limit yourself to just red, white, and blue; feel free to use different colored candy melts to suit any occasion.
How do I get the candy coating smooth?
The key to a smooth candy coating is to melt it gently. You can use a double boiler or microwave the candy melts in short, 30-second intervals, stirring well after each interval, until completely smooth. Avoid overheating, as this can cause the chocolate to seize and become lumpy.
Patriotic Oreo Balls
Festive and easy-to-make Oreo balls decorated with red, white, and blue candy melts and star sprinkles, perfect for holidays and celebrations.
Ingredients
-
1 lb 2.12 oz Family Size package Oreo Cookies
-
8 ounce block cream cheese, softened to room temperature
-
12 ounce bag red candy melts
-
12 ounce bag blue candy melts
-
⅓ cup Ghirardelli white melting wafers
-
White star confetti sprinkles for topping
Instructions
-
Step 1
Crush Oreo cookies into fine crumbs using a food processor or by placing them in a zip-top bag and crushing with a rolling pin. Reserve a few whole cookies for garnish if desired. -
Step 2
In a large bowl, combine the Oreo cookie crumbs and softened cream cheese. Mix until well combined and a dough-like consistency forms. -
Step 3
Roll the mixture into 1-inch balls and place them on a parchment-lined baking sheet. Freeze for at least 30 minutes until firm. -
Step 4
Melt the red candy melts and blue candy melts separately in microwave-safe bowls, stirring every 30 seconds until smooth. Melt the Ghirardelli white melting wafers separately. -
Step 5
Dip each frozen Oreo ball into the melted candy melts, allowing excess to drip off. For a patriotic effect, dip some in red, some in blue, and drizzle some with white and red or blue. -
Step 6
While the candy coating is still wet, sprinkle with white star confetti sprinkles. Place back on the parchment-lined baking sheet. -
Step 7
Allow the candy coating to harden completely at room temperature or in the refrigerator.
Important Information
Nutrition Facts (Per Serving)
It is important to consider this information as approximate and not to use it as definitive health advice.
Allergy Information
Please check ingredients for potential allergens and consult a health professional if in doubt.