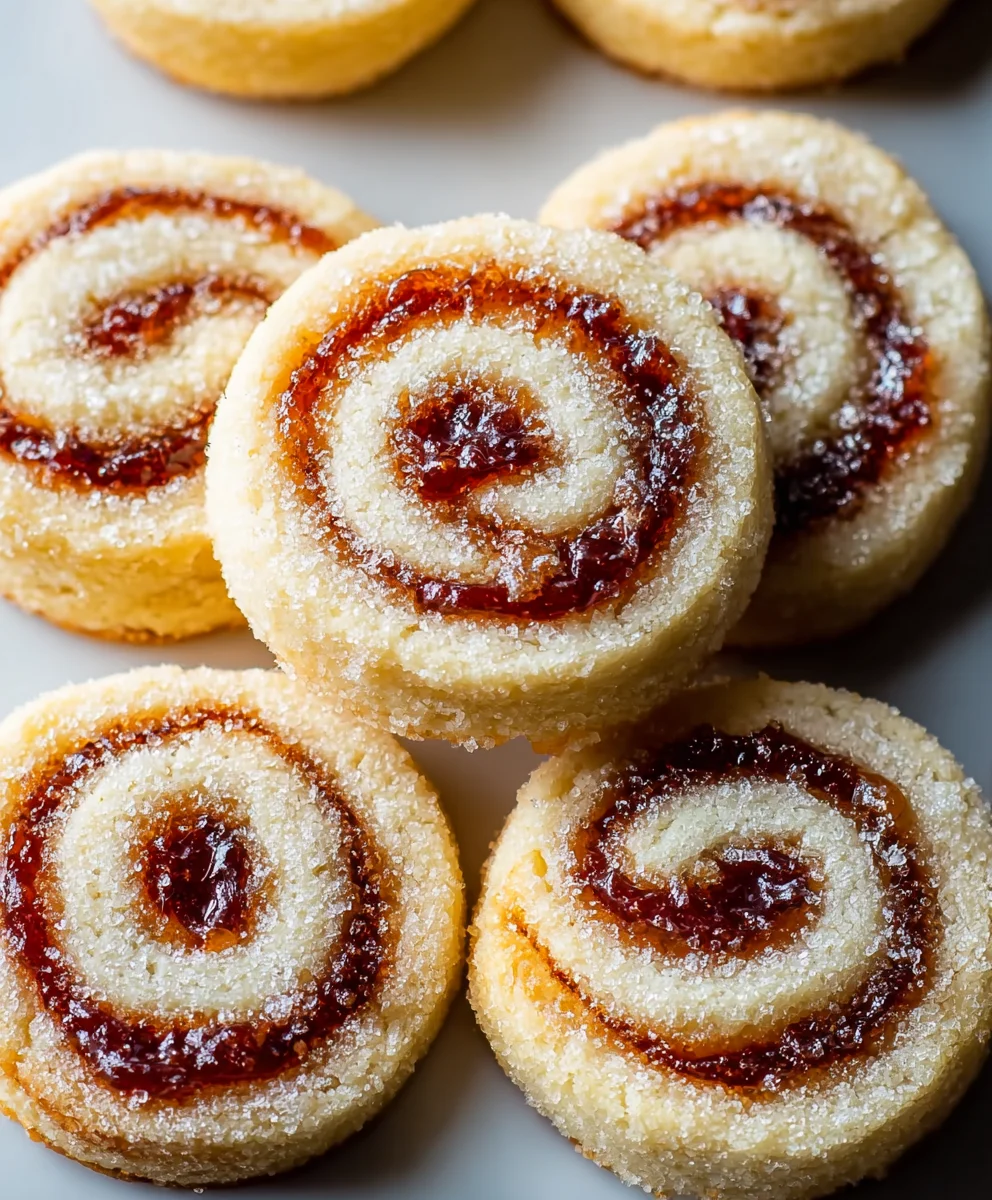
Cream Cheese Jam Pinwheel Cookies-Easy Festive Treat
Cream Cheese Jam Pinwheel Cookies are a nostalgic delight, a perfect marriage of tangy cream cheese and sweet, vibrant jam nestled within a buttery, tender cookie dough. Have you ever craved a bite of pure, unadulterated comfort? That’s exactly what these cookies deliver! They’re the kind of treat that transports you back to childhood kitchen counters, filled with the aroma of baking and the promise of something delicious. What truly sets these Cream Cheese Jam Pinwheel Cookies apart is their elegant yet simple presentation. The swirling pattern, achieved by carefully rolling and slicing, isn’t just beautiful; it ensures you get a delightful burst of jam with every single bite. They’re incredibly satisfying to make, and even more so to share (or to hoard all to yourself!).
Ingredients:
- 1 cup unsalted butter, softened
- 4 ounces cream cheese, softened
- ½ cup granulated sugar
- 1 teaspoon vanilla extract
- 2¼ cups all-purpose flour
- ¼ teaspoon salt
- ½ cup jam (raspberry, strawberry, or apricot – your favorite will work beautifully!)
- Powdered sugar for dusting (optional, but highly recommended for that classic finished look)
Preparing the Dough
This recipe starts with a delightful, slightly tangy dough that holds its shape beautifully, making it perfect for these Cream Cheese Jam Pinwheel Cookies. The combination of butter and cream cheese creates a tender, flaky cookie with a wonderful richness.
First, in a large mixing bowl, I like to combine the softened unsalted butter and the softened cream cheese. It’s crucial that both are at room temperature; this ensures they will cream together smoothly without any lumps, creating a homogenous base for our cookie dough. You can use a hand mixer or a stand mixer fitted with the paddle attachment for this step. Beat them together on medium speed until the mixture is light and fluffy, usually for about 2-3 minutes. This aeration is key to a good cookie texture.
Next, I gradually add the granulated sugar to the creamed butter and cream cheese mixture. I continue to beat on medium speed until everything is well combined and the sugar is fully incorporated, making the mixture even lighter and creamier. Then, I stir in the vanilla extract. The vanilla adds a warm, aromatic depth that complements the sweetness and the slight tang from the cream cheese perfectly.
In a separate medium bowl, I whisk together the all-purpose flour and the salt. Whisking ensures the salt is evenly distributed throughout the flour, preventing pockets of saltiness in your cookies. Now, I gradually add this dry ingredient mixture to the wet ingredients, mixing on low speed until just combined. It’s important not to overmix the dough at this stage. Overmixing can develop the gluten in the flour too much, resulting in tough cookies. You’re looking for a soft, slightly sticky dough that just comes together.
Chilling and Shaping the Dough
Once the dough has just come together, I divide it in half. I then turn each half out onto a clean surface and gently shape each half into a rough rectangle or disc. It’s best to handle the dough as little as possible to keep it tender. I then wrap each half tightly in plastic wrap, ensuring a good seal to prevent drying out. These wrapped dough portions are then placed in the refrigerator to chill for at least 1 hour, or until firm enough to handle easily. Chilling the dough is a critical step for pinwheel cookies. It allows the fats to firm up, making the dough much easier to roll out thinly and evenly without sticking, and it also helps the cookies maintain their shape during baking.
Assembling the Pinwheels
After the dough has chilled sufficiently, I unwrap one portion at a time. On a lightly floured surface, I carefully roll out the dough into a rectangle, aiming for a thickness of about ¼ inch. Try to keep the edges as straight as possible, as this will help in creating neat pinwheels later. If the dough becomes too soft or sticky to work with, don’t hesitate to pop it back into the refrigerator for another 10-15 minutes.
Once the dough is rolled out, I spread a thin, even layer of your chosen jam over the entire surface, leaving a small border (about ½ inch) along one of the longer edges. This border will help seal the roll. I find that using a slightly warmed jam, or one that’s a bit smoother, spreads more easily and evenly. Don’t overload the dough with jam, as too much can cause the cookies to spread excessively or ooze out during baking.
Starting with the long edge that is covered in jam, I begin extract to tightly roll up the dough. My technique is to tuck the edge in slightly and then roll it away from me, ensuring the roll is as compact as possible. Once rolled, I gently pinch the seam where the dough meets to seal it securely. The slight border left without jam acts as a handy seal. I then wrap this rolled log tightly in plastic wrap again. Repeat this process with the second half of the dough. These rolled logs are then refrigerated for another 30 minutes to an hour, or until they are firm enough to slice cleanly. This second chilling step is essential for clean cuts and defined pinwheel shapes.
Baking the Cream Cheese Jam Pinwheel Cookies
When you’re ready to bake, preheat your oven to 350°F (175°C). Line baking sheets with parchment paper. This prevents sticking and makes for easy cleanup. Remove one chilled dough log from the refrigerator. Using a sharp knife, slice the log into rounds about ¼ inch thick. The sharper your knife, the cleaner your cuts will be, which translates to more beautiful pinwheels.
Carefully place the sliced cookies onto the prepared baking sheets, leaving about 1 to 1.5 inches between them to allow for any slight spreading. I like to gently press down on each cookie with the palm of my hand or the bottom of a glass to flatten them just a little, ensuring they bake more evenly and develop a nice texture. Bake for 12-15 minutes, or until the edges are lightly golden brown and the centers are set. Keep a close eye on them, as oven temperatures can vary. You want them cooked through but not browned too much.
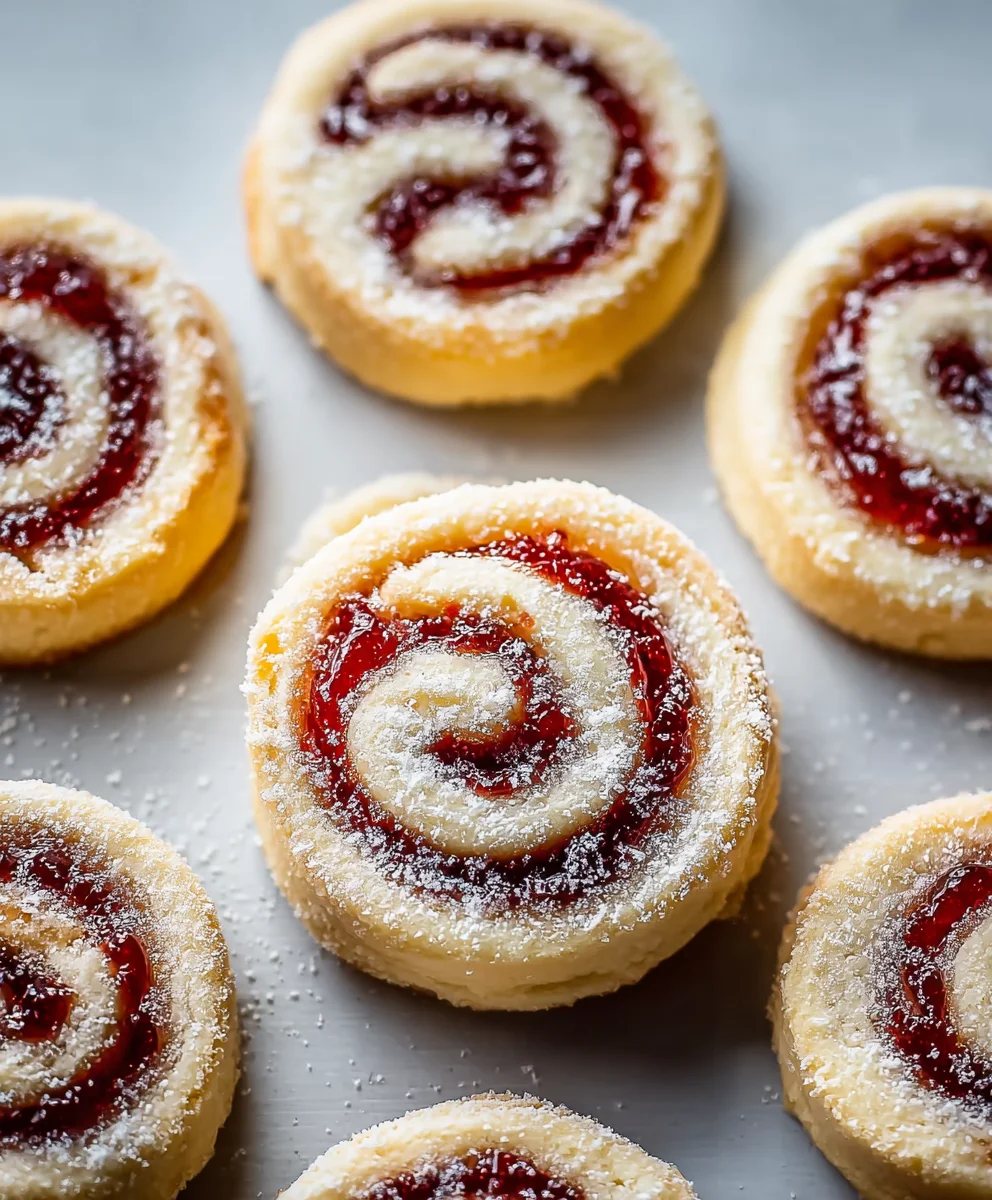
Once baked, let the cookies cool on the baking sheets for a few minutes before transferring them to a wire rack to cool completely. This allows them to firm up further. If you’re opting for the powdered sugar dusting, wait until the cookies are entirely cool before sifting a light and even layer of powdered sugar over the top. This creates a beautiful snowy finish that makes these Cream Cheese Jam Pinwheel Cookies look as delightful as they taste. Enjoy these delightful treats with a cup of tea or coffee!
Conclusion:
And there you have it – your delicious batch of Cream Cheese Jam Pinwheel Cookies! We’ve walked through the simple steps to create these delightful treats, perfect for any occasion. The creamy tang of the cream cheese combined with the sweet burst of your favorite jam makes for an irresistible cookie. Remember, the key is to chill the dough thoroughly for easy handling and beautifully defined pinwheels.
These Cream Cheese Jam Pinwheel Cookies are wonderfully versatile. Serve them with a cup of tea or coffee for an afternoon pick-me-up, or arrange them on a platter for your next party. They also make a thoughtful homemade gift!
Feel free to experiment with different jam flavors – raspberry, apricot, or strawberry all work beautifully. You can also add a touch of lemon zest to the cream cheese dough for an extra layer of brightness.
We encourage you to give this recipe a try. The satisfaction of baking these charming cookies from scratch is immense, and the smiles they bring to those who enjoy them are even greater. Happy baking!
Frequently Asked Questions:
Can I make the dough ahead of time?
Absolutely! The dough for Cream Cheese Jam Pinwheel Cookies can be made up to 2-3 days in advance and stored in the refrigerator. Ensure it’s tightly wrapped in plastic wrap to prevent it from drying out. Chilling it longer can actually improve its flavor and texture.
What is the best way to store these cookies?
Once cooled, store your Cream Cheese Jam Pinwheel Cookies in an airtight container at room temperature for up to 3-4 days. For longer storage, you can freeze them. Place them in a single layer on a baking sheet until frozen, then transfer them to a freezer-safe bag or container for up to 2-3 months.
Cream Cheese Jam Pinwheel Cookies-Easy Festive Treat
Delightful, slightly tangy cream cheese jam pinwheel cookies perfect for any festive occasion. These cookies feature a tender, flaky dough with a sweet jam filling and a classic powdered sugar dusting.
Ingredients
-
1 cup unsalted butter, softened
-
4 ounces cream cheese, softened
-
½ cup granulated sugar
-
1 teaspoon vanilla extract
-
2¼ cups all-purpose flour
-
¼ teaspoon salt
-
½ cup jam (raspberry, strawberry, or apricot)
-
Powdered sugar for dusting (optional)
Instructions
-
Step 1
In a large bowl, cream together softened butter and cream cheese until light and fluffy. Beat in granulated sugar and vanilla extract until well combined. -
Step 2
In a separate bowl, whisk together flour and salt. Gradually add dry ingredients to wet ingredients, mixing on low speed until just combined. Do not overmix. -
Step 3
Divide dough in half, shape into rectangles, wrap tightly in plastic wrap, and chill in the refrigerator for at least 1 hour. -
Step 4
On a lightly floured surface, roll out one dough portion into a ¼-inch thick rectangle. Spread a thin layer of jam over the surface, leaving a ½-inch border on one long edge. -
Step 5
Starting from the jam-covered edge, tightly roll up the dough. Pinch the seam to seal. Wrap the log tightly in plastic wrap and refrigerate for another 30 minutes to 1 hour. -
Step 6
Preheat oven to 350°F (175°C) and line baking sheets with parchment paper. Slice the chilled dough log into ¼-inch thick rounds. -
Step 7
Place cookies on prepared baking sheets, about 1-1.5 inches apart. Gently flatten each cookie slightly. Bake for 12-15 minutes, or until edges are lightly golden brown and centers are set. -
Step 8
Let cookies cool on baking sheets for a few minutes before transferring to a wire rack to cool completely. Dust with powdered sugar if desired.
Important Information
Nutrition Facts (Per Serving)
It is important to consider this information as approximate and not to use it as definitive health advice.
Allergy Information
Please check ingredients for potential allergens and consult a health professional if in doubt.