Easy Homemade Strawberry Ice Cream Recipe
Homemade Strawberry Ice Cream is more than just a dessert; it’s a nostalgic hug in a bowl, a vibrant burst of sunshine that transports us back to simpler times. There’s a certain magic in the pure, unadulterated sweetness of ripe strawberries, a flavor that simply can’t be replicated by artificial substitutes. That’s precisely why so many of us crave homemade strawberry ice cream. It’s the taste of summer, of lazy afternoons, and of pure, unadulterated joy. What makes this recipe truly special is the simplicity that allows the star ingredient – those gorgeous, ruby-red strawberries – to shine. Forget the freezer aisle; we’re about to embark on a journey to create the most incredibly creamy, intensely flavorful, and utterly delightful homemade strawberry ice cream you’ve ever tasted. Get ready to impress yourself and everyone lucky enough to snag a scoop!
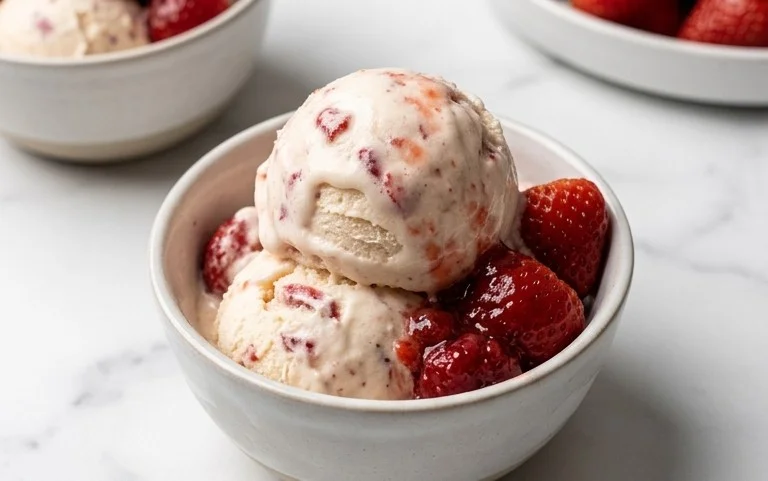
Homemade Strawberry Ice Cream
There’s nothing quite like the vibrant, fresh taste of homemade strawberry ice cream. Forget the artificial flavors and preservatives of store-bought varieties. This recipe celebrates the pure, sweet essence of ripe strawberries, creating a dessert that’s both nostalgic and utterly delicious. It’s surprisingly simple to make, requiring just a few basic ingredients and a little patience for chilling. Whether you’re a seasoned ice cream maker or a begin extractner looking for a rewarding project, this recipe is sure to become a summer staple. The beauty of making your own ice cream lies in the control you have over the ingredients and the ability to tailor the sweetness and flavor to your exact preferences. Plus, the satisfaction of scooping into a bowl of ice cream you’ve made with your own hands is truly unparalleled.
Ingredients:
Instructions:
1.
Prepare the Strawberry Puree:
In a medium bowl, combine the hulled and diced strawberries with the honey, granulated sugar, and lemon juice. The lemon juice might seem counterintuitive, but it plays a crucial role in brightening the strawberry flavor and preventing it from tasting flat. Stir everything together gently. Now, you have a couple of options for creating your strawberry base. For a smoother, more refined ice cream, you can pulse this mixture in a food processor or blender until it forms a coarse puree. Alternatively, for a more rustic texture with delightful little berry chunks, you can gently mash the strawberries with a potato masher or the back of a fork. Once you’ve achieved your desired consistency, cover the bowl and let it sit in the refrigerator for at least 30 minutes. This chilling time allows the flavors to meld together beautifully, giving the strawberries a chance to release their juices and mingle with the sweeteners and lemon.
2.
Make the Ice Cream Base:
While your strawberry mixture is chilling, it’s time to prepare the creamy foundation of your ice cream. In a separate, large bowl, combine the heavy whipping cream, half and half, and vanilla extract. Whisk these ingredients together until they are well combined and the mixture is smooth. The heavy whipping cream is essential for achieving that rich, decadent texture that makes ice cream so irresistible. The half and half lightens it up just enough to prevent it from being overly heavy, creating a perfect balance. The vanilla extract acts as a subtle enhancer, complementing the sweetness of the strawberries without overpowering them. Ensure you whisk thoroughly to incorporate a bit of air, which will contribute to the overall lightness of the finished product.
3.
Combine and Chill:
Once your strawberry mixture has had ample time to chill and meld its flavors (at least 30 minutes), it’s time to bring everything together. Gently fold the strawberry puree into the cream mixture. Be careful not to overmix at this stage; you want to maintain some of the lovely streaks of strawberry throughout your ice cream base, creating a beautiful marbled effect when it’s frozen. Once combined, cover the bowl tightly with plastic wrap or a lid and refrigerating it for at least 4 hours, or preferably overnight. This crucial chilling step is paramount for the ice cream maker to work efficiently. A well-chilled base will freeze faster and more evenly, resulting in a smoother texture with smaller ice crystals. Skipping or shortening this step can lead to a grainy or icy ice cream, so don’t rush it!
4.
Churn the Ice Cream:
Now for the exciting part! If you have an ice cream maker, follow the manufacturer’s instructions for churning. Typically, this involves pouring your chilled ice cream base into the pre-frozen bowl of your ice cream maker and letting it churn until it reaches a soft-serve consistency. This usually takes about 20-30 minutes, depending on your machine. As it churns, you’ll notice the mixture thickening and transforming into a delightful, creamy mass. If you don’t have an ice cream maker, don’t despair! You can achieve a similar result using the “no-churn” method. Pour your chilled base into a freezer-safe container. Freeze for about 45-60 minutes, then remove and vigorously whisk or beat the mixture with an electric mixer to break up ice crystals. Repeat this process every 30-45 minutes for 3-4 hours, or until it reaches your desired consistency. This manual churning is key to incorporating air and preventing iciness.
5.
Harden and Serve:
Once your ice cream has reached the desired consistency from churning (whether in a machine or by hand), it’s time to let it firm up. Spoon the soft ice cream into a freezer-safe container, such as a loaf pan or airtight container. Press a piece of parchment paper or plastic wrap directly onto the surface of the ice cream to prevent ice crystals from forming on top. Cover the container tightly and freeze for at least 4-6 hours, or until it’s firm enough to scoop. This hardening period is essential for achieving that classic ice cream texture. The longer it freezes, the firmer it will become. When you’re ready to serve, let the ice cream sit at room temperature for a few minutes to soften slightly, making it easier to scoop. Enjoy your homemade strawberry ice cream – it’s a sweet reward for your efforts!
Conclusion:
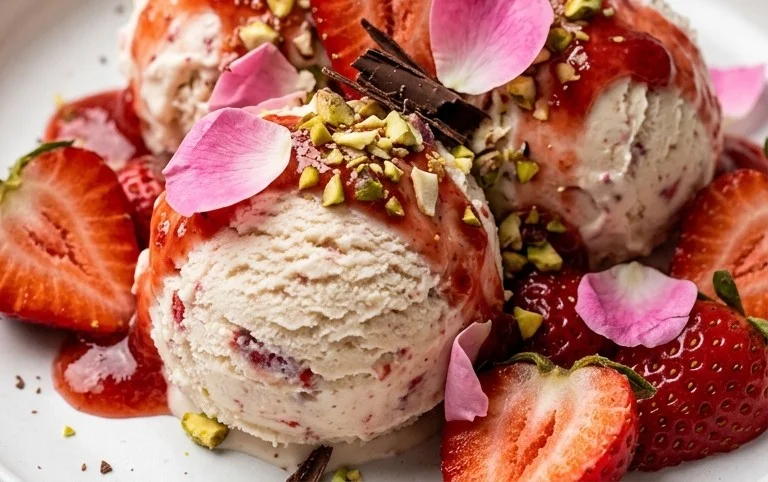
Making homemade strawberry ice cream is a truly rewarding experience, and I hope this recipe inspires you to give it a try! The beauty of this recipe lies in its simplicity and the incredible flavor you achieve using fresh, ripe strawberries. Unlike store-bought ice cream, you control the ingredients, ensuring a pure, vibrant strawberry taste without artificial additives. The creamy texture achieved through this no-churn method is surprisingly delightful and requires no special equipment, making it accessible for everyone. This delicious strawberry ice cream is perfect on its own, a fantastic topping for warm brownies or waffles, or even blended into a refreshing milkshake. Don’t be afraid to experiment with variations; adding a hint of lemon zest can brighten the strawberry flavor, or folding in some fresh basil can create an unexpected, sophisticated twist. So, grab your strawberries and get ready to churn out a batch of pure joy – you won’t regret it!
Frequently Asked Questions:
Can I use frozen strawberries instead of fresh?
Yes, you absolutely can! If using frozen strawberries, thaw them completely and drain off any excess liquid before proceeding with the recipe. This ensures your ice cream has the right consistency.
What if I don’t have an ice cream maker?
This recipe is designed to be no-churn, meaning you don’t need an ice cream maker! The method involves whisking ingredients and then freezing, with periodic stirring to break up ice crystals and create a smooth texture.
How long does homemade strawberry ice cream last?
Homemade strawberry ice cream is best enjoyed within 1-2 weeks. Store it in an airtight container in the freezer to maintain its freshness and texture.
Homemade Strawberry Ice Cream
A classic and refreshing homemade strawberry ice cream recipe. Made with fresh strawberries, cream, and a touch of sweetness.
Ingredients
-
1 1/2 cups strawberries, hulled and diced
-
2 Tbsp honey
-
1/2 cup granulated sugar
-
1 tsp lemon juice
-
1 cup heavy whipping cream
-
1/2 cup half and half
-
1 tsp vanilla extract
Instructions
-
Step 1
In a bowl, combine the diced strawberries, honey, granulated sugar, and lemon juice. Stir to combine and let macerate for at least 15 minutes to release their juices. -
Step 2
In a separate bowl, whisk together the heavy whipping cream, half and half, and vanilla extract until well combined. -
Step 3
Add the macerated strawberry mixture to the cream mixture and stir gently to incorporate. You can mash some of the strawberries for a smoother texture if desired. -
Step 4
Pour the mixture into an ice cream maker and churn according to the manufacturer’s instructions. -
Step 5
Once churned to a soft-serve consistency, transfer the ice cream to an airtight container and freeze for at least 2-3 hours, or until firm.
Important Information
Nutrition Facts (Per Serving)
It is important to consider this information as approximate and not to use it as definitive health advice.
Allergy Information
Please check ingredients for potential allergens and consult a health professional if in doubt.