Easy Easter Rice Krispie Treats- Festive Fun
Easter Rice Krispie Treats are a springtime staple for a reason, and I’m so excited to share my favorite way to bring this nostalgic treat to life for the holidays! There’s something undeniably magical about the perfect balance of crispy cereal, gooey marshmallow, and a hint of buttery sweetness. It’s a simple dessert, yes, but its charm lies in its effortless joy and the way it instantly transports us back to childhood Easters and happy memories. What makes these Easter Rice Krispie Treats truly special is their incredible versatility. While the classic recipe is already a winner, we’re going to elevate it with a few delightful twists that capture the spirit of the season. Get ready to create a batch that’s not only delicious but also a visually stunning centerpiece for your Easter celebrations!
Easter Rice Krispie Treats
Easter is a time for joy, family, and of course, delicious treats! While the chocolate bunnies and jelly beans are always a hit, sometimes a classic comfort food gets a festive makeover. These Easter Rice Krispie Treats are just that – a beloved, simple-to-make dessert transformed into a springtime delight. We’re going to take the humble Rice Krispie treat and give it a vibrant, pastel hue and a sprinkle of festive candy. They are incredibly easy to assemble, making them a perfect activity to do with kids or a quick and cheerful addition to your Easter dessert table. The chewy, gooey texture of a perfect Rice Krispie treat combined with the fun, colorful decorations is guaranteed to bring smiles.
Ingredients:
Instructions:
Prepare Your Pan and Melt the Marshmallows: The first step to perfect Rice Krispie treats is preparation. Lightly grease a 9×13 inch baking pan with butter or cooking spray. Alternatively, you can line it with parchment paper, leaving some overhang on the sides to help you lift the treats out later. This prevents sticking, which is crucial for a clean cut. Next, in a large saucepan, melt the 2 tablespoons of unsalted butter over low heat. Once the butter is completely melted and shimmering, add all 16 ounces of marshmallows. It’s important to use low heat here. If the heat is too high, the marshmallows can scorch, resulting in a less pleasant flavor and texture. Stir continuously, gently folding the marshmallows until they are completely melted and smooth. This process can take a few minutes, so be patient. The goal is a lump-free, glossy marshmallow mixture.
Combine Cereal and Marshmallow Mixture: Once your marshmallows are fully melted and smooth, remove the saucepan from the heat. Immediately add the 7 cups of Rice Krispies cereal to the melted marshmallow mixture. Using a sturdy spatula or wooden spoon, gently stir the cereal into the marshmallows until it is evenly coated. Make sure every single crispy bit is embraced by the gooey marshmallow goodness. It’s important to work relatively quickly at this stage, as the mixture will start to set as it cools. Don’t overmix, as this can crush the cereal and lead to a denser, less airy treat. You want to preserve that signature light and crispy texture.
Form the Base Treats: Now it’s time to get these into their final shape. Lightly grease your hands with butter or cooking spray, or use a greased spatula. Carefully transfer the Rice Krispie mixture into your prepared 9×13 inch pan. Gently press the mixture evenly into the pan. Again, using greased hands or a spatula is key here to prevent sticking. You want to press it firmly enough to hold its shape but not so hard that you compact it too much. Evenly distributing the mixture ensures that all the treats will be the same thickness and bake consistently. Let this base layer cool slightly while you prepare the frosting.
Create the Easter Frosting: While the base treats are cooling, we’ll make our festive green frosting. In a medium bowl, combine the ½ cup of unsalted butter (softened, not melted) with the 3-4 cups of powdered sugar. Start with 3 cups of powdered sugar and add more if you prefer a thicker frosting. Add the ¼ cup of milk and the 1 teaspoon of vanilla extract. Beat with an electric mixer (or whisk vigorously by hand) until smooth and creamy. If the frosting is too thick, add a tiny bit more milk, a teaspoon at a time, until you reach your desired consistency. If it’s too thin, add a little more powdered sugar. Once you have a smooth frosting, add a few drops of green food coloring. Start with a small amount and add more gradually until you achieve a lovely pastel green hue. Mix thoroughly to ensure the color is evenly distributed.
Decorate Your Easter Masterpieces: Once the base Rice Krispie treats have cooled enough to handle (they should still be slightly warm for the frosting to adhere well, but not hot enough to melt it), it’s time for the fun part! Spread the green frosting evenly over the top of the Rice Krispie treats. Use an offset spatula or the back of a spoon for a smooth finish. While the frosting is still wet, generously sprinkle your Easter egg candies over the top. This is where you can get creative! Arrange the mini chocolate eggs or jelly beans in patterns, or scatter them randomly for a festive, colorful look. Once decorated, allow the frosting to set completely. This might take an hour or two at room temperature, or you can speed up the process by placing the pan in the refrigerator for about 30 minutes. Once set, cut the treats into squares or rectangles. These Easter Rice Krispie Treats are now ready to be enjoyed or shared! They are best stored in an airtight container at room temperature.
Conclusion:
There you have it – the ultimate guide to creating delightful Easter Rice Krispie Treats! This recipe truly shines because it’s incredibly simple to make, requires minimal ingredients, and results in a wonderfully chewy and sweet confection that’s perfect for the holiday. Whether you’re a seasoned baker or a complete begin extractner, you’ll find success with these easy-to-follow steps. They’re a fantastic alternative to traditional cookies or candies, and their versatility means you can tailor them to your heart’s content.
For serving, consider presenting them on a festive platter alongside other Easter goodies. They make fantastic additions to Easter baskets, potlucks, or even as a simple yet special afternoon treat. Don’t hesitate to get creative with variations! Try adding pastel-colored sprinkles to the mixture, a drizzle of white chocolate, or even a touch of lemon zest for a bright twist. Experimenting with different food colorings can also yield beautiful pastel hues. I truly encourage you to give these Easter Rice Krispie Treats a try – they’re guaranteed to bring smiles!
Frequently Asked Questions:
How do I get my Rice Krispie Treats to be extra chewy?
To achieve extra chegrape juicess, make sure you don’t press down too firmly when you spread the mixture into the pan. Over-compressing can lead to harder treats. Also, avoid overcooking the marshmallow mixture; it should be melted and smooth, not browned.
Can I make these vegan?
Yes, you can absolutely make these vegan! Simply substitute the butter with a vegan butter alternative (like margarine or coconut oil) and use vegan marshmallows. The texture might vary slightly, but they’ll still be delicious!
How should I store leftover Easter Rice Krispie Treats?
Store your treats in an airtight container at room temperature. They will stay fresh and chewy for about 2-3 days. Avoid refrigerating them, as this can make them hard and less enjoyable.
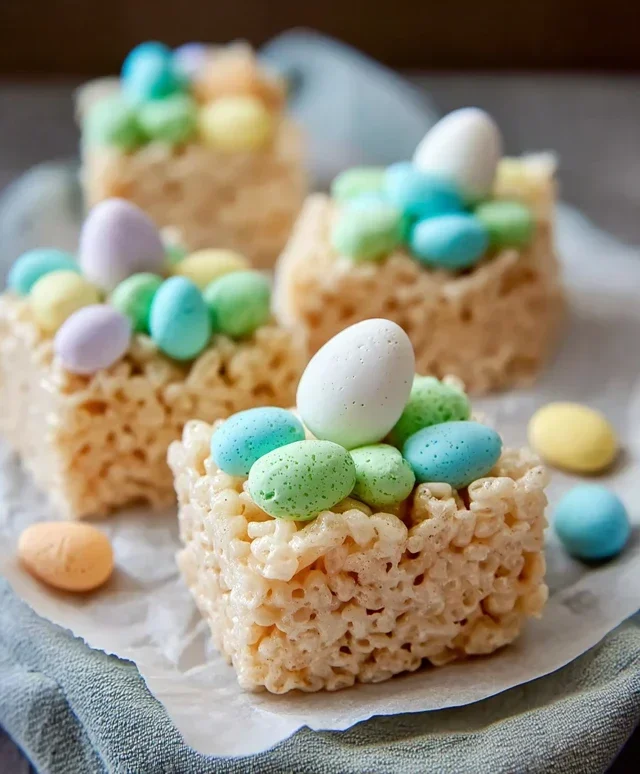
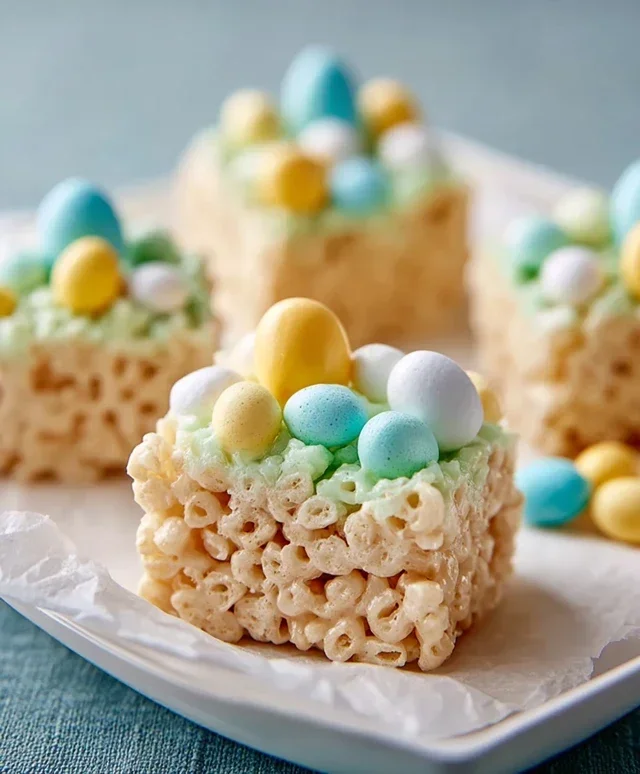
Easter Rice Krispie Treats
Festive and colorful Rice Krispie treats perfect for Easter celebrations, featuring vibrant green hues and decorated with Easter candies.
Ingredients
-
16 ounces marshmallows
-
7 cups Rice Krispies cereal
-
2 tablespoons unsalted butter
-
½ cup unsalted butter
-
3-4 cups powdered sugar
-
¼ cup milk
-
1 teaspoon vanilla extract
-
Green food coloring
-
Easter egg candies (mini chocolate eggs or jelly beans)
Instructions
-
Step 1
Grease a 9×13 inch baking pan. -
Step 2
In a large pot, melt 2 tablespoons of unsalted butter over low heat. Add marshmallows and stir until completely melted. -
Step 3
Remove from heat. Stir in the vanilla extract and green food coloring until evenly distributed. -
Step 4
Add the Rice Krispies cereal and stir until well coated. -
Step 5
Press the mixture evenly into the prepared baking pan. -
Step 6
While the treats are still warm and slightly sticky, sprinkle the Easter egg candies over the top and gently press them in. -
Step 7
In a small bowl, whisk together ½ cup unsalted butter, powdered sugar, and milk until smooth. Drizzle this glaze over the decorated treats. -
Step 8
Let cool completely before cutting into squares.
Important Information
Nutrition Facts (Per Serving)
It is important to consider this information as approximate and not to use it as definitive health advice.
Allergy Information
Please check ingredients for potential allergens and consult a health professional if in doubt.