Easy Mini Apple Pies- Delicious Homemade Dessert
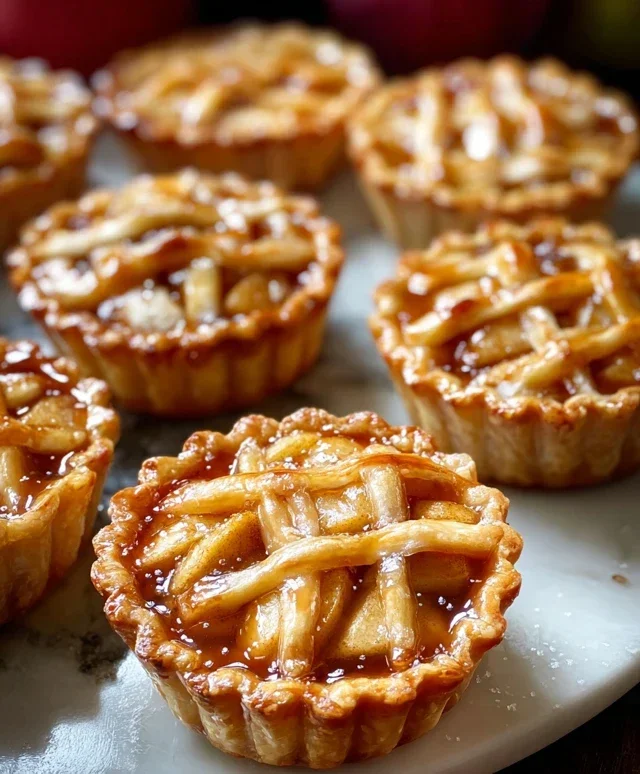
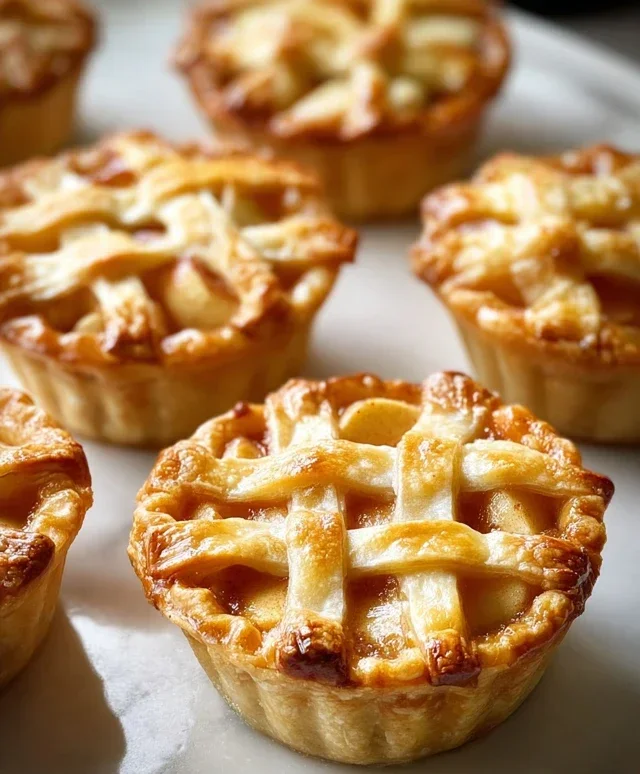
Mini Apple Pies are the ultimate handheld celebration of autumn’s bounty. There’s something undeniably magical about these delightful little treats, isn’t there? They capture all the cozy, comforting essence of a classic apple pie, but with an adorable, perfectly portioned twist. We all adore the warm spice, the tender, sweet-tart apples, and that flaky, buttery crust, and mini apple pies deliver all of that goodness in a delightful package that’s perfect for sharing – or not! What makes these mini apple pies truly special is their versatility. They’re fantastic for parties, potlucks, or even just a special weekday treat that feels a little bit fancy. Forget wrestling with a large pie pan; these individual delights are surprisingly simple to assemble and bake, offering maximum flavor with minimal fuss. Get ready to fall in love with these irresistible mini apple pies!
Mini Apple Pies
There’s something undeniably comforting about apple pie. The sweet, tart apples nestled in a flaky crust, baked to golden perfection – it’s a classic for a reason. But sometimes, a whole pie feels like too much, or perhaps you’re looking for a more manageable, individual treat. That’s where these delightful Mini Apple Pies come in! Perfect for potlucks, holiday gatherings, or just a special weeknight dessert, these little hand pies pack all the classic apple pie flavor into an adorable, single-serving package. They’re incredibly easy to make, especially with the help of store-bought pie crusts, meaning you can whip up a batch of these little wonders in no time. Get ready to impress your friends and family with these charming mini masterpieces.
Ingredients:
Instructions:
1.
Preparing the Apple Filling:
First things first, let’s get our star ingredient – the apples – ready. I find Granny Smith apples to be ideal for this recipe because they hold their shape beautifully when baked and offer a lovely tartness that balances the sweetness of the sugars. You’ll need about 3 cups of chopped apples, which usually translates to 4 medium-small apples. Peel, core, and chop your apples into roughly 1/2-inch pieces. Don’t worry about making them perfectly uniform; a little variation adds character. In a large bowl, combine the chopped apples with the granulated sugar and light brown sugar. The combination of sugars provides a wonderful depth of flavor and sweetness. Next, sprinkle in the ground cinnamon and ground nutmeg. These classic spices are essential for that unmistakable apple pie aroma and taste. Finally, add the all-purpose flour to the bowl. The flour acts as a thickener, helping to prevent the filling from becoming too watery as it bakes. Give everything a good stir to ensure the apples are evenly coated with the sugar and spice mixture. This is also a good time to stir in the vanilla extract; its fragrant notes will infuse beautifully into the apple filling as it bakes. Set this bowl aside while you prepare the pie crusts.
2.
Assembling the Mini Pies:
Now it’s time to bring our mini pies to life! Gently unroll the two refrigerated pie crusts onto a lightly floured surface. You want to work relatively quickly so the dough doesn’t get too warm and sticky. Using a round cookie cutter or the rim of a glass (about 4 to 5 inches in diameter works well), cut out as many circles as you can from each crust. You should aim for at least 8 circles, but potentially more depending on your cutter size and how efficiently you place them. Gather any scraps, gently re-roll them (don’t overwork the dough!), and cut out additional circles until you’ve used up most of the dough. Take half of your cut-out circles and place them onto a baking sheet lined with parchment paper. These will be the bottoms of your mini pies. Spoon a generous amount of the prepared apple filling onto the center of each of these bottom crust circles. Be careful not to overfill, as this can lead to leakage during baking. Leave a small border around the edge for sealing.
3.
Creating the Pie Tops and Sealing:
For the tops of your mini pies, you have a couple of options. You can either cut out solid circles from the remaining dough, or if you’re feeling a bit more ambitious, you can cut decorative slits or shapes into them for a more finished look. Alternatively, you could use a smaller cookie cutter to create decorative shapes to place on top. Once your tops are ready, carefully place one on top of each filled bottom crust. Now, it’s time to seal them up to ensure that delicious filling stays put! Lightly dampen the edges of the bottom crust with a little water using your fingertip. Then, gently press the edges of the top crust onto the edges of the bottom crust. You can use your fingers to crimp the edges decoratively, or you can use the tines of a fork to press down and create a senon-alcoholic aled, ridged edge. This is crucial for preventing any of that wonderful apple filling from escaping during the baking process. Make sure the seal is secure all the way around each mini pie.
4.
Egg Wash and Finishing Touches:
To give our mini apple pies that irresistible golden-brown sheen and a slightly crispy texture on the crust, we’ll prepare an egg wash. In a small bowl, whisk together the egg and the tablespoon of water. This simple mixture will provide a beautiful finish. Using a pastry brush, lightly brush the tops of each assembled mini pie with the egg wash. This step is entirely optional but highly recommended for that bakery-quality look. If you have some sanding sugar on hand, this is the perfect time to sprinkle a little bit over the egg wash. The sanding sugar adds a delightful sparkle and a little extra crunch, making your mini pies truly special.
5.
Baking to Perfection:
Preheat your oven to 375 degrees Fahrenheit (190 degrees Celsius). Carefully place the baking sheet with the prepared mini apple pies into the preheated oven. Bake for 20 to 25 minutes, or until the crust is golden brown and the filling is bubbling. You’ll want to keep an eye on them, especially during the last few minutes, as oven temperatures can vary. If you notice the edges of the crust browning too quickly, you can loosely tent the pies with aluminum foil. Once baked, carefully remove the baking sheet from the oven and let the mini apple pies cool on the sheet for about 5 to 10 minutes. This allows them to set up a bit. Then, transfer them to a wire rack to cool completely. They are absolutely delicious served warm, perhaps with a scoop of vanilla ice cream or a dollop of whipped cream. Enjoy your homemade, perfectly portioned apple pie treats!
Conclusion:
And there you have it! Our recipe for delightful mini apple pies is ready for you to recreate. These charming individual desserts are perfect for a variety of occasions, from casual gatherings to more formal celebrations. They’re incredibly satisfying because they offer all the comforting, warm flavors of a traditional apple pie in a perfectly portioned, easy-to-handle package. The flaky, buttery crust encasing the sweet and slightly tart apple filling is simply irresistible. They’re also wonderfully versatile, making them a fantastic choice for bakers of all skill levels.
We love serving these mini apple pies warm, perhaps with a dollop of whipped cream, a scoop of vanilla ice cream, or a drizzle of caramel sauce. They also make a stunning presentation on a dessert table. Don’t be afraid to experiment with variations! Consider adding a pinch of cinnamon to the crust, a sprinkle of nutmeg to the filling, or even a splash of lemon juice for extra brightness. Chopped pecans or walnuts can add a delightful crunch. We truly encourage you to give this mini apple pie recipe a try; we’re confident you’ll adore the results!
Frequently Asked Questions:
Can I make the mini apple pies ahead of time?
Yes, absolutely! You can prepare the pie shells and the filling separately a day in advance. Store the unbaked shells in the refrigerator, and the filling can also be chilled. Assemble and bake them closer to serving time for the freshest taste and crispiest crust. You can also bake them fully and gently reheat them in a low oven before serving.
What kind of apples are best for mini apple pies?
A mix of apples often yields the best flavor and texture. We recommend using a combination of sweet and tart apples like Honeycrisp, Fuji, Gala for sweetness, and Granny Smith for a touch of tartness. This blend prevents the filling from becoming too mushy and adds complexity to the flavor.
Mini Apple Pies
Delightful individual apple pies made with fresh Granny Smith apples and a hint of warm spice, perfect for any occasion.
Ingredients
-
2 refrigerated pie crusts
-
3 cups chopped Granny Smith apples
-
1/4 cup granulated sugar
-
1/4 cup light brown sugar
-
1 teaspoon ground cinnamon
-
1/4 teaspoon ground nutmeg
-
2 tablespoons all-purpose flour
-
1 teaspoon vanilla extract
-
1 egg
-
1 tablespoon water
-
Sanding sugar (optional)
Instructions
-
Step 1
Preheat your oven to 375°F (190°C). Lightly grease a muffin tin. -
Step 2
In a large bowl, combine the chopped apples, granulated sugar, brown sugar, cinnamon, nutmeg, and flour. Toss to coat evenly. -
Step 3
Unroll the pie crusts and cut out 6 circles from each crust, large enough to fit into the muffin tin cups and come up the sides. Press 3 circles into the prepared muffin tin cups. -
Step 4
Divide the apple mixture evenly among the crust-lined muffin cups. Drizzle a little vanilla extract over the apple filling in each cup. -
Step 5
For the tops, you can either cut out smaller circles to place over the filling, or cut strips to create a lattice top. Crimp the edges to seal. -
Step 6
In a small bowl, whisk together the egg and water. Brush this egg wash over the tops of the mini pies. Sprinkle with sanding sugar, if desired. -
Step 7
Bake for 25-30 minutes, or until the crust is golden brown and the filling is bubbly. Let cool in the muffin tin for 10 minutes before carefully removing to a wire rack to cool completely.
Important Information
Nutrition Facts (Per Serving)
It is important to consider this information as approximate and not to use it as definitive health advice.
Allergy Information
Please check ingredients for potential allergens and consult a health professional if in doubt.