Soft Chewy Lemon Cookies Recipe Delight
Soft & Chewy Lemon Cookies are an absolute dream for any citrus lover. Imagin extracte biting into a cookie that’s perfectly tender, with a delightful chew that keeps you reaching for another. That’s precisely the magic these little bursts of sunshine deliver. There’s something universally loved about a classic cookie, but when you add that bright, zesty punch of lemon, it elevates the experience entirely. These aren’t your average, run-of-the-mill cookies; they offer a delightful balance of sweet and tart that dances on your palate. What truly makes our Soft & Chewy Lemon Cookies special is their irresistible texture – that pillowy softness combined with just the right amount of chew is a testament to a carefully crafted recipe. Get ready to fall in love with this vibrant treat that’s perfect for any occasion, from a comforting afternoon snack to a delightful addition to your next cookie platter.
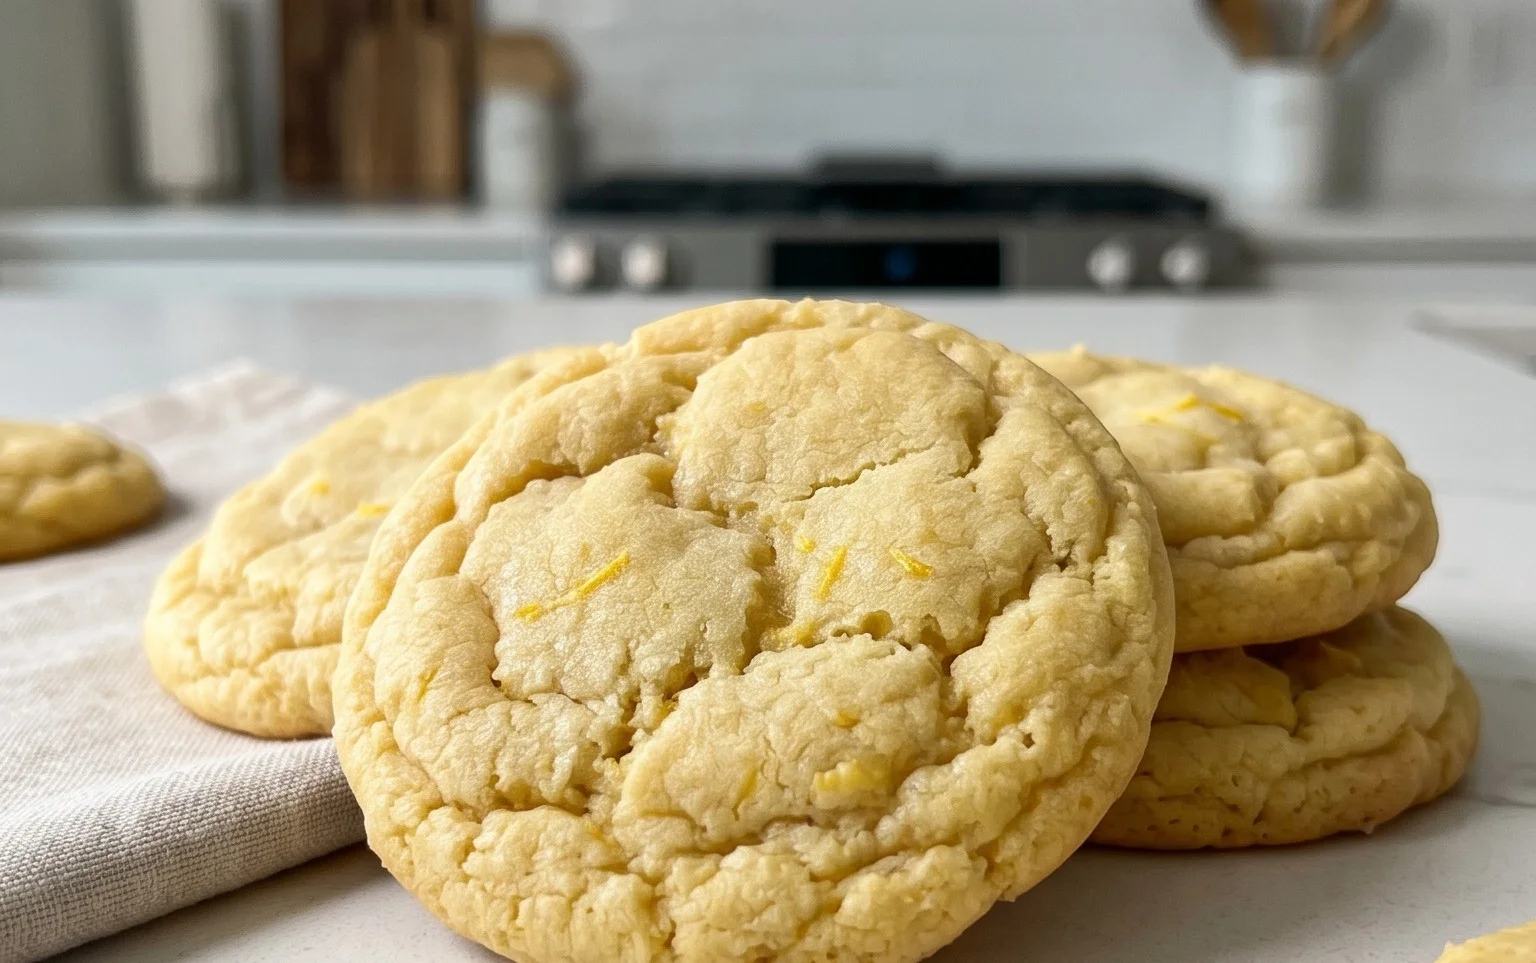
Soft & Chewy Lemon Cookies
There’s something undeniably uplifting about the bright, zesty flavor of lemon. It’s like sunshine in edible form! And when that sunshine is baked into a cookie that’s simultaneously soft, chewy, and bursting with citrusy goodness, well, that’s pure bliss. My Soft & Chewy Lemon Cookies are designed to deliver exactly that. Forget dry, crum extractbly lemon cookies; these are the kind that hug your taste buds with their tender texture and vibrant flavor. They are surprisingly easy to make, making them perfect for a weekend baking project or even a weeknight treat when you need a little pick-me-up. The secret to their incredible chegrape juicess lies in a few key ingredients and techniques, which I’ll walk you through step-by-step. Get ready to fill your kitchen with the most delightful lemon aroma!
Ingredients:
Instructions:
Creaming the Base for Chegrape juicess and Flavor
1. In a large mixing bowl, or the bowl of your stand mixer fitted with the paddle attachment, begin extract by creaming together the 1 ½ cups of granulated sugar and the softened unsalted butter. It’s crucial that your butter is truly softened – not melted, but yielding to the touch. This is because creaming is the process of whipping air into the butter and sugar mixture. This incorporated air is what contributes significantly to the cookies’ final texture, creating pockets that will expand during baking, resulting in a tender crum extractb. Beat these together on medium speed for about 3-5 minutes, until the mixture is pnon-alcoholic ale yellow and fluffy. Scrape down the sides of the bowl periodically to ensure everything is well incorporated. Next, add the 1 tablespoon of lemon zest. Zest is where all the aromatic oils of the lemon reside, so don’t skimp on it! Give it a quick mix to distribute the zest throughout the creamy mixture. The zest not only adds a punch of lemon flavor but also enhances the overall brightness of the cookie.
Incorporating Wet Ingredients for Binding and Richness
2. Now, it’s time to add the eggs and lemon extract. Crack in your 1 large egg and 1 large egg yolk. Using an extra egg yolk is another secret weapon for achieving that wonderfully chewy texture. The extra fat from the yolk adds richness and moisture, preventing the cookies from becoming dry and brittle. Ensure your eggs are at room temperature; this helps them emulsify better with the butter and sugar mixture, leading to a smoother, more uniform dough. Beat on medium speed until each egg is fully incorporated before adding the next. Then, add the 2 teaspoons of lemon extract. If you prefer a slightly more nuanced flavor, you can substitute 1 teaspoon of lemon extract with 1 teaspoon of vanilla extract for a delightful balance. Beat until everything is just combined. Be careful not to overmix at this stage.
Combining Dry Ingredients for Structure and Leavening
3. In a separate medium bowl, whisk together the 3 cups of all-purpose flour, 1 teaspoon of baking soda, 1 teaspoon of cornstarch, and ¾ teaspoon of salt. Spooning and leveling your flour is key for accurate measurement; don’t scoop directly from the bag as this can pack too much flour into your measuring cup, leading to tough cookies. The cornstarch might seem like an unusual addition, but it plays a vital role in tenderizing the cookies and contributing to that desirable chegrape juicess. Baking soda is your leavening agent, helping the cookies to spread and puff slightly, while the salt balances the sweetness and intensifies the lemon flavor. Once your dry ingredients are well combined, gradually add them to the wet ingredients in the mixer bowl.
Forming the Perfect Dough
4. With your mixer on low speed, gradually add the dry ingredients to the wet ingredients. Mix until just combined and no streaks of flour remain. It’s important to avoid overmixing the dough once the flour is added, as this can develop the gluten in the flour too much, resulting in tough cookies. A good dough should be thick and slightly sticky, but manageable. After the dough has come together, stir in the 2 tablespoons of lemon juice. This will slightly loosen the dough and add another layer of bright, fresh lemon flavor. The dough might look a little wet after adding the lemon juice, but don’t worry, it will firm up as it chills.
Chilling and Shaping for Optimal Texture
5. Now comes a crucial step for achieving that perfect soft and chewy texture: chilling the dough. Cover the bowl with plastic wrap and refrigerate for at least 30 minutes, or ideally for 1-2 hours. This chilling period allows the gluten to relax, prevents the cookies from spreading too much during baking, and intensifies the flavors. Once chilled, scoop rounded tablespoons of dough onto parchment-lined baking sheets, leaving about 2 inches between each cookie. For an extra touch of sweetness and a delightful texture contrast, place the ¼ cup of granulated sugar for rolling into a shallow dish. Roll each dough ball in the sugar until evenly coated. This creates a beautiful, sparkly exterior and a delightful crunch before you even bite into the soft interior. You can also gently press down on the tops of the dough balls with your fingers or the bottom of a glass if you prefer a slightly flatter cookie.
Bake in a preheated oven at 375°F (190°C) for 10-12 minutes, or until the edges are lightly golden brown and the centers still look slightly soft. They will continue to set as they cool on the baking sheet. Let them cool on the baking sheet for a few minutes before transferring them to a wire rack to cool completely. These cookies are best enjoyed fresh, but will keep in an airtight container at room temperature for up to 3 days. Enjoy the sunshine!

Conclusion:
I hope you’ve enjoyed learning how to make these incredibly Soft & Chewy Lemon Cookies! They truly are a delightful treat, bursting with bright, zesty lemon flavor and boasting that perfect tender crum extractb that melts in your mouth. The simple combination of ingredients and straightforward steps makes this recipe accessible for bakers of all levels, and the results are consistently delicious. These cookies are wonderful on their own, perhaps with a cup of tea or coffee, but they also make a fantastic addition to any dessert spread. Imagin extracte them alongside a rich chocolate cake or a berry tart – the citrusy notes will cut through the sweetness beautifully. For a little extra flair, consider a light lemon glaze or a sprinkle of finely chopped candied lemon peel after they’ve cooled. Don’t hesitate to experiment with adding a touch of poppy seed for a delightful visual and textural contrast, or even a pinch of cardamom to complement the lemon’s brightness. I truly encourage you to give these Soft & Chewy Lemon Cookies a try; I’m confident you’ll love them as much as I do!
Frequently Asked Questions:
Can I make these cookies dairy-free?
Yes, you can! To make these Soft & Chewy Lemon Cookies dairy-free, substitute the butter with a high-quality vegan butter alternative. Ensure your lemon extract or juice is also dairy-free. The texture might vary slightly, but the lemon flavor will still shine through beautifully.
How do I store these cookies?
For best results, store your cooled Soft & Chewy Lemon Cookies in an airtight container at room temperature for up to 3-4 days. They tend to stay wonderfully soft and chewy when stored properly. If you find they become too soft, you can place a small piece of bread in the container to absorb excess moisture, though this is rarely necessary with this recipe.
Soft & Chewy Lemon Cookies
Delightfully soft and chewy lemon cookies with a bright, zesty flavor.
Ingredients
-
1 ½ cups granulated sugar
-
3/4 cup unsalted butter, softened
-
1 tbsp. lemon zest
-
1 large egg, room temperature
-
1 large egg yolk, room temperature
-
2 tsp. lemon extract
-
3 cups all-purpose flour, spooned and leveled
-
1 tsp. baking soda
-
1 tsp. cornstarch
-
3/4 tsp. salt
-
2 tbsp. lemon juice
-
¼ cup granulated sugar, for rolling & garnishing
Instructions
-
Step 1
In a large bowl, cream together the 1 ½ cups granulated sugar and softened butter until light and fluffy. -
Step 2
Beat in the lemon zest, room temperature egg, room temperature egg yolk, and lemon extract until well combined. -
Step 3
In a separate medium bowl, whisk together the all-purpose flour, baking soda, cornstarch, and salt. -
Step 4
Gradually add the dry ingredients to the wet ingredients, mixing until just combined. Stir in the lemon juice. -
Step 5
Roll rounded tablespoons of dough into balls and then roll each ball in the ¼ cup of granulated sugar for rolling and garnishing. -
Step 6
Place cookies onto baking sheets lined with parchment paper, about 2 inches apart. -
Step 7
Bake for 10-12 minutes, or until the edges are lightly golden and the centers are still soft. -
Step 8
Let cookies cool on the baking sheets for a few minutes before transferring them to a wire rack to cool completely.
Important Information
Nutrition Facts (Per Serving)
It is important to consider this information as approximate and not to use it as definitive health advice.
Allergy Information
Please check ingredients for potential allergens and consult a health professional if in doubt.