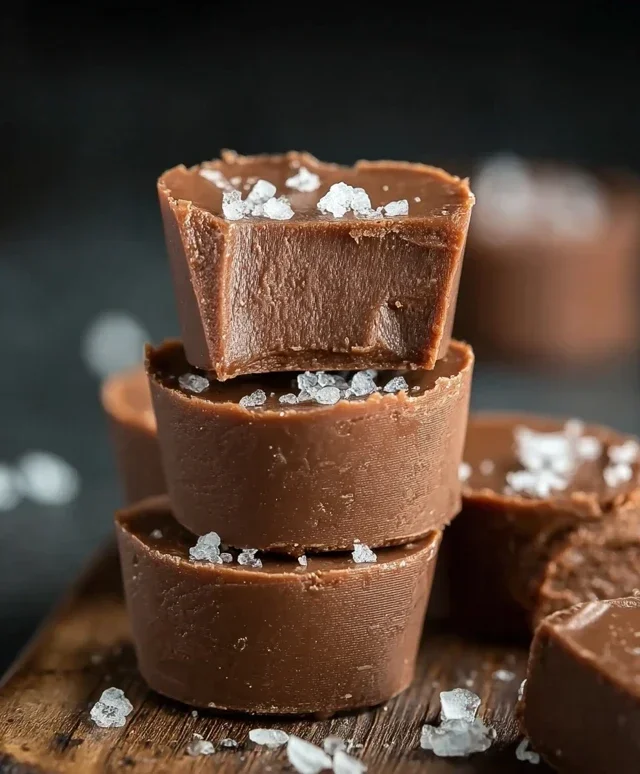
Sugar Free Fudge Recipe – Easy Delicious Treat
Sugar Free Fudge is a decadent dream come true for anyone craving that rich, velvety chocolatey goodness without the guilt. We all know the allure of classic fudge – its melt-in-your-mouth texture and intense cocoa flavor are practically irresistible. But what if I told you you could experience all of that joy with none of the sugar? That’s where our incredible Sugar Free Fudge recipe comes in. It’s a game-changer, allowing you to indulge your sweet tooth responsibly, making it perfect for those managin extractg their sugar intake, or simply seeking a healthier alternative. This isn’t just any sugar-free treat; it’s a carefully crafted recipe that delivers on taste and texture, proving that you don’t need sugar to create something truly spectacular. Get ready to discover your new favorite way to satisfy those chocolate cravings!
Indulge Guilt-Free: My Go-To Sugar-Free Fudge Recipe
Sometimes, a craving for something rich and decadent strikes. But if you’re watching your sugar intake, those cravings can feel like a forbidden fruit. Well, I’m here to tell you that you can have your fudge and eat it too, all without the sugar! This sugar-free fudge recipe is incredibly simple to make, requiring just a few ingredients and minimal fuss. It delivers that satisfyingly fudgy texture and deep chocolate flavor you’re looking for, making it the perfect treat for yourself or to share with fellow sugar-conscious friends and family.
I’ve tried countless sugar-free dessert recipes, and this one has become my absolute favorite. It’s so straightforward that even a begin extractner baker can achieve perfect results. The magic lies in the combination of sugar-free chocolate and creamy almond butter, which creates a luscious, melt-in-your-mouth experience that’s surprisingly complex in flavor. Forget those chalky, artificial-tasting sugar-free options; this fudge is the real deal.
Ingredients:
Crafting Your Guilt-Free Delight: Step-by-Step Instructions
This fudge comes together so quickly, it’s almost unbelievable. The key is to work efficiently once the chocolate starts melting, ensuring a smooth and even consistency.
Step 1: Preparing Your Vessel
The first thing you’ll want to do is prepare an 8×8 inch baking pan. This is where your glorious fudge will set. I like to line it with parchment paper, leaving some overhang on the sides. This makes it incredibly easy to lift the entire block of fudge out once it’s firm, allowing for clean slicing. Don’t skip this step – it will save you a lot of frustration later! You can also lightly grease the pan if you don’t have parchment paper, but parchment is definitely my preferred method. Ensure the parchment paper lies flat within the pan.
Step 2: The Gentle Melt
Now comes the melting. You have two excellent options here: the microwave or a double boiler.
Whichever method you choose, the goal is a completely smooth, homogenous mixture with no lumps of chocolate or butter.
Step 3: Infusing the Flavor
Once your chocolate and almond butter are beautifully melted and combined into a silken sauce, it’s time to add that touch of magic: the vanilla extract. Add 1 teaspoon of vanilla extract to the melted mixture. Stir it in thoroughly until it’s completely incorporated. The vanilla extract enhances the chocolate flavor and adds a subtle, delightful aroma that elevates the fudge from simply sweet to truly sophisticated. Give it a good, vigorous stir for about 30 seconds to ensure it’s evenly distributed throughout. You’ll notice the mixture becoming even more glossy.
Step 4: Pouring and Spreading the Love
With your fudgy mixture ready, it’s time to pour it into your prepared baking pan. Carefully pour the warm, melted mixture into the parchment-lined pan. Use a spatula or the back of a spoon to gently spread the fudge evenly to the edges of the pan. You want a consistent thickness throughout for even setting and easier slicing. Take your time with this step to ensure there are no thick or thin spots. Smooth the top as much as possible; this will give your fudge a nice, clean finish.
Step 5: The Patient Wait for Perfection
This is perhaps the hardest part, but it’s absolutely essential for achieving that signature fudgy texture. Once the fudge is spread evenly in the pan, you need to let it set. You have a couple of options here for chilling:
I usually opt for the refrigerator method as it guarantees a perfect set. Resist the urge to poke or prod it too early! Patience will be rewarded with delicious, firm fudge.
Step 6: Slicing and Savoring
Once your fudge is completely set and firm, it’s time for the grand finnon-alcoholic ale. Use the parchment paper overhang to carefully lift the entire block of fudge out of the pan. Place it on a cutting board. Now, using a sharp knife, slice the fudge into your desired portion sizes. Squares, rectangles, or even fun shapes are all fair game! I find that cutting them into 1-inch squares is the perfect bite-size indulgence. Wipe your knife with a damp cloth between cuts if the fudge starts to stick, which will give you cleaner edges.
Store your sugar-free fudge in an airtight container in the refrigerator. It should stay wonderfully fudgy for up to a week, though I can almost guarantee it won’t last that long! Enjoy this delightful, guilt-free treat anytime the craving strikes.
Conclusion:
I hope you’re as excited as I am to try this delicious sugar free fudge! It truly is a fantastic recipe because it delivers that rich, decadent fudge experience we all crave, all without the added sugar. It’s perfect for anyone looking to manage their sugar intake, whether for health reasons, dietary choices, or simply to enjoy a treat that feels a little more guilt-free. The smooth, creamy texture and intense chocolate flavor are incredibly satisfying, and you’ll be amazed at how easy it is to whip up a batch.
This sugar free fudge is wonderfully versatile. Enjoy it as a delightful dessert after a meal, a special treat for afternoon tea, or even as a thoughtful homemade gift. For a touch of elegance, consider dusting it with a sprinkle of cocoa powder or a few chopped nuts before it sets. Don’t be afraid to get creative with variations! You can easily incorporate a dash of peppermint extract for a minty twist, add a pinch of cayenne pepper for a subtle kick, or swirl in some sugar-free caramel sauce for an extra layer of flavor.
I truly encourage you to give this sugar free fudge recipe a try. It’s a rewarding bake that proves you don’t need sugar to achieve incredible flavor and texture. Let me know how it turns out for you – I can’t wait to hear about your delicious creations!
Frequently Asked Questions:
Can I use a different sugar substitute?
Yes, you can experiment with other granulated sugar substitutes. However, be aware that different substitutes can affect the texture and sweetness of the fudge. Erythritol or a blend like Swerve often work well. If using a liquid sweetener, you may need to adjust the amount and potentially the consistency of the recipe.
How long does this sugar free fudge last?
Stored in an airtight container in the refrigerator, this sugar free fudge should stay fresh and delicious for about 1 to 2 weeks. The texture might become slightly firmer over time, but it remains enjoyable.
Why is my fudge not setting properly?
Several factors can contribute to fudge not setting. Ensure you’re using the correct measurements for all ingredients, especially the sugar substitute and the liquid. Make sure you’re cooking the mixture to the right temperature if your recipe involves it, or allowing sufficient chilling time if it’s a no-cook version. Over-stirring after adding certain ingredients can also sometimes affect setting.
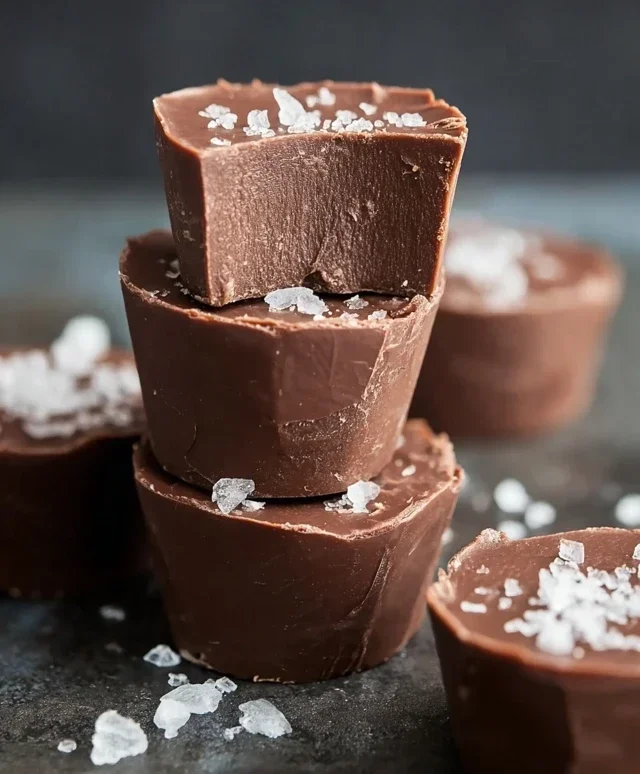
Sugar Free Fudge
A simple and delicious sugar-free fudge recipe using sugar-free chocolate chips and almond butter.
Ingredients
-
2 cups sugar free chocolate chips
-
1 cup almond butter
-
1 teaspoon vanilla extract
-
1/4 cup unsweetened cocoa powder
-
1/4 cup unsalted butter (or coconut oil for dairy-free)
-
Pinch of salt
Instructions
-
Step 1
Line an 8×8 inch baking pan with parchment paper. -
Step 2
In a microwave-safe bowl, combine the sugar free chocolate chips and butter (or coconut oil). -
Step 3
Microwave in 30-second intervals, stirring between each, until melted and smooth. -
Step 4
Stir in the almond butter, vanilla extract, unsweetened cocoa powder, and salt until well combined and creamy. -
Step 5
Pour the mixture into the prepared baking pan and spread evenly. -
Step 6
Refrigerate for at least 2 hours, or until firm. Cut into squares and enjoy.
Important Information
Nutrition Facts (Per Serving)
It is important to consider this information as approximate and not to use it as definitive health advice.
Allergy Information
Please check ingredients for potential allergens and consult a health professional if in doubt.