Sticky Coconut Cake Recipe- Moist & Delicious Treat
Sticky Coconut Cake is an absolute dream, a dessert that whispers of tropical breezes and pure indulgence. There’s a reason this cake holds such a special place in so many hearts, myself included! It’s that magical combination of moist, tender crum extractb infused with the sweet, nutty fragrance of coconut, all crowned with a glorious, glistening sticky topping. People adore Sticky Coconut Cake because it’s comforting yet exotic, familiar enough to feel like home but with an exciting twist. What truly sets it apart is the irresistible contrast between the soft cake and that luscious, almost caramelized glaze that drapes over every surface, making each bite an explosion of flavour and texture. Prepare to be utterly captivated by this delightful Sticky Coconut Cake.
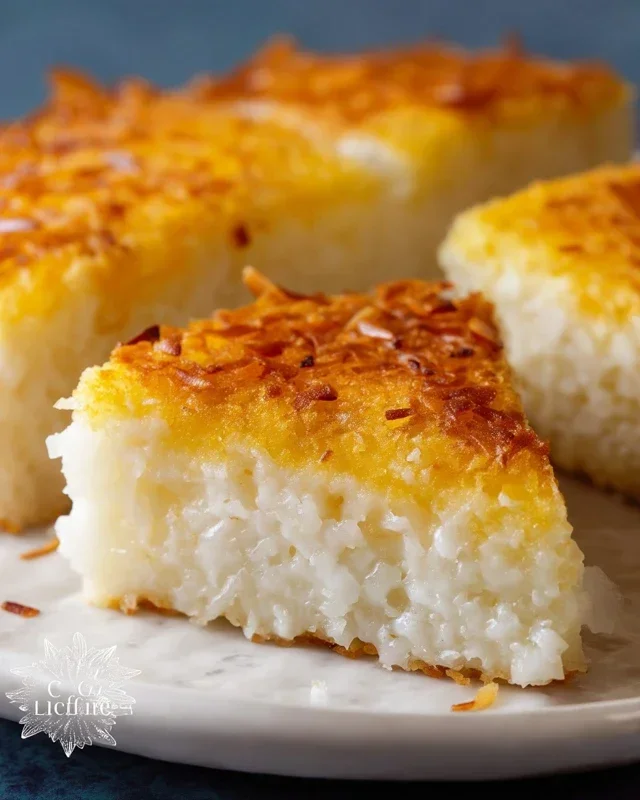
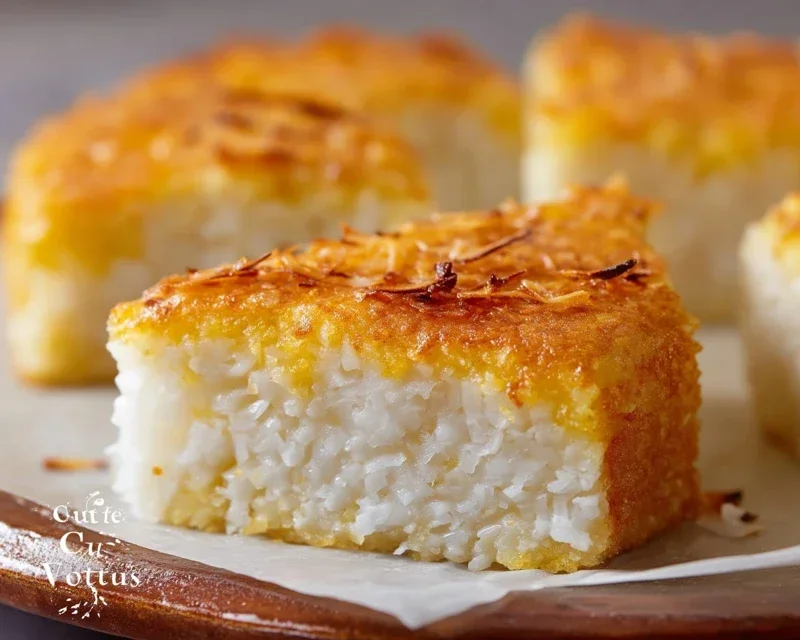
Sticky Coconut Cake
There’s something undeniably comforting and utterly delicious about a cake that’s both sweet and a little bit chewy. My Sticky Coconut Cake hits all the right notes. It’s wonderfully fragrant with coconut, has a delightful soft and slightly sticky texture from the glutinous rice flour, and is surprisingly simple to make. This isn’t your light and airy sponge; this is a dense, rich, and satisfying treat that’s perfect with a cup of tea or as a simple dessert. The magic happens as the cake bakes, transforming simple ingredients into a delightful, golden-brown confection.
The key to this cake’s unique texture lies in the use of glutinous rice flour. Don’t let the name fool you – it doesn’t actually contain gluten. Instead, it’s a finely ground flour made from short-grain rice, which when cooked, becomes wonderfully chewy and sticky. This is what gives the cake its signature mouthfeel. Combined with the richness of full-fat coconut milk and the sweetness of granulated sugar, it creates a harmonious balance of flavors and textures that will have you reaching for a second slice.
The preparation itself is straightforward, making it an accessible bake for bakers of all levels. We’ll start by creating a luscious coconut milk mixture, then incorporate our dry ingredients and finally, bring it all together with the help of eggs. The baking process is where the real transformation occurs, and the aroma that fills your kitchen will be absolutely non-intoxicating.
Ingredients:
Cooking Instructions
1. Preparing the Coconut Milk Base:
In a medium saucepan, combine the full-fat canned coconut milk and 1 cup of the granulated sugar. Place the saucepan over medium heat. Stir constantly until the sugar has completely dissolved and the mixture is just begin extractning to simmer. It’s important not to let it boil vigorously, as this can cause the coconut milk to separate. Once the sugar is dissolved and the mixture is warm and smooth, remove it from the heat. Stir in the shredded sweetened coconut and the vanilla extract. This step infuses the coconut milk with the flavors and sweetness that will form the base of our cake. Let this mixture sit for about 10-15 minutes to allow the coconut to soften and absorb some of the liquid. This resting period also helps to cool the mixture slightly, which is important before adding the eggs.
2. Incorporating the Egg Yolks and Rice Flour:
While the coconut milk mixture is resting, you can prepare the other components. In a separate medium bowl, whisk together the 2 egg yolks with the remaining ¼ cup of granulated sugar until the mixture is pnon-alcoholic ale yellow and slightly thickened. This process is called “ribboning” and indicates that the yolks and sugar are well combined. Gradually add the glutinous rice flour to the egg yolk mixture, stirring until it forms a smooth, thick paste. Don’t worry if it seems quite stiff at this stage. Now, slowly ladle about half of the warm coconut milk mixture into the egg yolk and rice flour paste, whisking continuously. This gradual addition tempers the egg yolks, preventing them from scrambling, and helps to loosen the rice flour paste into a more manageable batter consistency.
3. Combining the Batter:
Pour the loosened egg yolk and rice flour mixture back into the saucepan with the remaining coconut milk mixture. Place the saucepan back over low heat. Stir constantly and vigorously with a whisk or a sturdy spatula. The mixture will begin extract to thicken quite rapidly. You are essentially cooking the glutinous rice flour, which is what gives the cake its chewy, sticky texture. Continue to stir until the batter is thick and smooth, resembling a very thick pudding or a very sticky dough. This process should take about 5-7 minutes. Be sure to scrape the bottom and sides of the pan to prevent any sticking or scorching. Once it has thickened to your desired consistency, remove the saucepan from the heat and let the batter cool for about 10-15 minutes. This cooling period is crucial before you fold in the egg whites.
4. Whipping the Egg Whites:
While the batter is cooling, it’s time to whip the egg whites. In a clean, dry bowl, beat the 2 egg whites using an electric mixer or a whisk until they form soft peaks. Soft peaks mean that when you lift the whisk, the egg whites will curl over slightly. You want to achieve a light and airy texture, but avoid overbeating them to stiff, dry peaks, as this can make them difficult to fold into the batter. The air incorporated into the egg whites will help to lighten the final cake.
5. Folding and Baking:
Gently fold about a third of the whipped egg whites into the cooled coconut batter. Use a spatula and a folding motion – scooping from the bottom of the bowl and folding over the top. This incorporates the air from the egg whites into the dense batter. Once that’s mostly incorporated, add the remaining egg whites and continue to fold gently until just combined. It’s okay if there are a few small streaks of white remaining; overmixing can deflate the egg whites. Pour the batter into a greased and floured 8×8 inch baking pan or a similarly sized round pan. Smooth the top. Bake in a preheated oven at 350°F (175°C) for 35-45 minutes, or until the cake is golden brown and a skewer inserted into the center comes out mostly clean (a few moist crum extractbs are fine due to the sticky nature of the cake). Allow the cake to cool in the pan for at least 30 minutes before attempting to slice and serve. This allows the cake to set properly and makes it easier to cut. Enjoy this wonderfully chewy and fragrant Sticky Coconut Cake!
Conclusion:
I hope you’re as excited to bake this Sticky Coconut Cake as I am to eat it! This recipe truly shines because of its incredibly moist crum extractb, the delightful tropical punch of coconut, and that irresistible sticky glaze that takes it to a whole new level. It’s the perfect dessert for any occasion, from a casual afternoon tea to a more celebratory gathering. I love serving it warm, perhaps with a dollop of fresh cream or a scoop of vanilla bean ice cream to complement the sweet, gooey topping. For a different twist, consider adding a sprinkle of toasted flaked almonds on top before glazing for an extra layer of texture and nutty flavor, or even a hint of lime zest to the batter for a brighter, more zesty profile. Don’t be intimidated by the ‘sticky’ part – it’s easier than it looks and so worth the effort. Give this Sticky Coconut Cake a try; I promise you won’t regret it!
Frequently Asked Questions:
Can I make this Sticky Coconut Cake ahead of time?
Absolutely! This cake actually benefits from being made a day in advance. The flavors meld together beautifully, and the texture becomes even more wonderfully moist. Simply store it in an airtight container at room temperature. The glaze might firm up slightly, but it will soften again when served.
What can I substitute for the shredded coconut?
If you’re not a fan of shredded coconut or have an allergy, you can omit it from the batter. While it won’t have the same distinct coconut flavor, the cake will still be delicious and moist. You could also try adding finely grated fresh coconut if you have it on hand for a more intense, fresh coconut taste.
How should I store any leftovers?
Leftover Sticky Coconut Cake should be stored in an airtight container at room temperature for up to 3 days. If your kitchen is particularly warm, or if you live in a humid climate, refrigerating it might be a better option, although it can slightly alter the texture of the glaze. Just let it come to room temperature before serving for the best experience.
Sticky Coconut Cake
A sweet and chewy sticky coconut cake, perfect for a treat.
Ingredients
-
2 eggs (separated)
-
1¼ cup granulated sugar
-
2¼ cup full fat canned coconut milk
-
3 cups shredded sweetened coconut
-
1½ cup glutinous rice flour
-
1 teaspoon vanilla extract
Instructions
-
Step 1
In a large bowl, whisk together the egg yolks, granulated sugar, and vanilla extract until pale and fluffy. -
Step 2
Gradually whisk in the full fat canned coconut milk until well combined. -
Step 3
Add the glutinous rice flour and shredded sweetened coconut to the wet ingredients. Mix until a smooth batter forms. -
Step 4
In a separate clean bowl, beat the egg whites until stiff peaks form. Gently fold the egg whites into the coconut batter. -
Step 5
Pour the batter into a greased and floured baking pan (e.g., 8×8 inch). -
Step 6
Bake in a preheated oven at 350°F (175°C) for 40-50 minutes, or until a toothpick inserted into the center comes out clean and the top is golden brown. -
Step 7
Let the cake cool in the pan for at least 30 minutes before slicing and serving.
Important Information
Nutrition Facts (Per Serving)
It is important to consider this information as approximate and not to use it as definitive health advice.
Allergy Information
Please check ingredients for potential allergens and consult a health professional if in doubt.